Tag Archives: jail breaks

Hardware Review: Everdrive GBA Mini from Krikzz

Now that Krikzz and crew are back up and running again, I decided it was high time to seek them out about a product review. They mentioned that they were set up in a new location and that they had products being listed on their site. I asked them if they would be able to send over an Everdrive GBA Mini and they obliged (as well as another item I’ll do next week). Today I’ve got the review and I promise that you will not be disappointed!

Description:

Ever dream of having your whole library of Game Boy Advance games in a single cartridge? The EverDrive GBA Mini allows you to load your game back-ups (commonly known as ROMs) on a microSD card, put the SD card into the EverDrive GBA Mini, put the EverDrive GBA Mini into a Game Boy Advance compatible device and have your list of games at your finger tips.

Features:

  • Small design! Will fit flush in all your GBA handhelds.
  • High compatibility. Almost 100% compatibility with GBA game library.
  • All save types supported, no ROM patching required.
  • Fast Loading (most games load within 1 – 2 seconds).
  • 256Mbit PSRAM (32MByte) ROM memory.
  • 1Mbit SRAM (128KByte) save memory.
  • Real-time clock support.
  • Low power consumption.
  • SD, SDHC and SDXC cards are supported. Tested with micro-SD cards up to 64GB.
  • FAT32 support.
  • Supported with GameCube GBA Player, Super Retro Advance adapter and other GBA accessories.
  • NES, GB and GBC games support (emulation mode).

Unboxing Video:

Unboxing Krikzz's Everdrive GBA Mini

Pros:

  • X5? Those who have followed the word of God Krikzz, already know what I mean when I say X5. Traditionally, there are a few variants of any given flashcart from Krikzz. The fancier the feature set is, the higher the number. X3, X5, and X7 are all numbers that have been used before. So…is this an X5? Yes, it is. However, you’ll notice that the name is the Everdrive GBA Mini. The reason that the X5 moniker is now gone is because it was too confusing.
    .
    As I just mentioned, if there is an X5, that traditionally meant that there is also an X3 at the very least. So by using X5, it lead buyers to think that there was an X3 and an X7 version running amok that they couldn’t find. Maybe an X3 is more affordable with less features. Maybe there’s an X7 out there with even more features that the discerning buyer wanted. But no, there is not any other version than this one. So now it’s simply titled Everdrive GBA Mini.
    .
    There was a previously different version of the X5, though. This one is a renamed version of the second iteration of the X5. That became the X5 mini and the main difference is that this has a lower profile shell. So the Everdrive GBA mini features the same body type as the second run of X5, which is the size of a standard GBA cart. The first run had a taller body,something like Drill Dozer.

.

  • Build Quality. Now let’s take some time to talk about how everything fits beautifully in the form factor. Better yet, let’s talk about the fantastic build quality (as if you didn’t already know) of the Everdrive GBA Mini. First off, the plastic used feels at least as good as the ABS plastic that Nintendo uses on their own cartridges. I always remind people that I can’t speak to the longevity of the products. But they’ve consistently survived my harshest testing. This includes sitting with it in my back pocket, dropping from shoulder height to concrete f;oor, dropping down a flight of stairs, and squeezing them as hard as I can in my palm!
    .
    But there’s more than just plastic involved in this little cutie! Taking a walk around the product here, you’ll see a microSD card slot right on top (more on that soon). The type of card slot that Krikzz utilizes is the kind that you can click the SD card down into. This enables us to have the microSD card sit inside of it and the top of it sits flush with the top of the Everdrive. If it were a slot that had to slide it in and pull it out, the SD card would have to stick out a few millimeters and really rely on 2 fat ass fingertips to pull it out. Krikzz made the smarter choice and hopefully, you won’t need to eject the microSD card too often. But if/when new homebrew for the GBA comes out, it’s nice to have the option of simplicity.
    .
    Inside the cartridge, you’ll find too much to mess with, of course. But you will see a few key things that are pretty great. The first of which is the quality of the contacts on the board. The contacts, solder points, through holes, and Everdrive logo on the back are all gold-plated. The biggest item of those being the contacts as that ensures the best possible connection between the Everdrive GBA Mini and the device it’s being used on. The other key takeaway here is the built-in battery. You can definitely swap it out, we’ll be coming back to that later on. All in all, there’s so much to trust in this concise and well-tested cartridge.
  • Placement. There are flashcarts aplenty out in the wide world. Every single flashcart, I swear, has a different placement of the SD card slot and/or has a different SD card sizes. I understand that each cartridge is different with different features. But with Krikzz’ family of Everdrive flashcarts, very little has changed over the years. First off, it’s great that the flashcarts, even the largest ones, changed over to microSD. Then it comes down to the SD card slot on the top. This is vital! I threw a fit in a previous flashcart review that the SD card slot was on the inside edge of the cartridge. This matters when it comes to handheld cartridges because you cannot get to the SD card with ease. All handheld carts are slotted into the handheld so as to stay out of the way, but this then hides the SD card. Maybe the idea is to hide that it’s a flashcart?
    .
    But with Krikzz’ design, we now consistently have the ability to take the microSD card in and out. Versus having to pull out an entire cartridge and put more stress on the contacts inside the handheld. You know, the ones that only have so much use in them before they die? You may be wondering why I care, but after reviewing so many flashcarts over the years, I assure you, this specific feature matters.

.

  • Simplicity. There is so much to love about this miniature cartridge. But one that most Everdrive fanatics look forward to is that it takes practically zero effort to get going. If you’re wondering just how simple it is, I’ll give you a full tutorial right here. Step 1. Buy the dang Everdrive GBA Mini. Step 2. Format your microSD card to fat32. Step 3. Drag your legally obtained GBA ROMs to the microSD card. Step 4. Download the most up-to-date OS. Step 5. Extract the GBASYS folder out of the zip file you just downloaded. Step 6. Put that onto the root of your microSD. Step 7. Safely eject your microSD. Step 8. Insert your microSD card into the Everdrive GBA Mini. Step 9. Insert Everdrive into GBA. Step 10. Turn on GBA and enjoy the fast loading of games!

.

  • Extra Features. One of the fun bits about this cartridge is the extra abilities hidden within that just need unlocking. If you’re wondering if you can get more use out of this cartridge than just GBA games, worry not! The Everdrive GBA Mini can also run additional game files. If you buy it, you’ll be looking at games for the Game Boy, Game Boy Colo, NES, Neo Geo Pocket, Master System, and Game Gear. It’s just as easy to get these games running as it is to get GBA games set up. I won’t be giving tutorials on these in this review, mind you. That would drag on for far too long. However, you just need to get Goomba, PocketNES, NGPadvance, and SMSAdvance respectively.
    .
    Personally, I only cared about having all GB, GBC, and GBA on my ultimate modded GBA, so I stuck with that. But Krikzz’ own readme says you can do it, so yeah, you can frickin’ do it. One final note, if you’re wondering if the ROMs in these emulators load as fast as GBA games do, they do. Fast loading seems to apply across the board thanks to the hardware being utilized in the Everdrive GBA Mini.
  • MicroSD Compatibility. The GBA Mini ran every type of microSD card that I could throw at it. I have a few different brands lying about, so I tested them all. SanDisk, Micro Center, Kingston, PNY, and Inland. They all worked without issue. The only thing that I couldn’t test was capacity limitations. The largest microSD card that I had available was 64GB and it worked like a dandy once I formatted it to be Fat32. The smallest one I had available to test is 4GB, since I know that some people would rather not waste a giant card. Unfortunately for me, the only ones I had were 32GB and 64GB. But if you have any of these brands from 4GB to 64GB lying around, you won’t have to go out and buy a different one just for the Everdrive GBA Mini.

.

  • Hardware. The Everdrive GBA Mini can run on an assortment of devices. I tested every device that I own that can run a GBA cart and I’m happy to share the results with you all. It works in the original taco-shaped GBA. Both of the models of GBA SPs also support the GBA Mini. If you watched my unboxing video, you’ll see that it also fits beautifully in the Game Boy Micro. It works wonders in both the original Phat DS and the DS Lite.
    .
    I then tested it in the Game Boy Player on the Gamecube and it works great. And finally, I tested it in my consolized Game Boy Advanced (GBHD Advance review coming soon). It was inevitably going to work in the GBHD Advance because it’s just the guts of a GBA, but you never know if the fit of the slot was going to be warped due to the GBHD’s 3D print or something. Anyway, I digress, it works in everything!

.

  • Size. I saved this topic for it’s own “pro”. Heck, I showed it off at the end of my unboxing video. I want to give Krikzz a high five for managing this feat of electrical engineering. He mastered getting everything that this Everdrive can do into a cartridge that is under two inches tall. I’m fully aware that there are other GBA flashcarts out there. I’m also more than aware that they have been this size as well. For their price points, they accomplish what they set out to do. But Krikzz has a flashcart that is so feature-rich and structurally sound and it fits every device we talked about. Not only does it fit accurately, but it sits flush, just as an OEM cartridge does. Nintendo, hire this guy and pay him more money than anyone else.

.

  • Colors. There is the frosted, clear transparent shell currently available from Krikzz’s websites. There is other colors from Krikzz and StoneAgeGamer, but they appear to be sold out. And when I say there are more colors, there are plenty to choose from once they’re back in stock. On Krikzz’s webiste there is the classic GBA cartridge grey color. On the StoneAgeGamer site, there are those colors and more. There are also sticker variants to choose from. We have pictures throughout the article showing what I mean. Now, if you don’t care which color you have, and you just need one, the clear is available right now. Hurry up and scroll to the bottom and buy it. If you’re someone who needs a certain look, just keep going back to the sellers until there are more in stock.

.

  • Serviceable. I truly love that the Everdrive GBA Mini is simple and serviceable. There’s not much to it, but if you need to get into the cartridge for any reason, it’s simple to do. First off, Krikzz has removed the need to have a hex bit to open the cartridge up. Other shells do this, usually the larger shells like that of the N8 Pro Fami. This cartridge, however, has a Phillips screw head that can be removed with a 00 tip. Once you’re inside, you can update the cr1220 battery. This is likely the only reason that you will ever open it and likely the reason he made the screw simpler to remove. You shouldn’t have to replace the battery more than once every 3-5 years, depending on the frequency of use. That comes down to how often you have saves being used. The same goes for games with real-time clock functionality.

.

  • Cost. If you buy from Krikzz directly on his sites, this cartridge clocks in at $104. He sells his products as a cart only (no clamshell) if your heart desires at that price point. This is what I would personally do, as I don’t necessarily have a need for the extras that Stone Age Gamer has. But if you’re interested in the cool stuff they provide, you can get the cartridge, a case, printed manual, an EverDrive-GBA sticker, Stone Age Gamer sticker, and a 2-year Warranty for $135. They all have their benefits and it’s really just up to you and what you’re looking for.
    .
    If you’re thinking that $104 is just too much money for what you get, I’d have to wholeheartedly disagree. However, just put it in terms for yourself. One rare game can cost much more than $104 and that’s just one game. Inexpensive GBA games, after about twenty of them, cost more than $104. Now imaging toting those around and swapping them out when you want to play different games. The value here is the ability to play your library in one cartridge and get way more features. Oh, and to do it for less than a cartridge that is cheaper than a game being sold by a game flipper.

Cons:

  • Enhanced Games. Do you want to play certain games that come in a taller shell? Games that might have light sensors, vibration, or an accelerometer? Well, unless there is a way to patch out their dependency on that hardware, you’re not going to be able to play those games on this flash cart. This means theres no compatibility with Yoshi Topsy Turvy or Drill Dozer and others. I would love to see the next iteration of the GBA Mini include an accelerometer, a light sensor, and a small vibration mechanism to cover the rest of the specialty games. People might be okay with paying up to $150 for the extra features. Imagine having the option of the GBA Mini to play 98% of games for $104 and a GBA Mini X7 to play everything for $150. I think that this would be a lucrative idea for Krikzz. It’s possible that I may be on an island with this.

.

  • Save States. Unfortunately for all of us, there are not currently save states supported. This is not without exception of course. If you’re playing GB and GBC games on your GBA Mini using Goomba, there is a save state functionality. This makes sense of course considering flash carts for the GB and GBC have save states. There is still saving, naturally. This is by way of the games’ hardcoded save functionality using the built-in battery.

Final Thoughts:

There’s a lot to be said about this amazingly small and powerful device…besides it being small and powerful. It not only alleviates the need to carry handfuls of carts with you and swap them out but so much more. If you’re looking to also expand your abilities, there are emulators that you can add to it. And while save states still aren’t available at this moment, you can still use the game’s built in save functions because the Everdrive GBA Mini supports it with a battery that is easy to replace too.
.
There is nothing better that you can spend your $104 than a device that gets you practically everything you want in your GBA and also benefits a business that is needing your support now more than ever. Even if you’re reading this years down the road and the Ukrainian people are safe and happy again, you should still buy this product from Krikzz. Because it’s just that fantastic.

Purchase Links:

Krikzz

Everdrive.ME

Stone Age Gamer

Hardware Review: EverSD for Evercade

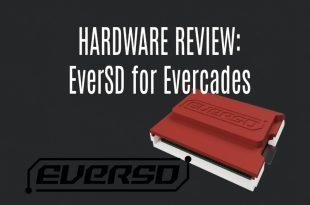
Do you have an Evercade? Are you looking for a reason to get an Evercade but you really don’t want to collect all of those custom cartridges? Well, might I interest you in the EverSD? It’s a flash cart specifically made for the Evercade! That may sound strange, but it’s actually not what you think at all. There are a lot of points I need to get to, I apologize in advance, but you’ll thank me later! Let’s get into it.

Description:

“Play multiple games and multiple consoles with your Evercade™ system with ease using the EverSD! (MicroSD not included)”

Features:

  • Use your MicroSD/TF (up to 512GB [patching may be needed)(MicroSD not included)
  • Use as a development kit
  • Play multiple homebrew games
  • Emulate even more consoles (with RetroArch)*
  • Make Use of External Controllers* (Needs EverSD USB Multiplayer Hub)
  • Use save states
  • Backup and restore your save states
  • Use additional themes

Trailer:

EverSD on EVERCADE™ with Firmware 2.0.1

Unboxing Video:

UNBOXING: EverSD for Evercades (and why you should buy an Evercade)

Pros:

  • Purpose. First of all, the obvious positive that comes from owning an EverSD is its intended purpose. By owning one of these beauties, you now reduce the need to collect official cartridges. For the longest time that is why I didn’t want to own an Evercade. The whole purpose of buying one is to play games that you can’t play elsewhere on the go. However, you find yourself in the precarious position of having to do the one thing portable gamers hate, which is carrying around games. The business model only half worked in my mind. Now that the EverSD is available, I immediately bought a used Evercade off of eBay and I’ll never look back!
  • Evercades. As of now, this works on the hundreds of thousands (if not more) that exist currently and in the future. To clarify, the EverSD works on all devices that can run the official Evercade cartridges. That means from the moment I’m writing this through the foreseeable future it supports the original Evercade, the Evercade VS. console, and the upcoming Evercade EXP. I’m not a gypsy fortune teller with a glass ball that can see into the future, of course. So if you’re reading this in the future, the systems that are released in the future may not support that form factor anymore. I doubt it because they want to keep people happy, but who knows if the Evercade will ever change or update their systems to thwart the EverSD. I can’t imagine because it has helped them sell systems, there’s no doubt about it. Someone out there bought a shiny new Evercade VS. and an EverSD and are smiling from ear to ear right now.
  • Compatibility. You’re looking at playing the games that you already own in your retro collection. What better way to load the ROMs than a preexisting emulator front end that is widely known? I’m of course talking about the fact that you can load ROMs from Retroarch. Instead of the EverSD having to create an entire OS with features, settings, and various internal emulators, they’re sticking with Retroarch which is something that people already have an understanding of. Doing this also means that there is no need to have manuals or online PDFs for people to reference. Everyone who is familiar with how to use Retroarch.
    .
    Now if you’re wondering what games will and will not run on this, I have good mainly good news. I find through my own testing and researching, that this can indeed play up to PS1 games. So you really have to view this through the lens of it being a retro console. There are plenty of arcade games that can run on this too. Especially because the Evercade itself can run old arcade games that are officially licensed in Evercade carts. So that is the good news in a nutshell. The only bummer here is that I cannot test every single game under the sun and tell you that they all work. I can tell you I tested 3 games on each system that I own retro games for. So everything that I tested from the first Atari through PS1 absolutely worked. Your mileage will vary of course, but I would say that if you have an existing romset of retro games that work on Retroarch up to the PS1, put those on the EverSD in full confidence that they will work.
  • Boo, Retroarch! Ok, so maybe you don’t like Retroarch. Everyone has their own tastes and likes versus dislikes. You will be happy to know that you can install individual games to load right from OS. That means that once you flash the firmware of the Evercade to run EverSD OS, then you’re almost done. These individually loaded games, mind you, use different emulators and have different compatibility. I didn’t test them really, but the FAQ on EverSD’s site says that N64 runs “VERY SLOW!”, so remember that if you don’t want to use Retroarch. I’ll have a tutorial soon about how to set up the EverSD to run on the Evercade. My recommendation is to use Retroarch with its increased option and feature list.
  • Enhancement. Which is a perfect segue to this next point. You’ve just purchased an EverSD and you’re wondering if there is anything else that it can do. Well, yes, actually there is. If you have put Retroarch on your EverSD already, you’re one step closer to being able to have multiplayer games on your Evercade in console mode. Yes, if you flash a quick patch onto the EverSD (like 60 seconds of work) then you can enable multiplayer support. EverSD’s website has a multiplayer USB hub that is designed to support this ability that you flash onto the Evercade. So then, just pack up your Evercade, a mini HDMI cord, the hub, controllers and go to friends’ houses. It’s a small package for playing a ton of multiplayer games. I haven’t personally been able to test this myself, but in EverSD’s FAQ section they discuss controllers that were tested. Their official findings were “DualShock 4, 8BitDo SF/SN30 Pro, Generic Keyboard, 8BitDo Wireless USB Adapter (You can connect any controllers that are compatible with this adapter)”.
  • Price. The price of a flash cart can be quite expensive depending on the handheld or console that it is for. Some cartridges have different versions with additional abilities and the cost scales accordingly, and rightly so. Normally quality flash carts start at $80 and go up from there. However, the EverSD is less of a flash cart and more of a microSD card adapter for the Evercade. That doesn’t diminish its value at all. It enables us to get so much more value out of the Evercade. But they still manage to keep the cost down despite its tremendous helpfulness. The EverSD’s cost is only 40 Euros, which as of this writing is about $41. To me, $41 as a price point is insanity since it enables you to load Retroarch on a system. Let me word that differently so you can understand the gravity of what I’m saying. You spend $41 and you get to run reputable Retroarch and potentially thousands of games. I rest my case!
  • Color choices. This is a fun bit to discuss. The EverSD doesn’t just come in one single color. It would be boring if it did and honestly, it wouldn’t match ever Evercade out there. The color that I received is red which appears to be their standard color. This is likely because the color scheme for the original model and the Evercade VS. console is white and red. I know that there are color variants, but the red matches mine perfectly. Now, you’ll have to go see them for yourself, but there are also other colors. They are all limited edition colors like orange, yellow, green, blue, and purple. As of now, the purple is sold out. I’m unsure if it will return or if any that get sold out of the limited edition will return. I think color matters a lot though because you’ll likely be leaving the cartridge in your Evercade permanently.
  • Set Up. The simplicity of setup for the Evercade (once you figure it out) is beautiful. As I stated before, my guide will be posted shortly, but I’ll give you a quick rundown so that you can tell I’m serious about the simplicity. You charge your Evercade and then first flash it to the current update (2.02 on handheld and 2.1 on console). Then run your microSD through a formatter and setup program that puts all necessary files on it. After that, you’ll flash your Evercade to the EverSD’s OS. Then download the Retroarch pack for EverSD on 2.02 and extract the contents to the microSD card that you set up, overwriting anything that already exists. Now make yourself a ROMs folder in the Retroarch file structure and put your ROMs there. Now put the microSD into EverSD, put EverSD into Evercade, and turn it on. You can then choose Retroarch and once it’s loaded, go into settings, and change your File Browser folder to the one that you named ROMs on your microSD. Then it will always look there first whenever you choose to load content.
    .
    If you know what you’re doing, it’s like 10 minutes of actual work. The copying of ROMs may take a while depending. If you ever want to roll back the EverSD OS, you can always reflash the original Evercade firmware and go back to stock, no issues. Now, if you’re one of those that don’t want to use Retroarch, you have a slightly different course of action to set everything up. You’ll instead use a program to flash the ROMs of your choice to the correct folders on the microSD and then the EverSD OS just sees your games on the main screen upon boot and you play your pick!
  • Support. If you’re questioning why you would buy the EverSD and do all of the steps if you’ve already collected a lot of Evercade carts, you can rest easy. Just because you flash a different OS so that the EverSD can be recognized doesn’t mean you’re out of luck. You spent money on those original Evercade games and you can still run official Evercade cartridges after you flash the OS. It’s almost like the people behind EverSD want your system to still do what you paid for it to do. So in other words, keep your carts and get an EverSD. You get more features, more games, and if you want, you can keep collecting. You don’t have to ever open those either, so you can let the value rack up on them!
  • Shipping. You might have noticed that I mentioned that the cost is in Euros. If you’re one of our readers from North America, I want this to not scare you off. One of the many things that I liked about my interaction with this whole process is that I received the package quickly. I’m not sure if it’s because they wanted me to receive the review unit quickly or if this is their standard. But it didn’t take a month or more. I believe it arrived just outside of a week. So if you’re interested in buying one, it’s worth it because even if you have to wait a week longer than me, it’s still faster than ordering things from AliExpress (oh the suffering). It does cost $20 for the shipping a small item, but please remember that it’s coming from the Netherlands. And let me reiterate that it’s still much cheaper than other quality flash carts. And it’s really the cost of one standard video game for the item and shipping. Paying ~$60 to have all of your ROMs in your Evercade seems like a no-brainer.
  • Build quality. This topic is always one of my favorites because I get to look all over the items and list ports and plugs. However, on the EverSD, its simple and concise. I’ll gladly tell you everything the EverSD has though. As I hold it and turn it over in my hands here, I see that it for sure has a 3D-printed shell. The flat side is white in color with a faint amount of sparkle to it. There is a sticker with the EverSD logo on it on this white side. On the opposite side, it is red and the sparkle/glitter is a bit more noticeable. It’s a tasteful amount of sparkle, mind you. This product isn’t going to look like your little sister’s toys or anything. On the red side, it has the EverSD logo embossed on it where on a normal Evercade cart it would say the name of the collection. Lastly, there is a microSD card slot on the side of the cartridge. The slot itself is luckily the kind that you can click the card in and out. I loathe the ones that you have to pull out and push in.
  • MicroSD. There are some readers who are wondering if they are going to have to buy a special kind of microSD card or if they can use one they already have. I would nod to you and assure you that that is indeed a good question. I’d raise my eyebrows and make an awkward smile as I nodded because, honestly, there’s no answer for this. I can tell you several things in place of a straight answer though. I can tell you that it accepted my Micro Center brand microSD card as well as the SanDisk that I tested. I also checked online and found that others were listing Kingston and PNY as companies that worked in their EverSD. In terms of size, I only needed a 32GB for all of the ROMs that I added to the card. If you need more than that, the company officially says it only supports up to 512GB. I’m willing to bet that every microSD card that you through into it is going to work. But if not, try another brand. There is a lot to choose from in this day and age, they’re very popular.

Cons:

  • The one thing I hate is when custom cartridges like this have the microSD card on the side. You no longer have access to it when it’s in the system. And then you have to pull it out and put it back in just to get to the microSD card. This is adding to more scratches and scuffs on the shielding. What’s worse than that is that the more back and forth that happens on the cartridges, the worse they will get with time. So that means you really just have to do the entire setup for the process before you use it. Well, you have to if you’re concerned about hardware longevity as I am.
  • The instructions for all of the setup are effectively download the stuff from the “Downloads” and read from the “FAQ” sections of their site and figure it out for yourself. Sure the programs have little helpers that tell you what to do, but it isn’t even conclusive which programs you need. The notes and instructions that are there seem a bit like an afterthought without any real structure. It makes sense to the employees who have likely done it dozens of times, but from a fresh perspective, it’s slightly disjointed. No worries though, I have posted it here for you to use.

Final Thoughts:

At first, I found the simple explanations to be lacking. Sure this thing looked cool, but I really wasn’t about to watch long YouTube videos to figure it out. So I downloaded everything relevant and worked through it bit by bit, building my guide as I went. So now that I have my EverSD officially setup, I not only have a quality cartridge that looks good, but it also runs brilliantly on the Evercade. You should do this because it’s so much easier and cheaper than collecting official cartridges. You can still collect those official carts if you want, but you now don’t have to open them! That means that they will rack up the big bucks as time passes and that will in turn help pay off the EverSD. It’s a win/win and the EverSD is a great product that I’m surprised the big retro YouTubers aren’t covering more!

Purchase Links:

All colors of EverSD can be found here

EverSD USB Mulitplayer Hub can be found here

unc0ver 6.0.0 Released

Unc0ver has been around for a while, and it satisfied most devices and newer firmwares. Nobody could really complain (or at least not in our household). But after iOS 14 came out, most people with newer devices were left wanting. Well today, you can count your blessings because unc0ver is back and better than ever. Enough with the beating around the bush. It’s time to talk about all things unc0ver 6.0.0!

What is unc0ver?

‘Unc0ver is a jailbreak, which means that you can have the freedom to do whatever you would like to do to your iOS device. Allowing you to change what you want and operate within your purview, unc0ver unlocks the true power of your iDevice.’

What makes this unc0ver special?

Unc0ver has been extensively tested to ensure it’s a seamless experience on *all* devices. Unc0ver works on all devices on iOS versions between 11.0 and 14.3. Below you can find a list of all devices that have been specifically tested. Unc0ver is designed to be stable and enable freedom from the moment you jail​break your device. Built-in runtime policy softener allows running code without Apple’s notarization and pervasive restrictions. Proper runtime modifications to iOS kernel modify security features as necessary.

Changelog:

  • Add support for iOS 12.4.9-12.5.1, 13.5.1-13.7 and 14.0-14.3

Note:

Instructions:

Click here to be taken to the instructions for a first time setup of unc0ver.

Like what you saw here?

Give me a follower on Twitter @V1RACY for not just reviews on tech and games, but also giveaways!

Unc0ver 5.0.1 Released!

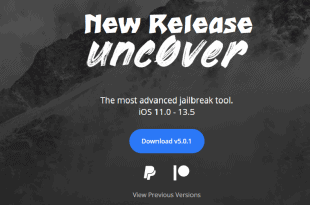
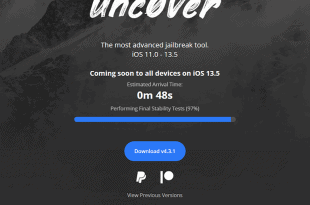
One after another these releases just keep coming! Just the other day 5.0.0 was released and we were all dancing in the streets over it. But just another day after that, we see the release of 5.0.1. What does it offer? Is it really that different? Here, I’ll show you.

What is unc0ver?

‘Unc0ver is a jailbreak, which means that you can have the freedom to do whatever you would like to do to your iOS device. Allowing you to change what you want and operate within your purview, unc0ver unlocks the true power of your iDevice.’

What makes this unc0ver special?

Changelog:

  • ‘Full-fledged support for all devices on iOS 11.0-13.5 with Cydia and tweak injection
  • Enable unrestricted storage access to jailbreak applications for sandbox backwards compatibility while keeping security intact by leaving the security restrictions enabled for system and user applications
  • Update Phone Rebel case models and bundled packages’

Note:

‘System must be rebooted to apply changes when updating the unc0ver jailbreak’

Instructions:

Click here to be taken to the instructions for a first time setup of unc0ver.

How To: Jailbreak iDevices using unc0ver

And just like that, hot on the heels of another unc0ver release, we’ve got the instructions for you. This is for those who are starting from scratch and need assistance getting the whole thing up and running. If that’s you, just know some of the screenshots still say a 4.x.x release, ignore that, if you’re still seeing this article, then the process is the same. Let’s get into it.

What You Need Beforehand:

  • A PC on Windows 10 or Mac
  • iPhone USB cord
  • iPhone connected to same internet/network as your PC or Mac
  • Altstore (Cydia Impactor Alternative) downloaded and installed for PC or Mac
  • iCloud and iTunes (yes, both) downloaded and installed on your computer

Instructions for Windows:

  1. Open Altserver (the program installed from the Altstore download).
  2. Plug iPhone into PC
  3. Once it opens, in the lower right hand corner by the time, click the up arrow and you’ll see a small diamond. Click that and choose Install Altstore.
  4. Now that you’ve clicked that, you’ll be required to sign in with your Apple sign in.
  5. If that was done properly, you’ll get to a part where the program sends a 6 digit code to your phone for you to type in on PC.
  6. Once you’ve done that, you’ll get a notification that it’s installing and then another that the install finished.
  7. You now have the AltStore app on your phone. You no longer need your PC, simply unplug your phone and continue.
  8. Now, on your phone, go into your Settings then to General and then Profiles & Device Management.
  9. You’ll see the account you used to sign into AltServer before, click it.
  10. Then on the following screen, click the blue “Trust” option followed by the red “Trust” button on the pop-up that you receive.
  11. Head to Safari and type the website unc0ver.dev into the address bar.
  12. Once that comes up, press the giant blue Download 5.0.0 button.
  13. Tell it to download the file. You’ll see a downloading icon in the upper right-hand corner for a moment.
  14. Once it’s done downloading, the icon will change. Click that icon and it will show you the file you just downloaded. Now tap on the new icon that is in the upper-right hand corner.
  15. You now have tons of options of what to do with it. On the icons, swipe all of the way to the right and then choose the More icon (box with 3 dots).
  16. Now scroll all of the way to the bottom where you should now have a Copy to Altstore option.
  17. Once you tap that it will take you to AltStore on the My Apps section. You’ll see the spinning wheel in the upper left-hand corner and a loading bar. This may take up to 1 minute to do.
  18. Once that’s done, it will say unc0ver is installed!
  19. I now recommend restarting your device to make certain it’s nice and squeaky clean on the backend.
  20. Once its restarted, make certain that you’ve deleted any downloaded OTA update that may be pending.
  21. Now finally, head over to unc0ver and open it.
  22. Tap the large, blue Jailbreak button. It will probably restart a few times, it did with me. After a few attempts, it should work out! Enjoy!


    Notes:

    I do want to go into the details of how AltStore works. It auto-resigns the unc0ver app every 7 days as long as AltServer is running on your computer. So it kind of does it itself so that you don’t have to do so every 7 days. However, if your PC is off or your phone isn’t on your home wifi, it won’t auto-resign. So every 7 days, just turn on your AltServer on your computer and connect your phone to your wifi and then it should absolutely resign for you!

If you like the author’s work, follow him on Twitter @V1RACY and don’t forget to enter the weekly giveaways!

And as always, stay tuned here on Hackinformer.com for so much more and follow us on Twitter @Hackinformer

Unc0ver 5.0.0 Released!

The development team and geniuses behind Unc0ver do it again. That’s right people, unc0ver 5.0.0 is finally released and with it are some monumental changes. Let’s get right into it, shall we?

What is unc0ver?

‘Unc0ver is a jailbreak, which means that you can have the freedom to do whatever you would like to do to your iOS device. Allowing you to change what you want and operate within your purview, unc0ver unlocks the true power of your iDevice.’

What makes this one special?


Changelog:

Full-fledged support for all devices on iOS 11.0-13.5 with Cydia and tweak injection.

Note:

We have the updated installation instructions coming very soon. If you’re uncertain how to do this, please hold off, you’ll get the instructions very soon. You should be able to use our existing instructions, but we’re going to test it first beforehand, so maybe wait for our confirmation.

PSA-Update/Downgrade iPhone to iOS 13.3 Now! (Details Inside)

If you follow the right people on Twitter, you may have already seen rumblings over the past couple of weeks hinting that everyone should be on iOS 13.3. Some people have been heavily hinting and calling any iOS other than 13.3 as crap and they downgraded or upgraded to it. Others have said outright that they like iOS 13.3 the best and nobody should have ever settled for anything before it. And now, they’re being far less coy and saying that everyone needs to get their butts onto iOS 13.3, let me explain why.

Upgrading to iOS 13.3 :

Besides the reasoning we’re about to talk about, you should probably update to iOS 13.3 from any of the previous iOS 13.x.x. They’re just so gummed up and Maps has issues, the sound is all messed up, it’s time to update to 13.3 just to have a more solid operating system. Apple really dropped the ball when they made iOS 13, I don’t know how. iOS 12 was a vision of beauty. To update using a PC, visit this site. It will ask you to choose your product, then choose your device, then choose your iOS of choice (13.3), then give you the link to download it. You then simply use iTunes to update to 13.3 (google is your friend). The website will tell you at the top of the page if iOS 13.3 is still being signed and if so, you’re good to go. If not, as long as you’re on some version of iOS 13 under 13.3, then you’ll still get the benefit of this article. Keep on reading.

Downgrading to iOS 13.3 :

Let’s say you’re already on iOS 13.3.1 and you want to go back to iOS 13.3. That’s totally a possibility as of the writing of this article. To downgrade you will need to use a PC. To get the proper file, visit this site. It will ask you to choose your product, then choose your device, then choose your iOS of choice (13.3), then give you the link to download it. You then simply use iTunes to downgrade to 13.3 (google is your friend). The website will tell you at the top of the page if iOS 13.3 is still being signed and if so, you’re good to go. If not, you’re already out of luck. Many apologies.

Save your Blobs :

Once you’re on 13.3, proceed to save your “blobs”. Again, google is your friend here. There are too many variables across devices to tell everyone how to back up their blobs. It’s just recommended for you to do for any time that you’re on a firmware that is golden like this. Which is a segway into the final section of this article.

Jailbreak :

Yeah, you guessed it. iOS 13.0.0 to iOS 13.3 will be getting a semi-tethered jailbreak for (all) iOS devices. Here, read this tweet from @Pwn20wnd.

“To be clear: #unc0ver will be updated for all devices on iOS 13.0-13.3 for those interested in a semi-untether but A12-A13 devices will be the priority.”

If you like the author’s work, follow him on Twitter @V1RACY and don’t forget to enter the weekly giveaways!

And as always, stay tuned here on Hackinformer.com for so much more and follow us on Twitter @Hackinformer

SX OS 2.9 Released, But Beware

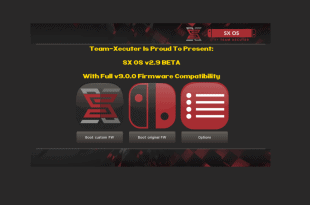
I mean, finally, am I right?! Well, no, I’m not. Sometimes things take time to get updates and we should always be patient and leave people to do work so that they do it right the first time. But I digress, the 2.9 update for SX OS is out finally out and I’m here to discuss what all that entails. Let’s dive in.


2.9 Announcement:

“Today, we bring you a much needed update of SX OS. Full compatibility with the latest Switch firmware 9.0! Sorry that we kept you waiting, we wanted to make sure all our unique features still properly work.

Additionally, we also introduced support for the “Horizon split format”. This means that people who use FAT32 can have folders named ‘game.xci’ with split parts contained therein (named 00, 01, 02, etc.). Make sure the folder has the ‘archive’ bit set.

We know you are waiting for some other big features in SX OS, they are coming. We wanted to get this compatibility update out first though.

Caveats:

There are a fair amount of people stating that they can’t load certain XCI titles, if not most of them. The simple workaround here is to install the XCI file as you would an NSP file. The second caveat here, and this is a larger one with zero workaround, is one discovered by @hexkyz. He made the following statement in a tweet. This might deter you from updating to 2.9 altogether. “Oh and beware, due to improper update of the XCI loader, this will burn the 9.0.0 Gamecard ASIC’s fuse, so downgrading afterward will render gamecards unusable on both system and emulated NANDs.”

That is a crazy statement. That means they basically killed any reason for you to downgrade back to an older firmware as it would make even your legit purchased games no longer work. We’ll keep everyone here in the loop. If and when Team Xecuter fixes this, we’ll let all of you know.


Where to Buy:

Want to buy an SX Gear? The best current place to buy in the US, and generally has sales pretty often is from Mod3DSCard’s site. If you need an SX Core or SX Lite, their site may have some. But in the US, they’re a bit harder to find.

Instructions:

  1. Update to 9.0.0 using your method of choice.
  2. Download the latest SX OS beta boot.dat file from xecuter.
  3. Insert your Switch’s microSD card into your computer.
  4. Drag and drop boot.dat file to the microSD card. If you have an old boot.dat file, let this overwrite it. If you’re a new SX OS user, this just sits on the root.
  5. Return your microSD card to your Switch and use it how you always have.
  6. Boot the system using the SX Pro dongle or the payload injection method as you always have.
If you like the author’s work, follow him on Twitter @V1RACY and don’t forget to enter the weekly giveaways!
And as always, stay tuned here on Hackinformer.com for so much more and follow us on Twitter @Hackinformer

unc0ver Updated to 3.7.0 Pre-Release!

Previously we had reported that the famed stable jailbreak, unc0ver, had been the first to jailbreak 12.4. Nobody really saw that coming, but everyone was exceptionally happy that it did. Except for those that were on 12.4 and also on an A12 and A12X device. Well, now the rest of the gang can join in on the fun. We officially have a full-fledged iOS 12.4 jailbreak for all! Let’s talk more about it and how you can get it running on your A8-A12X iDevice!


Changelog (it’s only one, big change):

  • ‘Full-fledged A12-A12X support with Cydia and system-wide tweak injection’

What You’ll Need to Jailbreak:

  1. A PC.
  2. Your mobile device must be an A8X through A11 device. (Google if you’re uncertain)
  3. Must have iTunes already installed.
  4. The 3.7.0 Pre-Release unc0ver .ipa file.
  5. The most up to date Cydia Impactor.
  6. Your device’s USB cord.

Instructions:

  1. Open Cydia Impactor and connect your device. If Cydia Impactor cannot start, it’s because you don’t have iTunes installed.
  2. Drag the unc0ver ipa file you downloaded onto the Cydia Impactor window.
  3. Enter your Apple ID (email and password).
  4. Open Settings, go to General, then click on Profiles & Device Management.
  5. Trust the new certificate for unc0ver.
  6. Now you can open unc0ver from your home screen.
  7. Tap the ‘Jailbreak’ button.
  8. It has ~30 steps to clear. You’ll know it worked properly if you get a window at the very end that says you’ve jailbroken successfully. It then exits back out to the homescreen and you’ll have Cydia. If it doesn’t work right, your phone will restart. That’s fine, just go into unc0ver again and hit the ‘Jailbreak’ button again. I had to do it three times the very first time and then Cydia finally popped onto my phone.
  9. Once Cydia’s installed, enjoy!

If you like the author’s work, follow him on Twitter @V1RACY and don’t forget to enter the weekly giveaways!

And as always, stay tuned here on Hackinformer.com for so much more and follow us on Twitter @Hackinformer

How to Jailbreak iOS 11 to iOS 12

Not even a day ago, we discussed the fact that iOS 12 now officially has a jailbreak. If you need to read all about that, feel free to do so here. The jailbreak for iOS 12 came a few weeks after unc0ver released for iOS 11. And for those historians out there, unc0ver was not the first iOS 11 jailbreak. It simply brought a lot more stability to the iOS 11 scene. That very same jailbreak for iOS 11 extended into iOS 12. The program is an all in one for people on iOS 11 through iOS 12.1.2 so long as you’re on a A8X through A11 device! So come with me, and I’ll show you how to do it on your own!

What You’ll Need:

  1. A PC.
  2. Your mobile device must be an A8X through A11 device. (Google if you’re uncertain)
  3. Must have iTunes already installed.
  4. The most recent unc0ver .ipa file. It’s at the end (bottom) of the very long changelog.
  5. The most up to date Cydia Impactor.
  6. Your device’s USB cord.

Instructions:

  1. Open Cydia Impactor and connect your device. If Cydia Impactor cannot start, it’s because you don’t have iTunes installed.
  2. Drag the unc0ver ipa file you downloaded onto the Cydia Impactor window.
  3. Enter your Apple ID (email and password).
  4. Open Settings, go to General, then click on Profiles & Device Management.
  5. Trust the new certificate for unc0ver.
  6. Now you can open unc0ver from your home screen.
  7. Tap the ‘Jailbreak’ button.
  8. It has 38 steps to clear. You’ll know it worked properly if you get a window at the very end that says you’ve jailbroken successfully. It then exits back out to the homescreen and you’ll have Cydia. If it doesn’t work right, your phone will restart. That’s fine, just go into unc0ver again and hit the ‘Jailbreak’ button again. I had to do it three times the very first time and then Cydia finally popped onto my phone.
  9. Once Cydia’s installed, enjoy!

Questions:

  1. This doesn’t support A8? Don’t worry, it’s reported that it will very soon.
  2. What about A12 devices? Again, this is reported as working very soon.
  3. Do I have to use my PC? Yes, unless I find a reliable “No PC” method. Then I’ll update this article accordingly.

If you like the author’s work, follow him on Twitter @V1RACY and don’t forget to enter the weekly giveaways!

And as always, stay tuned here on Hackinformer.com for so much more and follow us on Twitter @Hackinformer

iOS 12 Jailbreak Emerges!

Hello one and all! I’ll keep this section short and sweet because I want to get down with sharing this story that just broke within the last 24 hours. That’s right, not just a day ago unc0ver announced an update to their very stable iOS 11 jailbreak. If you’re on iOS 11, you can read more about that here. You know what, let’s just get right into it because I just have too much to share with you!

So yeah, unc0ver has a great update to make it work with iOS 12. But what are some of the features of unc0ver that make it so great? Well here is a laundry list of reasons to use it.

  • ‘All exploits in same app
  • Detailed error messages
  • Faster patches
  • More stable patches
  • No extra battery drain
  • No random freezes
  • No random slow downs
  • No data is logged or shared
  • No malware
  • Proper jailbreak state detection
  • Proper bootstrap extraction to fix issues such as Cydia not appearing after jailbreak
  • Native build of Cydia for iOS 11 and 12
  • Telesphoreo port for ARM64
  • Much faster Cydia
  • Much more stable Cydia
  • Much more modern looking and acting Cydia
  • Cydia skips uicache when not needed
  • Cydia supports iPhone X screen size
  • Cydia Substrate for tweak injection
  • Much faster ldrestart
  • Much more stable ldrestart
  • Changes to Cydia were made with permission from Saurik
  • Option to skip loading daemons
  • Option to dump APTicket
  • Option to refresh icon cache
  • Option to disable auto updates
  • Option to block app revokes
  • Option to restore RootFS
  • Button to restart device
  • Button to open Cydia in case it doesn’t appear on the Home Screen
  • Label to show the days left till the application expires
  • Working debugserver
  • An awesome UI’

Are there any downsides to the jailbreak for iOS 12? Well yes, but they’re nominal at best.

  1. It only works on iOS 12.1.2 or lower. So if you’re on 12.1.3 or higher, you cannot jailbreak it. But as of the time of this writing, you can downgrade to 12.1.1 Beta 3 and jailbreak. So google and try that method.
  2. This is still a beta jailbreak for testing. While all is working beautifully for myself, it could have its hiccups. So keep that in mind, don’t just angry tweet about it. Just be patient and updates will come.
  3. It only works on A8X-A11 devices. So basically every modern phone except the XS and the XS Max.

If you need Instructions:

We officially have a walkthrough for jailbreaking on the PC. Click here to get jailbreaking!


If you like the author’s work, follow him on Twitter @V1RACY and don’t forget to enter the weekly giveaways!

And as always, stay tuned here on Hackinformer.com for so much more and follow us on Twitter @Hackinformer