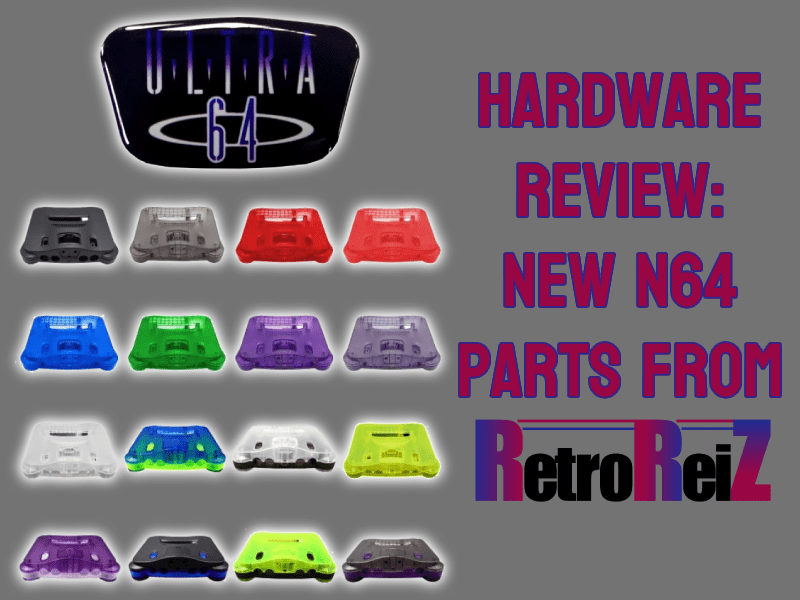
I think this is the first time that I’m reviewing a console shell. I know I’ve covered plenty of handheld shells, and there are likely more to come, but this feels good. I could see myself doing more shell reviews in the future. If you’re here, you likely need a new N64 shell or you’re just tired of looking at the same ol’ color. Well we got a lot to talk about, so let’s get into it.
Description/Features:
- Custom-fit N64 replacement case for your Nintendo 64 console
- In 10 new basic colors and 6 special editions
- The cases fit EUR, USA and JAPAN motherboard versions
- Conversion is child’s play (see video) – no soldering required
- High quality ABS material, similar to the original
- New goods from third-party manufacturers – without Nintendo logo / Nintendo 64 logo
- 1x top, 1x bottom, 1x expansion compartment lid, 1x reset button, 1x ON/OFF button, 1x external port cover, 1x back closure, 1x light tube, 2x cartridge slot holder, 2x feet, 2x cartridge, 1x compartment flaps
- 3x matching screwdrivers (no other tools are needed)
Unboxing:
Disassembly/Assembly:
Pros & Cons:
So let’s start by talking about one quick thing I noticed after I was done recording my assembly video. There is the slightest, almost imperceptible gap at the front of the console that might raise a concern for some users. However, even after meticulously tightening all the screws, the gap remains and it’s the smallest gap. The bottom line is that it doesn’t impact the overall functionality of the console. So if you notice it, you can ignore it. And in dimly lit gaming setups like mine, this tiny gap is easily overlooked. I can’t notice it whatsoever.
The next topic of discussion is sizing of door flaps. Yes, there’s a disparity in lengths of the door rails, but it’s a minor inconvenience that can be easily resolved. The replacement rails are the same length as each other. The OEM door flaps are ever so slightly different from one another. Having both flaps be the same length can sometimes cause the doors not to close properly. Luckily, there are simple fixes available. Users can opt to use their OEM doors, for example. But if that doesn’t sound ideal, you can loosen the screws holding in the cartridge tray. Doing so will relieve pressure on the longer rail. This issue is also shown in the assembly video, where you see me have the issue of stuck flaps and then loosen both screws a full turn each. After that, you can then see the flaps work brilliantly.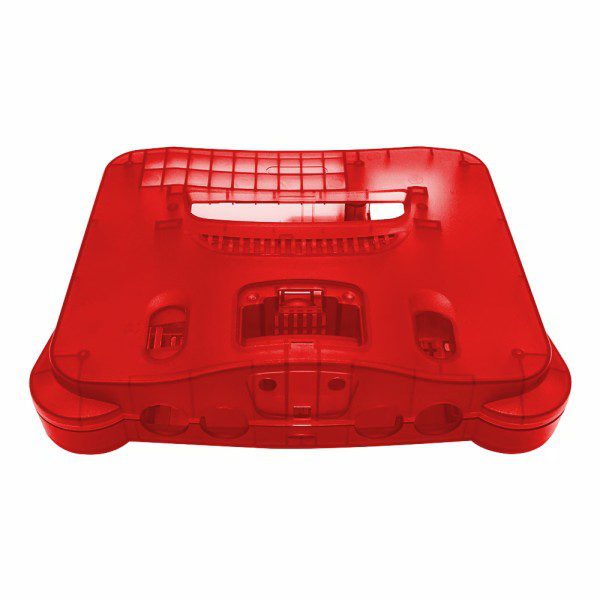
The next point has to do with the front slot where you can insert a jewel. The shallower depth of this jewel area may result in a slight protrusion of jewels from 3rd party manufacturers. This might be concerning for some of you, and I understand. I will say that the difference is hardly noticeable without a direct comparison to an original N64 shell. It’s also important to note that the aftermarket shell doesn’t come with a jewel, so users will need to purchase one separately on the RetroReiZ site or remove the OEM jewel for use on this replacement shell. They sent me one for review and I love it to death. It’s so cute and with the watermelon red color, the black emblem is evoking a big watermelon seed on the front. There’s nothing bad to be said of their gems! I recommend just buying one from RetroReiZ at the same time you pick up one of the shells.
The absence of screws in the shell replacement is a significant oversight in my mind for several reasons. This could inconvenience users who have to find their own screws or repurpose existing ones from their OEM shell. As many of you know, your N64 may have stripped or missing screws after decades of being owned by various children. Additionally, the untapped screw posts in the shell pose a risk of stripping more screws if not handled with caution during installation. Might I suggest a quick tactic for implementing the screws into the new shell? Twist the screw in forward twice and then back once. It will take you three times as long to achieve, but your screws may very well survive. And though it’s missing screws and that sucks, at the very least, I’m glad they included all three screwdriver types that you’ll need!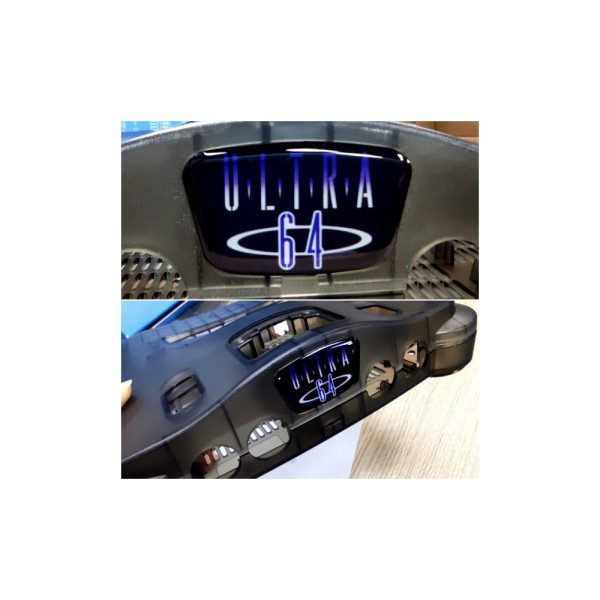
Next up, I wanted to talk about the LED light pipe. I find it interesting that the clarity of the plastic used for the front LED differs from the OEM one. For some reason they made it perfectly clear instead of making it frosted, affecting the direction of light. There’s likely a fair amount of you that will the OEM light pipe may opt to keep it for a more optimal lighting effect. It just gives it a classic look while the OEM one just kinda dumps the light out and it bleeds into the surrounding plastic a bit.
We may as well keep talking about the plastic. Let’s talk about the outside shells. Despite minor differences in clarity compared to OEM Funtastic shells, the overall quality of the aftermarket shell is still satisfactory, maintaining a close resemblance to the original. I’m referring to strength and even texture of the outside, though you won’t likely be comparing the feel to your old shell anymore once the swap is completed. The problem I cannot test for, despite my desire to, is degradation. Sure it feels as strong and durable as the OEM shell, but I’m not entirely certain if it will become brittle over the decades and break at all. Only time will tell. But you can always buy another one at that point…I hope.
Now, the exclusion of rear rubber feet from the package may seem surprising, given their low cost. Heck, they even add more stability so as to prevent the console from sliding forward if you accidentally tug the controller cord too hard. I’m guessing that this omission could be simply attributed to the fact that they want to stick with one manufacturer, in this case a plastic components company. You can just a cheap heat gun or high powered hair dryer and remove your previous OEM feet and use them again. But they’re likely much thinner and practically useless at this point. I recommend getting the $4 set from Stone Age Gamer.

Overall Thoughts:
The whole shell is 50/50. It’s 50% fun and it’s 50% difficult. It’s definitely rewarding once you’re done, but the assembly can be frustrating at times. My hands and wrists were cramping all along the way and exhausted by the end. Not having a pre-tapped post is brutal from your fingers to your forearms when applying the screws. I did strip a screw in the process, so now I have to buy an entirely new set of N64 screws to just get a new screw for that. But like I said, once that hour of disassembly and reassembly is completed, you’re looking at a whole new N64 shell and it’s gorgeous and suddenly all worth it!
Links: