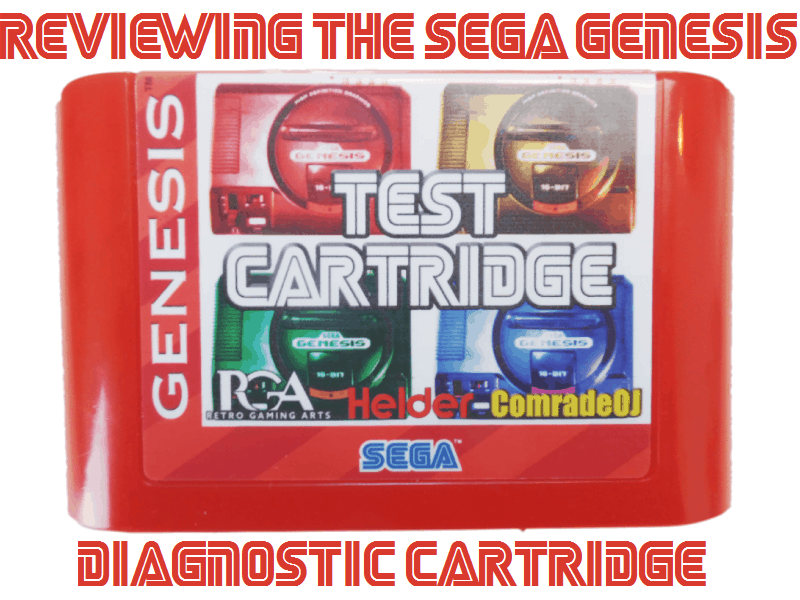
Earlier in the year we made an article about where to find modchips in 2018. Our article featured the company Retro Gaming Arts. This company not only sells modchips for you to install, but they could also install them for you. This goes as well for AV mods and other premodded systems that are on their site. If you want to read the full article, click here. But if you’re someone who likes to tinker with systems yourself, we have a product that we’re reviewing from Retro Gaming Arts today called the Sega Genesis Diagnostic Cartridge ($34.95). Wondering what that is and who could get use out of it? Read on!
What is a Diagnostic Cartridge?:
What is it Compatible With?:
Right off the bat, before anyone even asks; no this will not work on clone systems. And why would you want and/or need it to? Usually, the clone systems you buy are still under warranty anyway. Mainly because they’re so new, so just invoke your right to a new clone system by contacting the manufacturer. No, this is for official Sega Genesis systems which were created by Sega. If you’re wondering if this will work on the Mega Drive, it’s hard to know as I don’t have one.
I think that in judging by the shape of the shell that this won’t work in a Japanese system and the same most likely goes with the PAL version. So I’m going to go ahead and say that the answer is most likely no, although there is a screen that tells you your region. I’ll update this article if it turns out that this does indeed work or if there is ever announced a version that works on PAL and JAP Mega Drives.
What does it work on? Well, naturally what we have are four different models of essentially the same system. You have the Sega Genesis model 1, the model 2, and the model 3. Then you also have a variant of the Sega Genesis which is the Sega Nomad. I inserted this device into all four of those devices so that I may see what happens in all of those scenarios. Maybe one wouldn’t work or maybe they all work and it shows me that I needed to fix one of them. The outcome was a good one overall. What I found is that worked on all of the primary Genesis models, but for some reason, I could not get it to work on my Sega Nomad.
What Can You Do With It?:
This is where the fun really ensues! There are so many different things that this cartridge has jam-packed into it. To be able to use the cartridge, you need to have a 3 button Sega Genesis controller. You can use a 6 button variant, but it has problems with this cart. If all that you have is a 6 button controller, you’ll be forced to hold the Mode button every time you have to press anything.
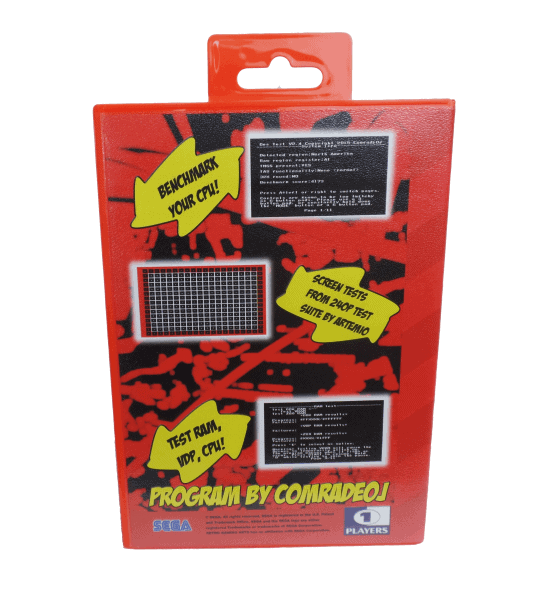
The first screen asks you to press A if you’re going to load the program normally. There is also an option to press B to load a memory diagnostic program. You’ll press A to boot the cart normally if it has problems, then you can assess your hunch of it having issues by pressing B basically. Once you’re in the regular program, you’re greeted with a system information screen. This has your region, your region register, if you TMSS (Trademark Security System) is present, the TAS functionality, if there is a 32x present, and your overall benchmark score.
The next screen that you’ll come across is the “Exception Testing” screen. This screen may be the scariest one on the entire cartridge. It’s a screen full of options for those who need to do intense debugging of the system. The options are trigger an address error, execute an illegal instruction, divide by zero, 1010 instruction emulator, 1111 instruction emulator, cause a privilege violation, and cause a privilege violation alternative method. All of these will yield some kind of a result for you. But be warned, since they cause a 68k trap on the system, so after you’ve used one you’ll have to reset the console.
On the next screen, you’ll come across a Hex Data Dumper and on the screen after that you’ll see the Hex Data Writer. There’s nothing of use for me on these screens personally. We’ll talk about the Hex Data Writer a little more later, but just know that these are there. And if you know what you’re doing, you can definitely get some kind of proper use out of the tool. I just wouldn’t fool around with this if you have zero idea what you’re doing. Or if you have kids, keep this clear of them.
Further along, there is a screen that shows you if all pins on the controller one, controller two, and extension port are reading input properly. This is even more apparent when you have your controller plugged in and you press buttons as you’ll see different number/letter combinations flash on the screen for different inputs.
As I had mentioned before, there is a way to test sound with this. Once you get to the seventh page of the eleven pages that exist, you’ll find sound testing there. You will be able to ping FM, PSG, and DAC sound chips. It does mention that you can write different values to the sound chips of the Sega Genesis using the aforementioned built-in tool called the Hex Data Writer. The cartridge not only has that tool but also mentions the exact address of where you can write to on the chips using that tool.
Towards the end of the pages, on page nine, you’ll find the RAM test screen. It will allow you to test your 68k RAM, your VRAM, and your Z80 RAM. It does warn you on the screen that if you were to test the VRAM, it will cause on-screen glitching. There’s no need for panic though, the screen only temporarily glitches as it’s doing the tests. All of the test results show up on screen in real time. So that means you can see exactly where they end if they die off somewhere in the test.
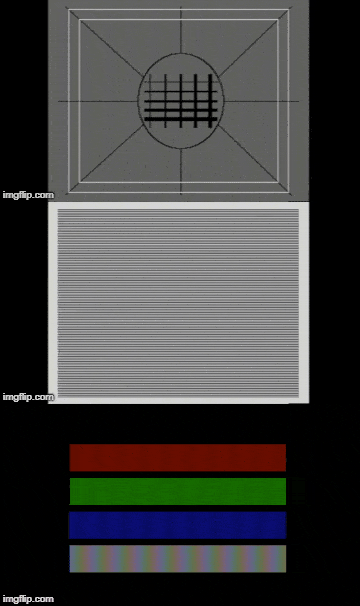
The second to last screen features the test images. I made a small gif file up above this is you want to watch them cycle. But there are so many options that I just chose the three screens. You have options for a color bleed test, sharpness test, overscan test, stripes test, checker test, red/blue gradient, green/white gradient, and a violet/yellow gradient. If your images are looking slightly off and you can’t tell why and you don’t maybe know how a certain game is supposed to look, these will help you.
Build Quality:
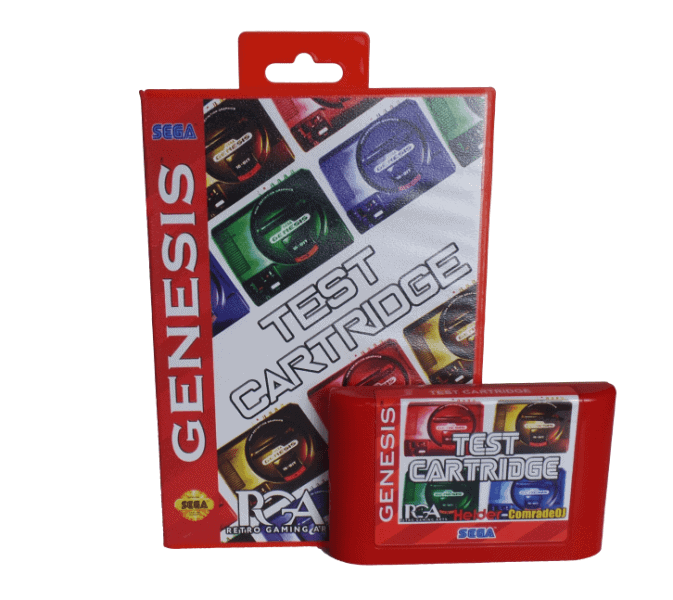
Many Kudos go to Retro Gaming Arts with this one. I’m uncertain if they bought the parts and did the assembly themselves. Or maybe they sent the file to be flashed to a company that manufactures the shell and stickers and does the flashing. Maybe they commissioned these red shells from a company that is local in their area. No matter how they did it, the product came out great. Not only does it look stupendous, but it is solid and could be mistaken with a cartridge from 1994. The same can be said for the shell, wherever they got the cover printed and the shell from, they’re damn near perfect.
While this all appears to be good and well, we also know that the stickers on these carts are prone to damage. That may not matter to you overall, I suppose. If you just use this cart for its actual purpose, I think that the bright red shell may be enough that you remember what it is for. Especially if you return it to its box every time after use. However, the sticker coming free or being torn or anything is something yet to be seen. All in all, it’s only speculation that it will even become hurt. Maybe the stickers nowadays are better and more resistant to scuffs and scratches than stickers of yesteryear.
Overall Thoughts:
It took me a long time to get my hands on one of these bad boys. There was a transition phase where it was planned that Retro Gaming Arts would start having a clamshell box for these. So I had to wait to get one of those versions as it would be the more complete version for review. I had the patience to wait for one of these puppies to come to me for review for you readers at home. If you were to buy one right now, there would be no wait aside from shipping. This is better for you readers as you can see that the case clearly makes it feel like a complete package. Furthermore, it makes it easier to set on your shelf next to your other boxed Genesis games.
A small part of me wonders why it says Sega Genesis Diagnostic Cartridge as the listed title on their site, but the cartridge says Test Cartridge. Is it just because one day the cart will have the full name? I think Sega Genesis Test Cart rolls off of the tongue a bit better. However, all in all, the title does not affect the product in any way. I would say that this is a one of a kind product that has its purpose. I think that anyone who intends on doing upkeep on their Genesis or flipping Sega Genesis’ should buy just one of these and they’ll be set for good.
Unboxing Video:
Looking to buy one of these Diagnostic Carts? Click here.
If you like the author’s work, follow him on Twitter @V1RACY
And as always, stay tuned here on Hackinformer.com for so much more and follow us on Twitter @Hackinformer
 Hackinformer Your device needs to transform, we are here to inform
