Just like all systems that says you can’t do this or that hackers always find a way to get by any measures placed in by the company and with the Mini NES its just like that. First, we were told it could hold only 30 games then BAM 90 with the first hack and then floodgates were open with Haxchi2 and the use of over 700+ games & more working on it.
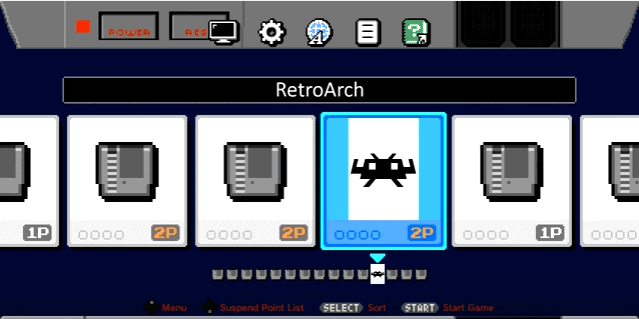
Now madmonkey has ported RetroArch to the Mini NES, now with it being able to play Gameboy, Genesis, SNES and much more. Now keep in mind this is all a work in progress and will get even more fine tune with the community continually working on Haxchi2.
https://youtu.be/Uj4_clJg_kA
CPS1/NEO GEO working on the Mini NES
Instructions via GBAtemp
It’s possible, and madmonkey’s release of RetroArch had shortcuts for NES, SNES and MegaDrive cores.
You can write bash script that launches RetroArch with specific core and ROM file, and then just replace kachikachi (Exec=…) path in the .desktop file.
It’s very easy to do, but considering that Haxchi2 currently overwrites .desktop file, it’s too much of a hassle. That’s why I went with RetroArch GUI.
So, if someone is still interested in RetroArch, I’ve made a new pack (and removed the previous one from my Google Drive). Now the game ID is a little more meaningful (CLV-H-RARCH), and all RetroArch files are in /games/[Game ID]/libretro instead of /games/[Game ID]/etc/libretro.
Also I’ve added .desktop_temp file in the “game” folder and few lines to the init script that remove automatically generated .desktop file and replace it with the temp one. This is basically a quick hack meant to bypass Haxchi2’s .desktop generation.
Download:https://drive.google.com/open?id=0ByJabzdhjqvQdC1aZ19NTWgzY1k
You can download other cores directly from LibRetro’s BuildBot
How to use this:
1. Extract archive contents to Haxchi2 folder, agree to replace init file
2. Copy additional cores to games/CLV-H-RARCH/libretro/core (not necessary)
3. Copy ROMs to games/CLV-H-RARCH/libretro/roms
4. Open Haxchi2, enable RetroArch
5. If you need folders, clone and build Haxchi2 from GitHub, then make sure to enable “Settings -> “Pages/folders structure” -> “Custom – show Folders Manager every time”
6. Synchronize. Make sure to move RetroArch to the root folder if you enabled custom folders in the previous step.
7. That’s it.
As always, thanks to madmonkey for the RetroArch binary and Cluster for a very convenient Haxchi2.
 Hackinformer Your device needs to transform, we are here to inform


Okay I find this nothing short of impressive a NES running Super Nintendo games never in my life would I ever thought it granted it is a Soc but still it’s a huge smack in the face to Nintendo
Impressive indeed! wouldn’t mind picking up a nes mini now 🙂
Good luck finding one at a decent price they are obscenely marked up I’m glad I picked mine up on pre-order before all these greedy resellers got a hold of them
Picked mune up at walmart lol