Reviewing Raspberry Pi accessories are anything but new to us here on Hackinformer. I myself have previously reviewed the ultimate Raspberry Pi case for portability, which was the Raspiboy. If you want to read the review, click here. If you just purchased one and want to read about how to read about the assembly, click here. So I’d like to think that we have your best interests in mind when we review Raspberry Pi anything. Well today, we’ve got another tasty treat for you, and I think you’re going to like it! Let’s dive into the Super Kuma 9000 from Kintaro.

Description:
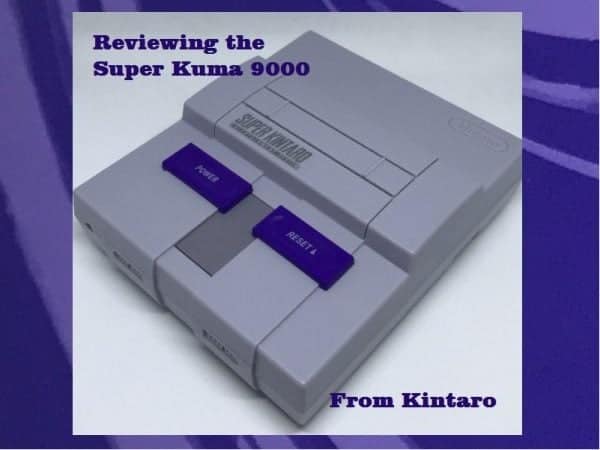
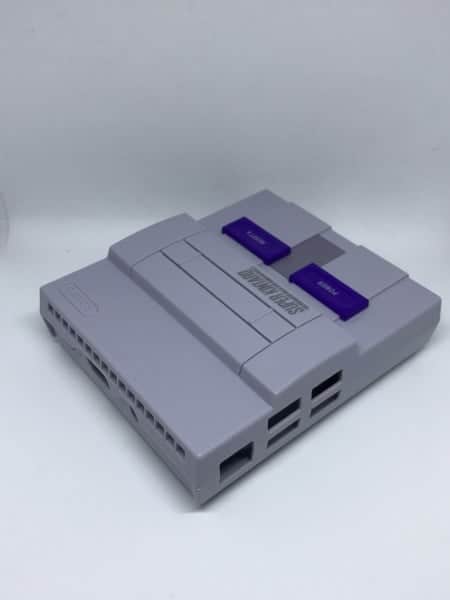
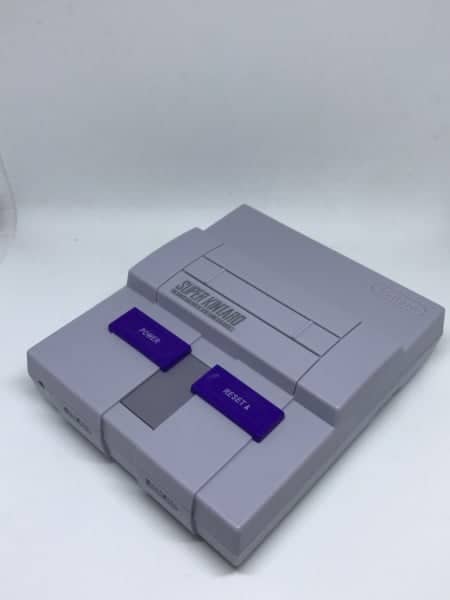
‘SNES inspired Raspberry Pi case – Super Kuma 9000 with functioning Power & Reset buttons, LED and Superior Custom Heatsink by Kintaro’
Features:
- ‘SPECIFICALLY DESIGNED | Our Super Kuma 9000 case, inspired by the classic SNES, is specifically designed for Raspberry Pi 3, 2 and B+ & Asus Tinker Board, making it a multi compatible case. (NOTE: The heatsink is not compatible with the Raspberry Pi 3B + and Asus Tinkerboard)
- COOLING | Including a superior custom made heatsink together with thermal compound for even better passive cooling. Tested to outperform fans, even after hours of playing your favourite game. Also including a dedicated space for an optional fan, in case you feel like customising your case. Fan is not included.
- FUNCTIONING BUTTONS & LED | This time around we added a custom PCB, enabling you to switch your gaming console on & off with the functioning Power and Reset buttons. Feel the nostalgia as soon as that LED buttons turns red.
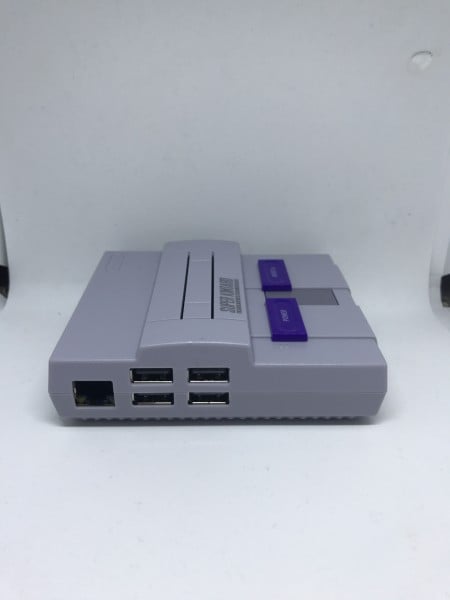
- INJECTION MOLDED | High quality injection molded plastic. The Super Kuma 9000 case has full access to all ports, such as: USB, HDMI, SD Card, Ethernet, Audio & microUSB Adapter. Giving you the opportunity to easily connect your favourite controller and other accessories within seconds without having to open the case.
- FULL KIT | We provide you with an extensive guide (We provide you with a more detailed instruction manual via email after your purchase), helping you with: assembling the heat sink & easy to read Retropie installation. Also included: matching mini screwdriver + screws and heat paste for the heatsink, for even better heat dissipation. Making sure that you get the best use out of our high quality case.’
Unboxing Video:
Assembly Video:
Pros:
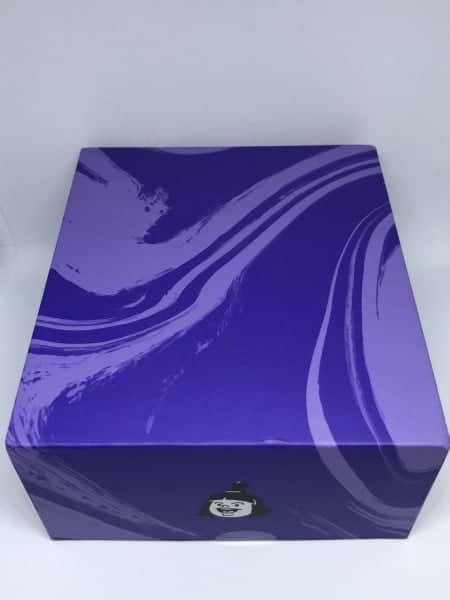
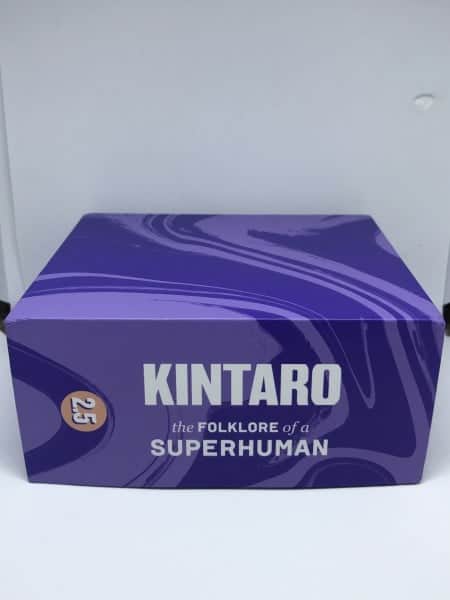
There are simply a heap of pros in this case, not only in terms of what it can do but also quality and what comes in the box. So let’s first talk about what you get in the box, shall we? If you watched the unboxing the video, you’ll already know, but basically, here’s what it breaks down to. In the box, you’ll find that there is the case first and foremost. Underneath that is the case is the instruction manual. Here’s a tip about that, read both sides, I’ll explain more about that in the cons section. Below the instructions is a card inviting you to join something that they do and have set up. Underneath that though is the heatsink as well as the thermal paste needed. And then you’ll also find the small screwdriver and the appropriate screws. It all sounds like a lot, but it’s definitely a fun little project in a box.
Now we can speak on the quality. These cases are made of very high-quality plastic that has been created using an injection molding process. That means the results for all cases should be identical and are not made by hand. The buttons on the top of the case are nice and feel the way that scaled down buttons should feel. They’re not exactly one for one the same as the Super Nintendo Classic, but as close as I think any company could muster. So kudos go out to Kintaro for the buttons as I thought they would feel cheap. The ports all fit perfectly into the slots allocated for them as well. It’s a perfect fit and nothing is out of place once you put it all together.
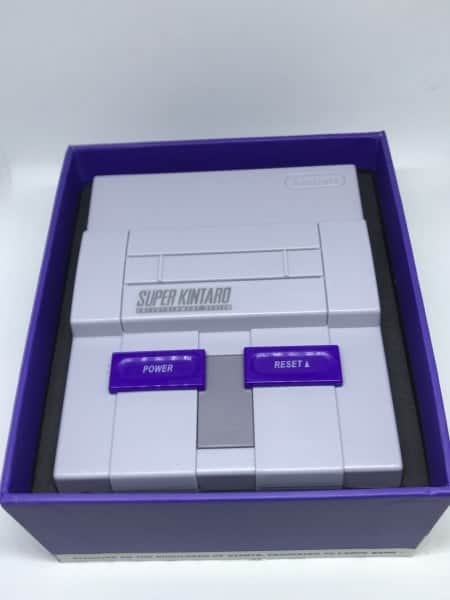
There is some empty space inside of the front of the case, I’m glad that they did not try to fill this space with anything. I think having that open feels a lot better than if they would’ve tried to balance out the weight. I would have hated this if it had a weight in the front as that means I have a higher chance of potentially pulling it off of the shelf that it sits on. The bummer of this is that there is a spot for a small fan in that space, I’m not certain how much weight it would add though. I would’ve liked it though if they had had a USB extension so that they could have a USB port in each controller port spot. But they chose to stick to the aesthetics as much as possible and I respect that. Speaking of aesthetics, that hates the way the North American Super Nintendo will be happy to know that there will be a Super Famicom version coming to the European market within the year. I got confirmation from Kintaro themselves that they’re working on it as we speak.
The heat sink and the LED light work fine after everything is all set up. Not that I would ever overclock my Raspberry Pi, but if I did I could rest easy knowing that the massive heat sink was there to dissipate a lot of the extra heat. Other features that are present is the reset and the power button, they work as best as they can. The power button does what it says that it should, but what does Reset do? Does it reset the game that you’re playing? No, it actually just resets the whole EmulationStation. This is best reserved for any changes that you have made within EmulationStation that you want to take effect immediately that would normally require rebooting. If you’re in a game, it will do the same thing. Which, all things considered, is better than turning the system completely off and back on again.
Cons:
It was truly hard to find anything dramatically wrong with this case. You have all of these pros and I really had to search for something to scrutinize. Something for them to potentially improve upon or for something for buyers to be aware of before buying. Well, to that end I found just a few things. The first was that my red LED light never came in on the very beginning. I don’t know why this is as the power button works just fine and the LED seems to be soldered in place. I looked for any and all reasons as to why this may be, but I really couldn’t find why it wasn’t working or a way to repair it. And then, I accidentally flipped over the instructions and there was my answer. It requires that you just open up the terminal on your Retropie specifically and have it fetch the driver for the custom driver for the Kintaro PCB. So, not really a con about the LED so much as it is that I have to do an extra step to get the drivers for it. But it’s only a 5 minute task at most and you only have to do it once unless you start from scratch.
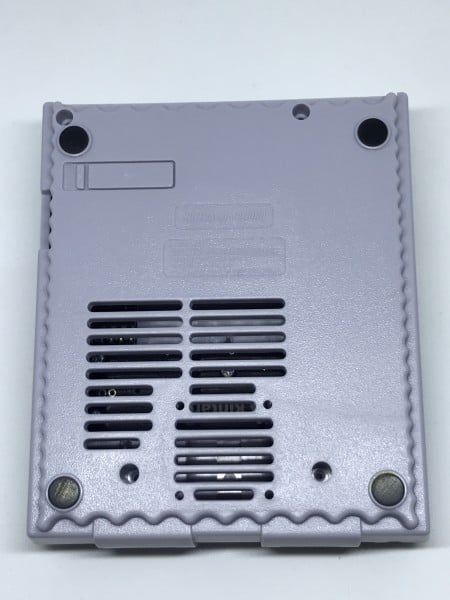
The other issue I found was barely an issue at all. I went to take the device apart to look at the LED light as I mentioned. I had it near the window so all of the bright, natural light was coming in through the window. And I was able to notice that there was a little bit of extra glue on the bottom of the case. The glue was from holding one of the four rubber feet on. It is barely noticeable at all and it took having it in an extremely bright situation to even notice it. Not to mention the fact that I had to turn the device upside down. But I barely find this to be a con since most people won’t have their Super Kuma 9000 in a well-lit area, upside down all of the time.
The third and final strange issue I had, as you may have seen in the assembly video above, is the extra screws. Why were they there, I ponder. I couldn’t find a single reason for it in the instructions either. I don’t know if that means that the instructions were lacking if they included extra screws, or if the screws belong somewhere that are mentioned in the instructions and I just overlooked all of it. All I know is that their instructions are pretty well thought out to make use of the small space on the paper, so it’s probably just me not deciphering the instructions properly. The great thing here is that if you need more information on this product and the emulation OS’s and you want more than their double sided small sheet of paper, they have a more complete version of it in a PDF file. I’ve added that to the bottom of the page for you so that you can feel more comfortable with the product.

Overall Thoughts:
Just buy the thing, it has our full Hackinformer endorsement. The Super Kuma 9000 is made of a really great solid plastic. All of the parts in it are uniformly manufactured and don’t look like crappy Chinese knockoffs. It comes with everything that you could possibly need right inside the purple cardboard box. There are, for the most part, direct instructions. The pros so heavily outweigh the cons and the cons themselves are barely an issue. And they’re probably on a per case basis too. I doubt the glue that I found by the foot will be on every single unit. Heck, it was barely worth mentioning in the first place. The extra screws were confusing, yes, but they ultimately were a non-issue. I would say that if you’re okay with buying the fan that needs to go inside separately, then you’re golden. Yes, it’s a bummer that the fan isn’t included, but I think at roughly $5, you’ll live.
Update:
Kintaro has offered us a custom discount code to use on Amazon for use on ALL of the Kintaro products including their custom heatsink. The code is this without the quotes “3ZZ9URM2”.
I also wanted to make mention that the company has some great customer service and will gladly help you out with any questions or issues you may have. Simply email them at hello@kintaro.com or you can chat them up on their Discord server: http://discord.gg/vEUfvGp
If you’re interested in buying a Super Kuma 9000 kit, click here.
Or maybe you want to browse the full site, click here.
If you are going to get the case or already have the case and need the fan, you can find it here.
Now, if you’re looking for that instructional PDF file, it’s here.

Stay tuned here on Hackinformer.com for more reviews and follow us on Twitter @Hackinformer
If you like the author’s work, follow him on Twitter @V1RACY and remember to enter the weekly giveaways!