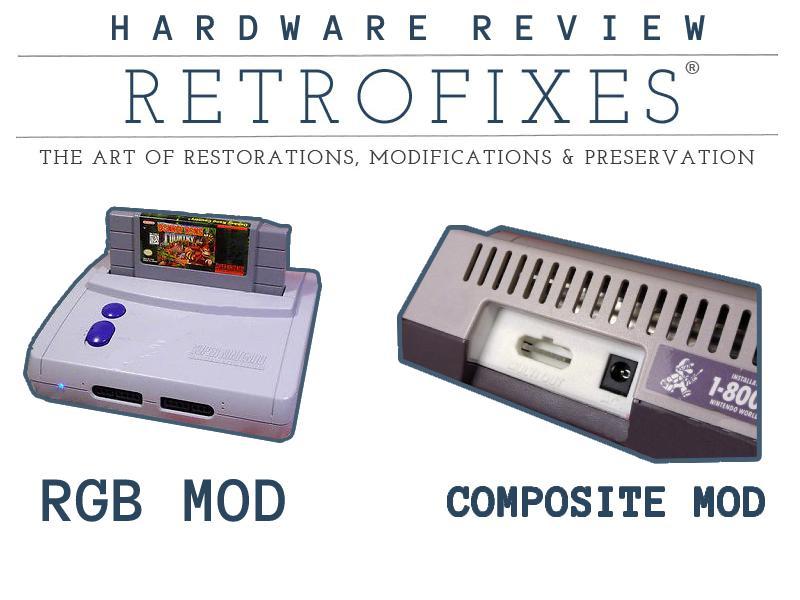
So many options exist for making NES’s and SNES’s have more advanced video out options. I reached out to Retrofixes and sought to only make my systems just have a step up from what they were made with. My NES-101 (NES Jr./NES Top Loader) was taken from its lowly single cable AV port to a full-on composite port. The SNES Jr. (SNS-101/New-Style Super NES) got an RGB upgrade to its composite port. Let’s see how they fare against their original video output in comparison and the build quality too.![]()
Unboxing Video:
NES Jr. Composite Mod Description:
- ‘Rear of console will have a custom upgrade and output Composite video.
- Choose from many different upgrade configurations 3.5mm port, RCA ports, SNES/N64 style Multiport port. With TRRS port installs will include the AV cable.
- Console will be cleaned. This will remove most stains and dirt from the shell. This will not remove sun-faded yellowing.
- Optional Power LED. Request this feature in your order notes. It will not be install if not requested.’
SNES Jr. RGB Mod Description:
‘Why Upgrade? With this upgrade you can have the best possible analog picture. The RGB or Svideo upgrade will not change the outer appearance of the console.
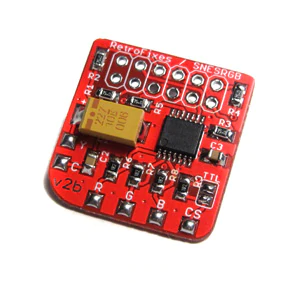
RGB AMP: The newer THS7374 RGB amp design will be installed. Has a jumper for 75ohm or TTL output. The LPF is disabled (most common request)
SERVICE: Deluxe RGB Services + Svideo:Install THS7374 RGB amp + Svideo+ Ghosting Fix (C11 replacement) Console case carefully cleaned. Most signs of dirt, scuffs and stains can be removed. (note: this will not remove deep yellowing from severe sun damage)
OPTIONAL SERVICE: Power LED, NTSC-J Region Upgrade. Include your LED and Region upgrade request in the order notes. Optional features will only be installed if requested.
OTHER OPTIONS: 75ohm or TTL output available. Let us know which method you prefer.’
Pros:
- Price. I want to first start with the cost of the SNES RGB mod. No real reason, I just love the SNES so much, that I’m giving it first dibs! The SNES-101 RGB mod costs the end user $79.00. When you’re choosing the mod, you’ll also see that it enables the S-Video signal from the board. That’s just part of the process and I believe that it is brought up so that you understand why it will take the time it takes. You’ll see as we talk about more of the upsides, that $79.00 for a cleaner and more colorful image will sound great.
.
With the NES-101 it does have more options for you. These different options have different price points. They’re all under $100 though, so that should entice you. Retrofixes has managed to optimize their output and manage to keep it under $100 while still maximizing their own profits. It’s a win/win for all parties. First up, if you want the Deluxe RCA port, and cleaning of the console, and the LED power light, it’s $99. The Deluxe RCA port simply means each color has their own jack. There is a video, an audio left, and audio right jack.
.
Should you want a multiport like what you see on the back of an SNES or N64, you can do that too. There is an option for the multiport, with the LED power indicator, and a cleaning. This clocks in at $99 as well, and this is the one that I went with. The last option is not one that I ever would’ve personally chosen, but it’s all a matter of opinion. With this one, you still get the standard cleaning and the LED power indicator. But what is different is that you get the 3.5mm (headphone jack style) TRRS port. This option is the least expensive one at only $89 and it comes with a cable.
.
Finally, there is free shipping over $45 spent. This is a great feature that Retrofixes has. Just be aware that that doesn’t pertain to services. But they have plenty of other items on their site besides send in services.
.
- Build Quality. I want to start by stating that I am not willing to disassemble these consoles for the sake of the review. My review of the build quality will be based on other things. I’ll make bullet points so that it’s easier to ingest.
- Multiport on NES-101 is the first point to bring up. It’s a custom-made multiport that doesn’t feel custom. I plugged in the cable and unplugged it multiple times in my testing. I’m happy to report that it doesn’t hug too much. The plug can also go into the port without any complications.
- This is a good segue into mentioning the 3D print. They custom-made the multiport with a 3D printer. The printed object is of great quality and is solid. You can rest easy knowing that it doesn’t feel brittle or cheap. But it also doesn’t have any burrs or bits of fuzzy plastic all over it. The multiport is smooth and that’s what I meant when I said it takes the plug without complications.
- I already had an LED mod done on NES-101. I did it myself, feel free to read that review here. So, in all fairness, I can’t judge the LED mod from Retrofixes. But judging by the images that they include on their site, I’d believe that it’s a simple and effective mod. I wouldn’t worry about that aspect if I were you.
- SNS-101 doesn’t have an S-Video signal by default. The full-size SNES is actually capable of such. The mod here definitely introduces S-Video. Some people might simply want this mod alone if they have one of the mulitport to S-Video cables.
- Nothing has been tampered with in regards to the SNS-101’s multiport. It operates still as it should and doesn’t grab onto the cable any tighter. I was wondering if the multiport would be replaced in the process, if it was, it is not noticable in the slightest. It still feels OEM.
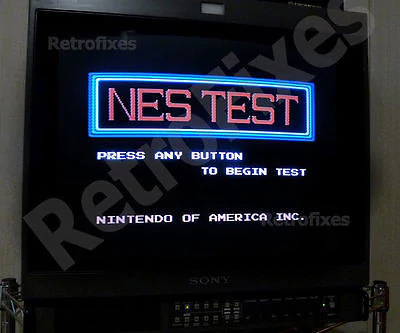
- NES-101 Video Output. First off, the main reason I wanted this mod is to see the benefit of being able to break out video and audio separately and easily. I have a surround sound system and sure would love to have my audio come out of the speakers in stereo. One could also get the benefit of being able to record the audio for whatever musical purposes that they want to use it for. Retrofixes pointed out to me that the audio drastically improves as well.
.
The other main reason is that having video and audio coming through one cord is less than desirable. Even using older television sets it’s pretty dumpy. The single cord idea may sound convenient to modern thinking ala the HDMI cord, but I assure you it’s not like that. I’m aware that this was done by Nintendo to keep costs low. That should be your first indicator of why it’s no good. I’m also assuming it’s because the SNES was already out or about to come out. They’re just trying to make an NES that had a lot of the same features that the upcoming SNES had to scoop up more cash.
.
So, an option that makes the NES-101 have separate audio and visual so that I can route audio to surround sound. And having multiple plugs so that the video can be routed to a scaler before going to a television, that’s what I wanted. This mod gives it to me in spades, however, it’s hard to explain if it cleans up the image or not.
.
Since it’s just taking a mono output to a composite output, one would think that it would. But really, the video aspect of it looks the same to me. I do notice that it does seem to get rid of interference, this could be due to how it is modded. I’m also happy that after a mod, I don’t see any jailbars happening. Jailbars only tend to show up before, ultimately being cleaned up by a composite mod. You’ll have to see the comparison video to see which differences you spot.
.
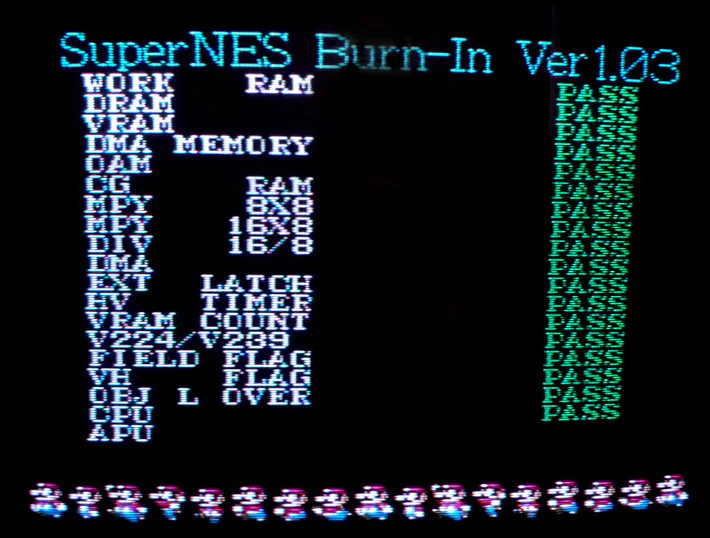
- SNS-101 Video Output. With the SNES I knew that I was going to actually see a difference between standard composite and RGB through an S-Video signal. I cannot wait to share the video comparison with you. It was originally hard for me to notice any change. When you’re used to playing on a modern solution like the SNES Classic Mini, everything before that seems sort of muddy. I had to actually go back and plug in my other SNES without a mod first and play on it for a while. Then when I plugged in the SNS-101 model and ran it for a while. One point that I wasn’t aware of before I did the mod was that the SNS-101 actually outputs a better picture than the full size SNES’s. However, with an RGB enhancement, I was really able to see where all of the cost comes from. This is especially true since reinstating a missing CSync back into newer SNES’s.
.
CSync, for those who are wondering, is composite sync. You’re likely to get the same quality as SCART if you have CSync enabled on a composite console. Again, I have an upscaler at play, so I’m less worried about the differences. But I definitely compared it all without a scaler in the middle. The testing that I got is that if you have the right cable for this, then you’re really going to reap the benefits. If you are using your standard component cable, you’ll simply see the same results as you did before the mod.
.
Again, I don’t notice any jailbars here either. I also don’t notice any interference and I love how clear the image looks when plugged into a CRT. It was even cleaner on my friend’s PVM. I definitely wish that it had a method of having a component cable to use to break out even further, but I really am happy with my setup now. Again, it’s hard to explain the differences without showing, so that video will go live very soon!
- Extras. When the package arrived, I unboxed it on camera. If you watched the video, you’ll see that I received a composite cable for the NES-101. Retrofixes told me that they gave it to me for the sake of my review. However, if you do the $89 mod 3.5mm jack option, then you’ll get a cable added in for free. Likely due to the fact that most people do not have a spare TRRS to RCA cable lying around.
.
It’s also worth mentioning the extra services that are optional that I have glazed over thus far. The SNS-101 has the option to have the LED upgraded. There is already one on the front, but you can do more by including another up in the power switch. Secondly, you can upgrade the region to be NTSC-J for compatibility with those cartridges. I myself have a FX Pak Pro, so I simply run the other region games through that. But if you’re an import purist, Retrofixes has you covered!
.
The extra bits for the NES-101 is just the LED mod. The LED service is indeed mentioned in the drop down menu when you choose your service. However, it’s not included unless you tell them to do so. To do the LED mod, physical cutting and such must be done to your shell. They want to make sure you’re okay with it first. Let’s not forget the cleaning service that is part of the options. They will for sure be done, just note that they won’t be retrobrighting your system!
.
- Turnaround Time. If you’re concerned about the turnaround time, you just should be. But if you still are, that information is posted on a specific page and updated as needed. This is smart of Retrofixes as it sets an expectation for you before you even send out your console. They are working around the clock and will send your product back to you as soon as they can, so best not to email them. Just let them work as fast as possible, be decent, remember that replying to emails only slows them down further. The package itself, after being shipped out, takes 2-4 days on average. I would say that waiting a month (on average) to have your console set the way you want it for the rest of eternity really is pretty damn good!

Retrofixes’s Custom SNESRGB Mod with CSync
Cons:
- Freebies. I will never bite the hand that feeds me. Beggers can’t be choosers after all. If someone gives me something for free, I am always grateful. However, we need to talk about that free composite cable. Not everyone gets that for free, you’ll have to have your own. In any case, the cable they threw in was a poorly shielded cable. My main concern is that I cannot the TRRS cable for shielding since I didn’t do a 3.5mm jack for my mod. If you’re uncertain and want to be sure, use it in the meantime. Find a replacement online for one that is well shielded and thick and then swap it out. This will ensure that you’re always going to get the clearest image.
Final Thoughts:
My comparison videos are coming within the week. Check below to see if they’re added. Ultimately, I think that if you want to do a low-cost upgrade, these services are the best options. I know that there are people vehemently against composite. So for them, they may go the route of an HDMI out solution. More power to them, but remember the cost is tremendous in comparison. The NES-101 composite out mod is for people like me with CRTS, scalers w/HDTV, or PVMs that just want the best quality that they can have without paying so much more.
The SNES mod is interesting because you should really get a set of these or a SCART cable to see the results. Likely you can even buy a plug-and-play SNES to HDMI option, but I’m uncertain on that front. Anyway, feel free to get an RGB upgrade and use the cord of your choice to get the best results. If you’re wondering whether you can use the composite cords still in times of need, the answer is yes. Nothing has changed in regards to cables, you simply have more to choose from now. I think that it looks fantastic when next to a standard SNES output.
Comparison Video:
Links:
![]()