So after a recent leak from RemixOS there is now an official Version available and it’s awesome. Some of you may know it by the name Android-X86. It’s a project that ports Android open Source Project to the X86 architecture of the PC, but all of the Android versions for PC up until now were missing features like multitasking and more. Now this is where RemixOS comes in hand, It is based on Android-X86 Project but with the highly anticipated features like Multitasking, Taskbar and more. The Company behind this, Jide Technology, was founded by three ex-Google engineers with a mission to unlock the potential of Android in order to accelerate a new age of computing. They had 2 successful Kickstarter campaigns with their Tablet and worlds first Android PC featuring RemixOS.

This is still an alpha which can have bugs. For me, I’m using it on my Laptop and the only bug I’m experiencing, for now, is that the screen freezes at some point and the laptop needs to be shutdown with the power button. If you still want to test this out I will guide you through setting it up, Installing on the internal HDD, adding it to the Windows Boot menu and Installing the Google Play Store 🙂
But first… There has been a little bit of trouble regarding the EULA of Remix OS
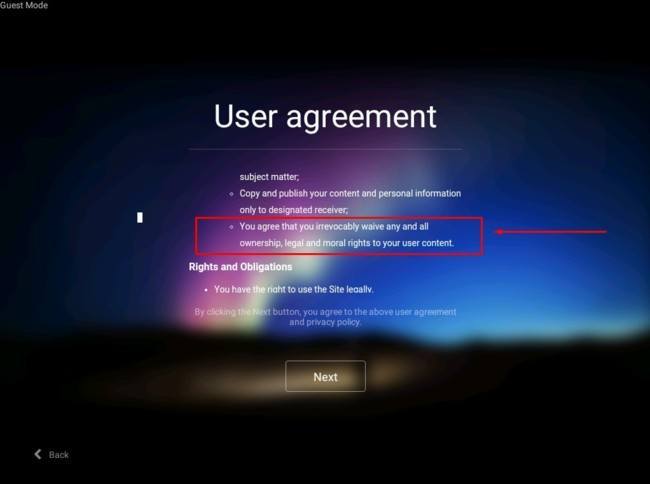
As you can see the Remix OS EULA tells you to agree that you irrevocably waive any and all ownership, legal and moral rights to your user content but soon after a few people posted this and asked about it one of the Developers stated that this has been a misunderstanding because they just copied the EULA of Xiao Mi an overlooked this part. This has now been fixed and doesn’t apply but for those that didn’t have this information yet it should prove useful to decide whether or not to use the OS 🙂
But for me after this has been made clear I’m going to use this OS 🙂
For those who want prove here is the post from said developer 🙂

//
What you will need:
8GB USB Stick (USB3.0 preferred)
RemixOS for PC
EasyBCD (If you want to install RemixOS on your HDD and add it to your Boot Menu)
GSMInstaller.apk (Used to install Play Store)
1. Download RemixOS and extract the ZIP archive. Now plug your USB into your PC and wait for it to get detected. After that open the RemixOS Installer.exe. Now point it to your USB you want to install RemixOS on and point it to the RemixOS ISO file. If you just want RemixOS installed on your USB Stick you can skip step 2 and go right to point 5.1 🙂

Start the installation and wait until it’s finished.
2. To install RemixOS on your HDD, you will need to shrink your HDD Partition and create a tiny 8GB Partition that needs to be formatted with FAT32. After doing so, copy all the files on your RemixOS USB Stick to this Partition.
3. Now install and start EasyBCD. After opening go to Add new Entry and there to NeoGrub. Select Install and then click on configure. Copy this Text into the window that opens and save it:
3. Now install and start EasyBCD. After opening go to Add new Entry and there to NeoGrub. Select Install and then click on configure. Copy this Text into the window that opens and save it:
default=2
timeout=3
title RemixOS 2.0 Alpha
root (hd0,2)
kernel /kernel quiet root=/ androidboot.hardware=remix_x86_64 androidboot.selinux=permissive quiet pcie_aspm=force usbcore.autosuspend=2 video=-16 SRC=/ quiet
initrd /initrd.img
4. You will need to adjust (hd0,2) to your HDD. If you don’t have any other system installed next to Windows then you should be just fine like this but If you have more than 3 Partitions then your will need to change the value (0=the HDD/2=The Partition). The Start Screen of EasyBCD should now look like this:
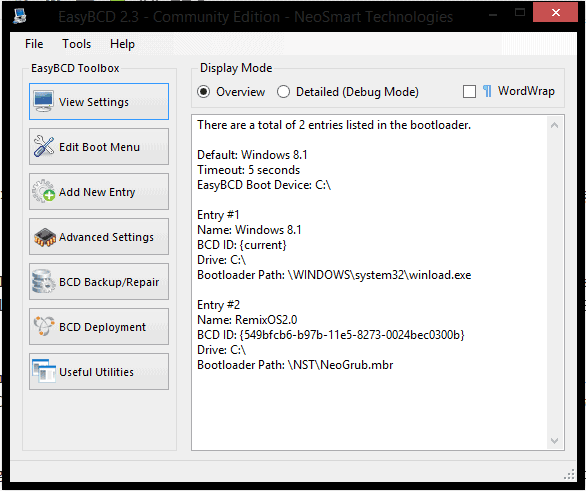
5. After setting up this custom start point you can now restart your PC. When booting Windows, it should now show a boot menu that has two buttons: Win 8.1 and RemixOS. Click on RemixOS and wait for it to start. Now go on the Menu Point saying: Resident Mode. This will create a data partition that will be the emulated SDCard later. After making the data partition it should boot up and greet you with a Start Screen where you have to select a language. Normally this is set to English but don’t worry, after setting up RemixOS for the first time you can also use all the other languages. But for now, just click on next. You will then be greeted with a screen to accept the Terms of use. Here click Agree and you will get to a screen where you can add Your Wifi network or skip doing it. After that screen there will only be one screen saying that the setup is finished and you can now use RemixOS 🙂 Congratulations you now have set up RemixOS and can continue with installing the Missing Play Store 🙂
5.1 This is only if you are using RemixOS on your USB Stick. Skip this if you just want to install RemisOS on your HDD. After the Installer finished you can just reboot your PC and click the Boot Menu Key at the start of your PC (Normally this should be F12). Here you need to select the USB Stick and it will boot into a GUI where you can choose Guest Mode or Resident Mode. Guest Mode is only temporary and will not save any changes or apps that you downloaded but resident mode will create a tiny 4GB data partition which is used as emulated SDCard and allows you to install apps and more. After the startup, you will be greeted with a Start Screen where you have to select a language. Normally this is set to English but don’t worry, after setting up RemixOS for the first time you can also use all the other languages. But for now, just click on next. You will then be greeted with a screen to accept the Terms of use. Here click Agree and you will get to a screen where you can add Your Wifi network or skip doing it. After that screen there will only be one screen saying that the setup is finished and you can now use RemixOS 🙂 Congratulations you now have set up RemixOS and can continue with installing the Missing Play Store 🙂
Installing the Play Store:
1. Enable installation of apps from unknown sources:
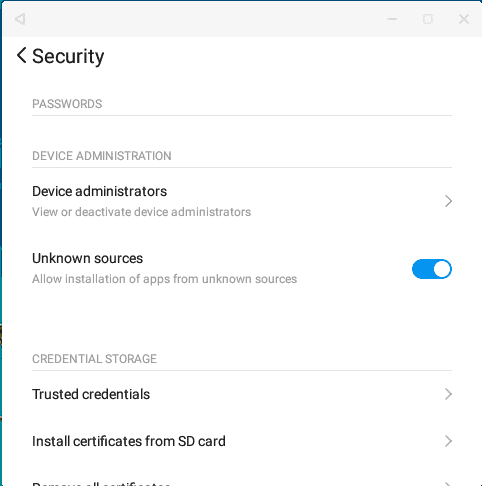
2. Download the GSMInstaller.apk file on your RemixOS system and install it.
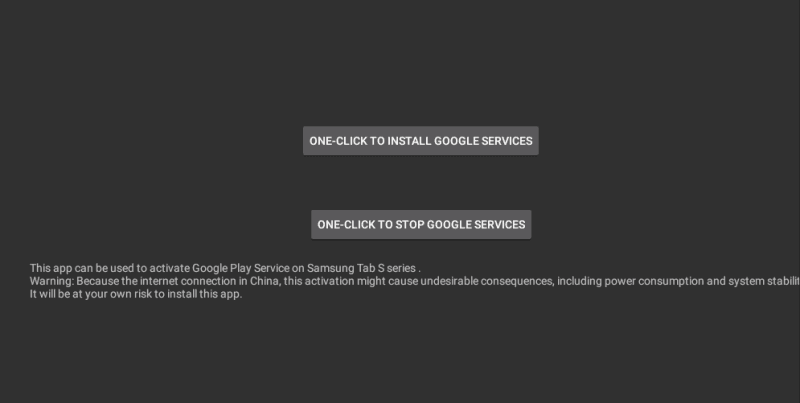
3. Launch the app and click on: One-Click to Install Google Services.
4. After the installation finished you should now have the Play Store installed. But before adding a Google account you will first need to delete the cache and data of the Play Store app, then the data and also the cache of the Download Manager and the cache and data of the google play services app. After doing that reboot your PC and go back into RemixOS. You can now set-up your account and should be able to download as many apps as the emulated SDCard can take 😀
I hope you got RemixOS running and I would like to hear on which devices you are running it, if it works fine for you or anything else you just want to say 🙂
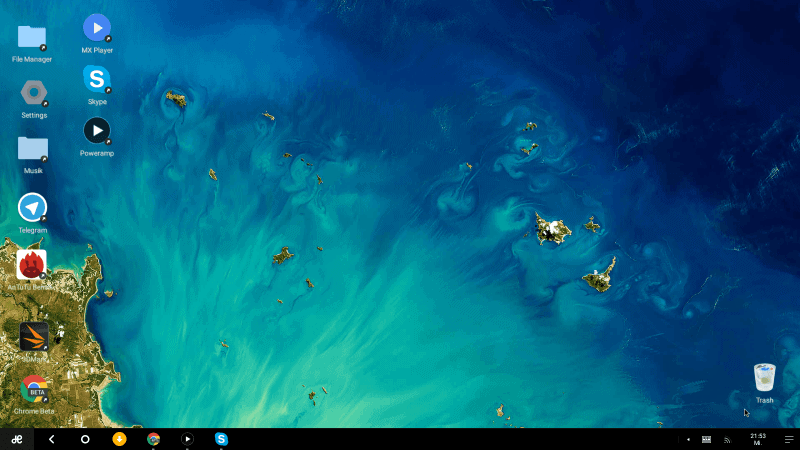
I can’t wait for the more stable releases and hope that they will soon add support for accessing the internal HDD of the PC or generally allowing you to access other Mass Storage Space next to the emulated SDCard. Btw, this post was written entirely on RemixOS with Chrome Beta installed 🙂


Will twitch and ustream operate without issues?
Both apps should work just fine 🙂
If you can’t download them from the playstore you can also just intall the apps with an apk file 🙂
What about the Flash/HTML5 player?