The first tools to hack the PlayStation Classic where not the safest to use. Everyone was warned about the risk of using it and it could damage the console to where it might not start again.

Now we have a safe alternative to gpghax called Bleemsync from pathartl. It still uses lolhax the payload launcher by madmonkey. Plus help form dantheman, skogaby and the modmyclassmod dicord channel.
Bleemsync Features:
- Overmounts portions of the PSC’s filesystem to safely allow modifications
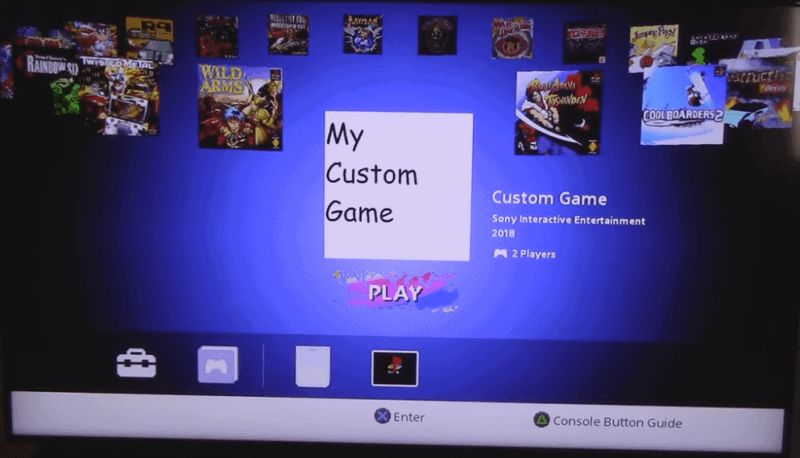
- Modifies the stock UI to show added games
- Supports multi-disc games
With the release of Bleemsync, the developers have now taken down gpghax. They recommend using Bleemsync the safer way to add games that actually work.
“If you’re here because someone told you to use this to inject custom games and you listened to them and now you’re console doesn’t work anymore, then good news. You’re in the right place. But please remember that after you’re done fixing your console, never ever listen to that person again and go to BleemSync. It’s much safer and easier way of injecting custom games that actually work.”
Installation:
- Download BleemSync.zip
- Extract the contents to the root of your FAT32 or ext4 formatted USB flash drive
- Name your flash drive.
SONYThis is a requirement. Please read the read.me file for other frequently asked questions or visits BleemSync FAQ.
If you were using gpghax here are the instructions on how to safely uninstall gpghax.
Uninstall gpghax:
- Format a USB drive to FAT32 with a label SONY
- Download this repository and put all the files in the root folder of the USB drive.
- If you use Japanese/Taiwan/Hong Kong model of the console, you will have to remove the
databases/default.dbfile and rename thedatabases/default_jp.dbtodatabases/default.db, otherwise, you will end up with non-working US games on your JP system. - Turn off the PlayStation Classic
- Plug the USB drive into the PlayStation Classic
- Turn on the console
- After few seconds the power LED should start blinking and the TV should go black.
- Remove the power cable from the console.
- Remove the USB drive from the console.
- Insert power cable into the console.
- Start the console again, if everything went right, you should have restored the console to the factory state, retaining all the save files.
- If above didn’t work, open a new issue and attach the
uninstall.logandfilelist.logfrom the root folder of the USB drive. - If it did, congratulations!
 Hackinformer Your device needs to transform, we are here to inform
