The Nintendo Switch is becoming to be the #1 go to system for homebrew, apps and Emulators. Today a gentleman that goes by the name of bobdamnit at GBATEMP posted up a video of Super Mario Bros 3 forwarded from Retroarch to the Switch Main home Menu! The name of this method is called Retroarch NSP forwarder!
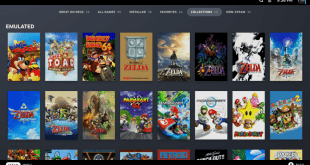
Now this method have been around for quite some time and have been done on Consoles like the 3DS and the Nintendo Wii. What so cool about this method is that You can basically take any game from a emulator such as N64, Snes, Genesis, MAME, and probably a PSX title and have it right on the home menu.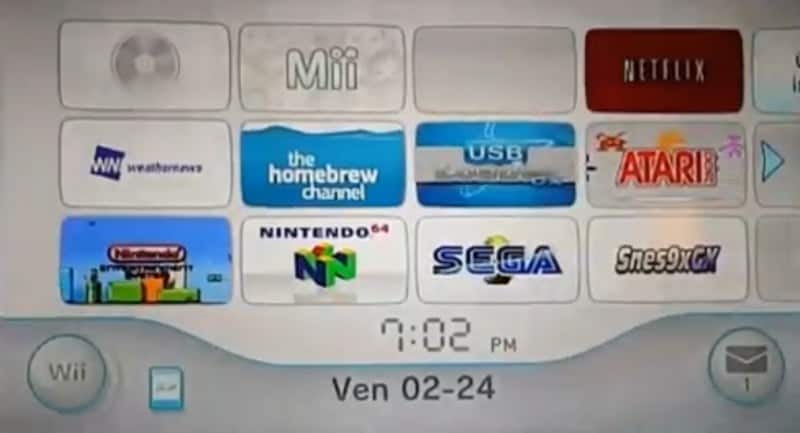 Forwarded channels on the Nintendo Wii
You will also be able to add a icon to the game that you want forwarded to the home menu. When you open up the game you forwarded on the home menu, Retroarch will then launch the game and run it directly from the main menu. This is more of a welcome convenience when you look at it especially if you have a favorite retro title.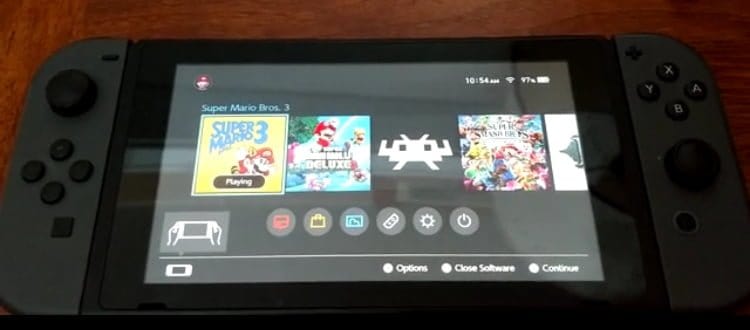
This method is a little tedious to do but if you want to give it a try, you can follow the tutorial at the end of this article. Let us know how it worked out for you and what game you forwarded to the home screen in the comments below.
1. What’s needed
◦ A dev environment (yes I know I’m sorry) : https://switchbrew.org/wiki/Setting_up_Development_Environment
◦ The latest release of hacBrewPack : https://github.com/The-4n/hacBrewPack/releases
◦ keys.dat (I recommend using Lockpick to dump it)
◦ The sources of the modded hbloader : https://github.com/natinusala/nx-hbloader-retroarch-forwarder-mod/archive/master.zip
◦ The core (NRO) and the game you want to forward on your SD card (download the core through RA’s online updater)
◦ A 256×256 JPG icon of the game you want to forward (I suggest that you make your own)
◦ (optional) a PNG to be displayed in the top-left corner of the screen while loading (normally Nintendo logo) and a GIF to be displayed in the bottom-right corner (normally an animated Switch logo)
2. Rebuilding hbloader
In this step we will rebuild hbloader to change the title ID, name (as in title displayed in HOME menu) and author. Everything happens in the modded hbloader sources you should have downloaded and extracted.
◦ genetate a new title ID by using random_tid.bat. Write it down somewhere. The title ID must be different for each NSP you install!
◦ open hbl.json and set “name” to the name of the game you want to forward (only for display purposes). Set “title_id”, “title_id_range_min” and “title_id_range_max” to the title id you generated (don’t forget to add 0x in front of it).
◦ open Makefile and set APP_TITLE to the name of the game you want to forward (only for display purposes) and APP_TITLEID to the title if you generated (this time without 0x). You can also change the author and the version if you want.
◦ in the devkitpro environment, run “make clean” and “make”. If everything went correctly, you should now have a “build” folder with some files in it.
3. Creating the NSP
Extract hacBrewPack somewhere and follow these steps:
◦ copy your keys.dat where hacbrewpack.exe is
◦ create a folder called “control” where hacbrewpack.exe is
▪ inside, copy “hbl.nacp” from the hbloader build folder, and rename it “control.nacp”
▪ copy your 256×256 JPG aswell and rename it “icon_AmericanEnglish.dat”
◦ create a folder called “exefs” where hacbrewpack.exe is
▪ inside, copy both “main” and “main.npdm” from the hbloader build folder
◦ create a folder called “logo” where hacbrewpack.exe is
▪ inside, copy both “NintendoLogo.png” and “StartupMovie.gif” from the logo folder of the modded hbloader sources
▪ or you can use your own images here, they are displayed in the corners of the screen when loading (normally Nintendo logo and animated Switch logo)
◦ now the important part: create a folder called “romfs” where hacbrewpack.exe is
▪ inside, create two files: “nextNroPath” and “nextArgv”
▪ in “nextNroPath”, write the path to the core on your SD card starting by “sdmc:” (for example sdmc:/retroarch/cores/quicknes_libretro_libnx.nro)
▪ in “nextArgv”, write the path to the core on your SD card starting by “sdmc”:, followed by a whitespace and the path to the game on your SD card between quotes (for example sdmc:/retroarch/cores/quicknes_libretro_libnx.nro “sdmc:/roms/nes/Super Mario Bros. 3 (USA).nes”)
▪ Be sure not to put newlines in the end of any of those files
◦ Run hacbrewpack.exe
◦ If everything went fine, you should have your NSP in the “hacbrewpack_nsp” folder (called by its title id)
4. How does it work?
If a content path is set in argv when running RetroArch, the content is loaded instead of opening the menu.
This is a simple mod of hbloader which reads the NRO path (“nextNroPath”) as well as argv (“nextArgv”) from its romfs.
1. you run the title
2. hbloader starts
3. hbloader reads the NRO path and its arguments from its romfs
4. hbloader starts the NRO (the core), giving the arguments (the content path)
5. The core is started, and loads the content given in arguments.