
Hi guys darkamon here, ready to bring you a handy tutorial for our beloved Psvita/PSP.
Well, enough chitchat and let start.
First I wanna explain for who still don’t know what is the Psone Loader, through Tekken 2 and Moto X exploit we can run ps1 games with perfect sound, at the moment, a 99% compatibility due to my tests.
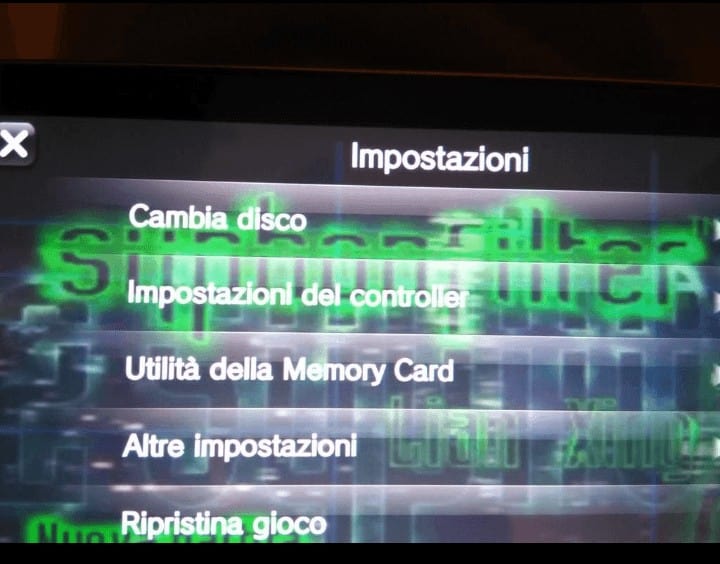
The only pain is having to close the ps1 exploit and retrigger it pay a different PS1 game. But hey! I’m here to help you avoid this! With making your know ps1 multiboot eboot for the psvita/psp. In the picture below you can see the option to swap disk (it’s the first option) which mean you can load a different PS1 game without restarting the PS1 exploit all over again. So now you can have 5 different games in one eboot to pick from.
Here is a quick video of it in action.
After that little introduction we can start.
First we need an image extractor for your ps1 black disk games.
(Me and the staff of Hackinformer do not encourage piracy!)
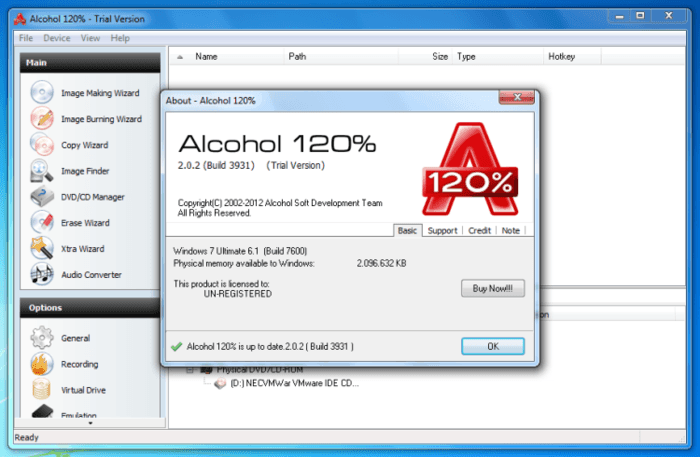
You can use whatever you want, Alcohol 120% is my favorite because it has the best compatibility with all the images formats, but of course you can use magic iso, daemon tools etc…
Is important to say, that you should ABSOLUTELY extract the ps1 game to a ISO format or bin/cue.
ECM, MDF and IMG doesn’t work for the conversion.
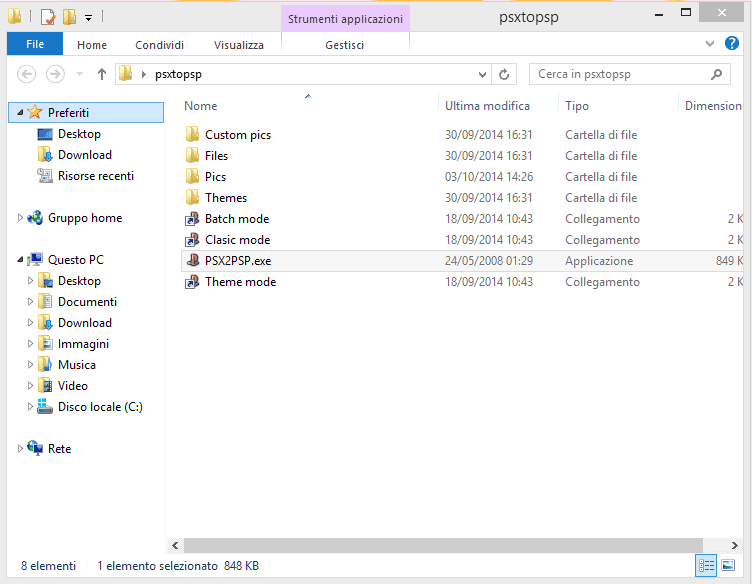
Now you need the PsxtoPsp tool that you can download from here
That’s it we have all the necessary tools to start having fun.
First you have to extract the files and save them to your desktop.
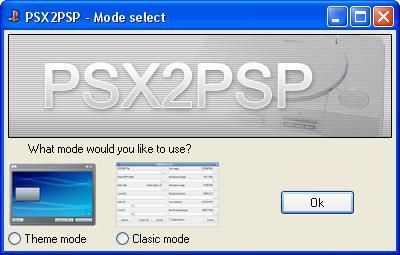
Open the tool, select CLASSIC MODE and OK
For single disk games, click the “…” under the ISO/PBP file 1
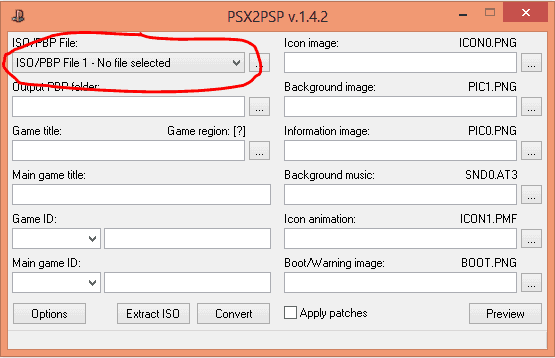
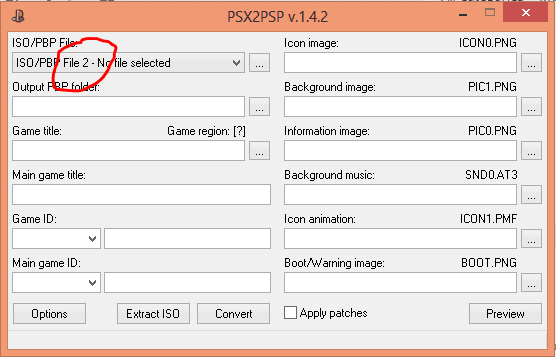
As for multiple disk games, click the drop down and select ISO/PBP file 2 for disk two, 3 for disk three, and so on. With this process we can create a SINGLE eboot with the multi disk selection!! Nice No?
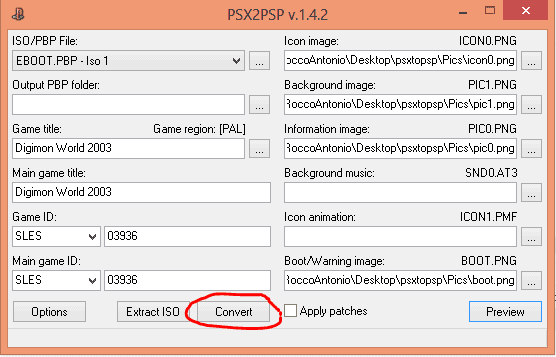
Browse for your Psx game backup. I have selected Digimon World 3. All of the information will be filled in with the game ID, if don’t your ISO is corrupted.
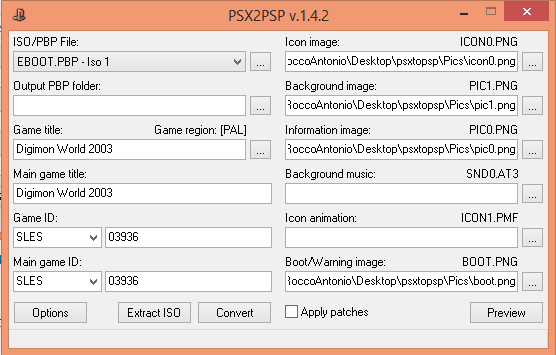
Now select an output folder for your finished PSP eboot.
On the right side you can see icon image and background.
I recommend you to use only this two option just for leave the eboot lighter.
For icon i use the front cover of the games renamed “icon0” in png format, for background a screenshot in game named “pic1” always png.
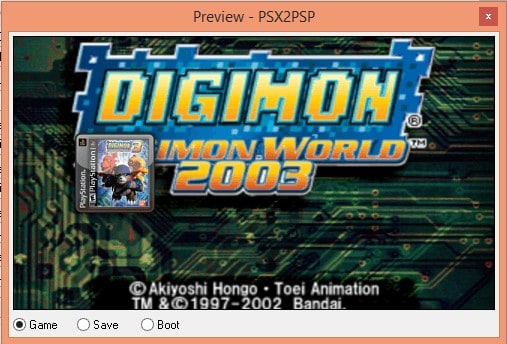
After you have Browsed for and Selected the game, image and optional images/sounds, you may click “Preview”. Here is my preview:
When is all set click “Convert”
You will notice it will say “converting iso, #% done. Average Compression #%.”; at the bottom of the window.
Wait for it to say “Done. Final Compression: #%.” and then exit.
That’s it! Your eboot is ready.
Now you should just put it in the PSP/GAME/yourfoldergamename/EBOOT.PBP
If you use TN-V you can use ftp connection or put the folder in a zip file, select the compression to “storage” and name the folder in INSTALL.ZIP. The put it in the exploit save data and start your exploit to TN-V to extracted the zip file..
Hope everyone likes this tutorial I wrote for you my friends.
If you need help ask me on twitter @666darkamon666 and leave comments below.
Enjoy the fun with us now!! If your device needs to transform, we are here to inform!

hi whare to get the icon.0 from?
Some come with the game id and some you may have to make your self…