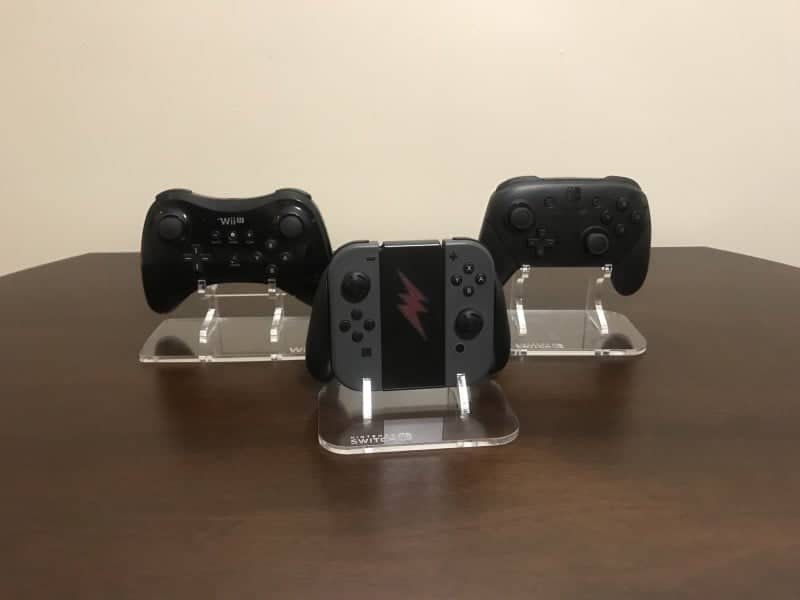
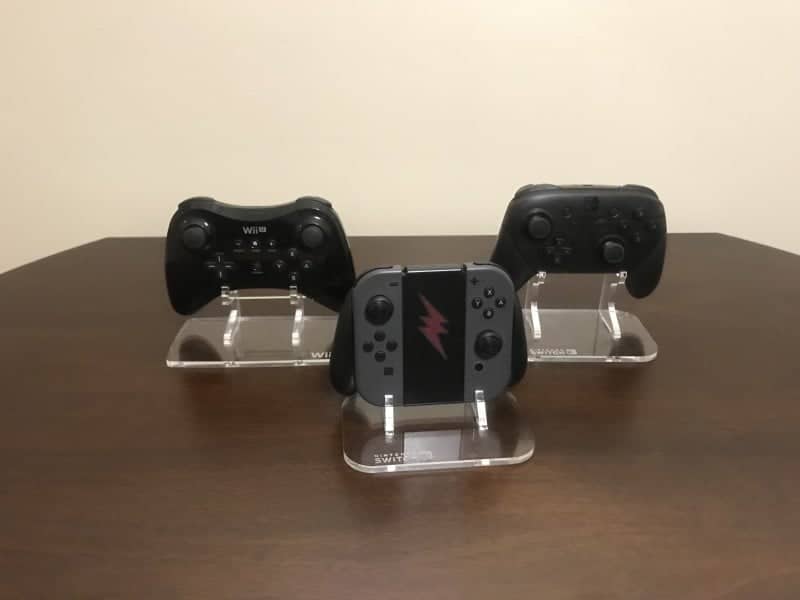
This is the second of a 3 part series made to focus on reviewing some of the stands that are exclusive from Rose Colored Gaming. The previous article was over PlayStation controller and handheld stands. This article will be over the Nintendo controller stands and the last will be the stands for the Nintendo handhelds and Nintendo consoles. I have lots of juicy pictures throughout and links to the product pages if you want to purchase the stands in our article. I’d reviewed a PlayStation TV (PlayStation Vita TV) stand previously if you would like to read that article, I have that right here for you.
As you may have noticed, in my previous PSTV stand review I had just the one item and so I examined every possible aspect about it. I went over appearance, functionality, and durability. Since all of the products that I’m reviewing in my 4 part series are made using the same techniques, they have the same build quality as well. It’s for this reason I intend to skip over durability. I will, however, focus on appearance and functionality since the appearance of them may generally be glossy and acrylic, but they all still have their own shapes and contours. The same can be said with durability as some of them feature much thinner pieces than other models. I want everyone to have the most accurate information possible what I’ve gotten my hands on.
Nintendo Switch Joy-Con Grip Stand

The stand for the Nintendo Switch Joy-Con grip may just be the only stand that you ever end up needing for the Switch in terms of controllers. This understated stand is comprised of 3 total pieces, making assembly a simplicity. You may find that maybe you use your Nintendo Switch Pro Controller more than you do your Joy-Cons and that is where this stand comes in. Maybe you like the way it looks and you really don’t play your Switch on the go as much as you do a home console. This stand is going to help your controller be on display and it balances the device quite well. It has two small arms in the front to keep the controller from sliding out and down. It also includes two larger arms in the back that support the weight from behind. What I like the most about Rose Colored Gaming is their color option. For instance, with this stand is how you have a choice between black and clear. I would also say that the clear stand is just the way to go if you don’t want the controller to blend in with the stand and thus presenting an odd scenario of making the controller look larger than what it is. If you have it on a clear stand, even people who are the most uneducated about gaming would be able to understand that your controller is on display. What’s even better here is that it also works with the charging Joy-Con grip from Nintendo and you can plug a cord into the top of it, thus letting it double as a charging stand. The PowerA Comfort Grip also technically works, but it leans forward about half an inch and just doesn’t have the same allure. I would say that the only downside to this one is that it assumes that you have the Joy-Cons in the grip. You cannot leave the grip on the stand and take the Joy-Cons off. It will not fit the stand and the grip has to come off of it.
You can find this stand by click here for $8.99


Nintendo Switch Joy-Cons Stand

This stand is more useful for those of you who maybe do use the Joy-Cons time and again. The real perk with this stand is that if you have a pair of Joy-Cons that you use repetitiously, they could just sit on the stand while not being used. Then when they are being used, you can pick them right up and go. So it’s really a win-win situation there. This stand too is made up of three total pieces, making the assembly a cinch. It, like the previous stand, has the Nintendo Switch logo etched into it. It ups the quality and makes the who package more legitimate and classy. There are some strange things about this stand, they’re not a big deal, but I should still bring them up. As you may see in the picture below, the Joy-Cons need to sit facing the opposite direction from each other. This is most likely due to the fact of the location of the thumbstick on each of the Joy-Cons. However, it is worth noting that it doesn’t matter which Joy-Con goes in the front and which one goes in the back. It only matters that the rail faces down toward the acrylic. One other thing you may notice is that I have the Joy-Con “bumper” things on them. I’m not entirely certain that it’s necessary to have them on there, but I did find that they rest easier and are more centered if the extension is on them. The clear color is also good in this scenario as I stated in the aforementioned grip stand review. It’s for the same reasons as before of course, but what’s more is that if you have any of the other colors of Joy-Cons, picking up the black stand would make more sense on this specific stand.
You can find this stand by click here for $8.99


Nintendo Switch Pro Controller Stand

As I mentioned before, if you use your Switch Pro Controller a lot, you may never need a stand like this. But where it does shine through is if you’ve cleaned the house and have guests coming over, this stand will bring so much attention to the controller. You have a four piece assembly with this one, so it’s not terribly complicated, but you should pay attention to what you’re doing while assembling the item. To clarify, you take the base of the stand, then take the two identical pieces and place the widest part of them in the base; their feet should match up to the holes in the base. Lastly, there is a 4 inch piece left, this piece will sit perpendicular to the base. Simply take this piece and place each end in the hole that exsists in the back of each of the tall pieces.
Once you have your assembly finished and you have the device on there you may notice some other things as I did. I noticed that my stand had a bit of a wiggle to it straight away. Now, I’m not certain if they all will, but mine definitely did. I found this unusual as every other stand that I had assembled up to that point stood solid. I took the controller off and tried to push the feet of the taller pieces into the base more, but I had already pushed them all of the way in. I’m not certain if the holes were miscut and were a bit too wide or what the issue may be. It’s not a monumental issue, if you’re not a maniac and can rest your controller on the stand and lift it up gently, you’d be fine. I decided to leave it alone and just not touch it. Sure, I could do something like super glue, but since my stand is clear, I didn’t want to be able to see the cloudy colored glue through the stand. I also thought that I would want to take apart the stand some day, should I ever move for example. All in all, this stand is gorgeous, and as I said, makes your Pro Controller the center piece for a nice conversation with guests. If only mine was sturdier…
You can find this stand by click here for $8.99


Wii U Pro Controller Stand

This one might be my favorite so far. I don’t know what it is about my Wii U Pro Controller, but I love it and this stand is just the icing on the cake. Where do I start? The stand is a four piece assembly like the Switch Pro Controller stand. In fact, it’s assembled the same way, just different sizes of the pieces. So if you get one, just read my quick and dirty assembly instructions up in the Switch Pro Controller Stand review. This one does not wiggle or move, making it much more sturdy overall. With most, if not all of the other stands, their four sides of the base are a rectangle with rounded corners. The Wii U Pro Controller stand has a four slightly curved sides with slightly pointier corners. This is closer to a square with bowed out edges. I just love how sublte it is, but it just adds the flavor that I’m looking for in my gaming space. I think that in terms of the stand color, it makes more sense to use clear here as well. That’s also assuming that maybe you have the white Wii U Pro controller.
Furthermore, I love how the stand keeps it up high off of the base. Given the way that the Wii U Pro controllers handles are shaped it almost looks like the Wii U Pro controller is blasting off! I simply love it. You also can get your charge on since the charge port is on the top. So if this is sitting on a black shelf, you can sneakily feed a black USB Mini cord behind the stand and plug it straight into the top of the controller. And since you’re presumably going to use this controller much less than its newer counterpart, it only makes sense that you just leave it charging. It makes more sense than just barely ever using it and then you decide to go pick up Mario Party 10 and the damn thing is dead and you have to wait and charge it. I just couldn’t find one bad thing about this stand to mention.
You can find this stand by click here for $8.99


If you want to see the rest of their products, you can visit Rose Colored Gaming by clicking here.
Stay tuned here on Hackinformer.com for the next part in my series and follow us on Twitter @Hackinformer
If you like the author’s work follow him on Twitter @V1RACY


