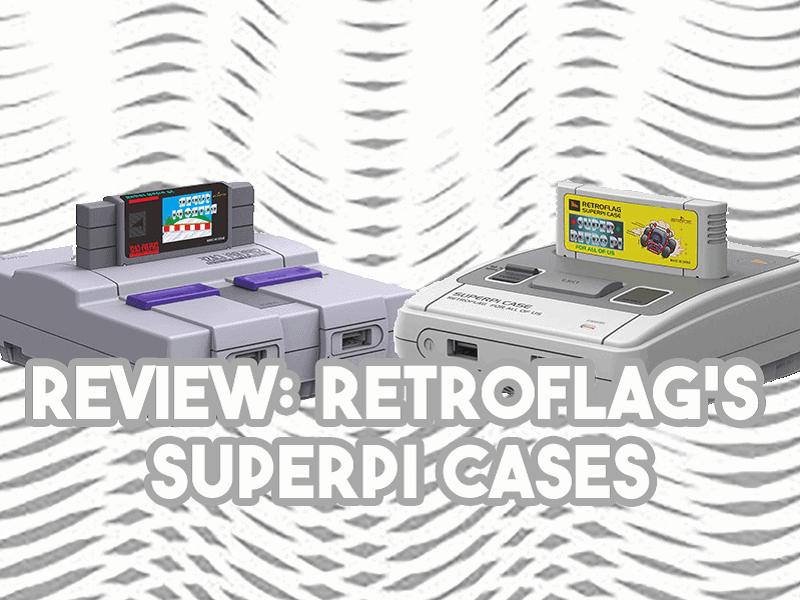
This review isn’t our first review of products from Retroflag and it probably will not be our last. They’ve sent us a review unit of the Retroflag GPi case which was a Game Boy form factor for your Raspberry Pi Zero to have RetroPi on the go. It was a great, fun product to review and if you’d like to read about it, click here. Our products today are similar in fashion, they’re SNES Classic Mini and Super Famicom Classic Mini form factors for your Raspberry Pi (not the 4th one though). But is the quality as good as the GPi, is the shell complete with extra features and homages to the original hardware? Let’s go through it together, shall we?
Features:
- ‘Safe Shutdown and Safe Reset
- Functional LED power indicator
- Functional POWER and RESET buttons
- SUPERPi CASE specifically designed for Raspberry Pi 3 B+ (B Plus) 2
- Easy access to the SD-Card and all other ports without opening the case’
Unboxing:
Pros:
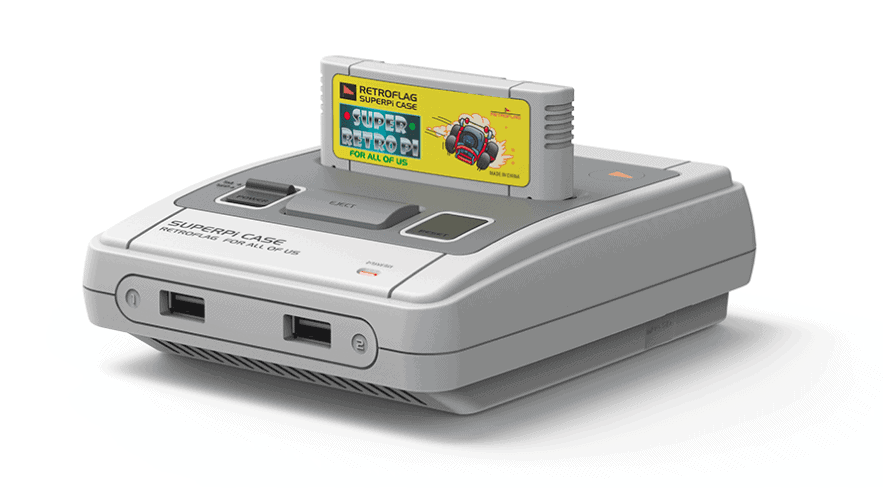
Quality. I couldn’t wait to talk about the quality of this thing, so I made it the first point in its favor. If you watch my video up above, you’ll see how it looks almost exactly one to one the same as the SNES Classic Mini. Not just in the looks, but also the quality of the plastic used. There was literally a point where I couldn’t remember which one was the official Nintendo box. Then I read the text printed on the top and saw it was the Retroflag unit. Honestly, I’m not certain that Retroflag didn’t just do a train robbery of a pallet of SNES Classic Mini’s and just make some adjustments to it so that they would be unique.
And the quality doesn’t stop with just the plastic. The units also have the same functioning buttons. So on the SNES unit, the power and reset buttons function and feel the same as the SNES Classic Mini. The same can be said for the Super Famicom style Retroflag case. You can feel the power button click back and forth the very same as the Super Famicom Classic Mini. The reset button also goes up and down as it should.
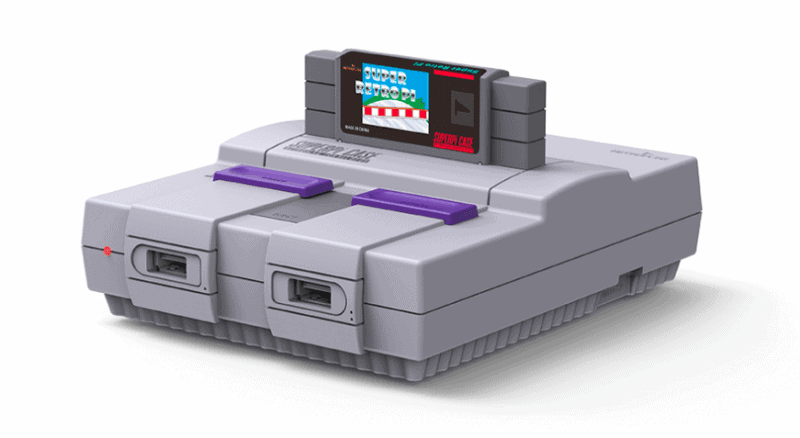
Form Factor. Continuing to discuss the body of these Raspberry Pi cases, I wanted to bring up some other points. First off, while the form factor appears the same, they go one step further than Nintendo did. Because these cases don’t just look the same, they improve on the formula. For instance, of course they have to have a spot for accessing the ethernet port and USB slots. So Retroflag has made an optional opening on the side to access those things. This port, as I said, is optional as if you’re probably using wifi, you shouldn’t need it round the clock.
And while the back looks about the same with the microUSB port and HDMI port, they’ve also made the port for the audio out plug. On the right side of the case, there is also a small opening for easily clicking out and in the microSD card. With regards to the front of the shell, gone are the weird proprietary Nintendo ports and instead, are 2 controller ports. But the largest change is the fact that they made the eject button functional. No, it doesn’t take you out of the game and back into the menu, that would be the logical thing. We’ll come back to the eject button further below.
Abilities. Some abilities that come with these cases are indeed the same as what Nintendo enabled. For example, you already know that these cases have functional power and reset buttons. But by that I mean the power sliders actually power on the device. And the reset feature actually doesn’t do what you think it would do, which would be to reset the game. Again, we’ll come back to that later. You also naturally have the LED light. The one thing I noticed about this is that the LED hole is larger than that of the one on the SNES Classic Mini. It’s not terribly larger, but more light does come through when comparing them. This could be construed as a good thing or a bad thing depending on who you’re talking to.
Storage. When pressing the eject button, you open up a small door on the top of the device. This is yet another feature of the SuperPi Case. You have a magical trap door to put any and all extra microSD cards that you have. This is for those of you who keep extra Raspberry Pi OS’s on different cards. Now, I’m not sure how many people out there actually do this. I would wager big money that those who intend on getting this case for having one RetroPi OS on one microSD in their system at all times. But the option still exists and there is space enough for what I would estimate as 10 microSD cards comfortably. Maybe you could squeeze more in, but why would you want to? Do you really have that many microSD cards? If so, you may risk it jamming and not opening back up. Take it easy, honch!
Weight. This topic is more or less to point out that the fact that just by adding a Raspberry Pi to the case, it’s still so lightweight. By adding the extra stuff to it though, you do increase its weight. So now would be a good time to point out that while Nintendo has rubber feet on their product, Retroflag SuperPi cases do not. I would maybe suggest that if you’re using a wired controller to play your games, you may want to go ahead and add the extra weight of the faux cartridge and some microSD cards. Whatever you can do to keep it from sliding off the desk or shelf. It’s a much easier and cleaner solution to use a wireless controller. I know the lightness of it sounds like a negative aspect, but I mean to bring it up with love. Big, bulky modern day emulation machines (like the AtGames Genesis boxes) are useless and too heavy. I’m relieved to know that Retroflag didn’t add weights to it. That would’ve driven the cost up higher.
Simple. I love items that are easy to assemble. You really just want to have it put together and start using it as quickly as you can. These units are different inside since they are different body shapes, but both are easy to assemble. The assembly would’ve been much easier if it showed the full instructions with words, which it didn’t. But we’ll talk more about that later. But after you have them all assembled and your RetroPi card popped into the Raspberry Pi, you’re good to go. The extra abilities like Safe Shut Down and Reset have to have scripts installed for them. It should be the same instructions that you find on their official site under the GPi case. That’s the only “difficult” part about the whole assembly. Really, if you have wifi and 5 minutes, you’ll have maybe used a whopping 15 minutes getting your SuperPi together!
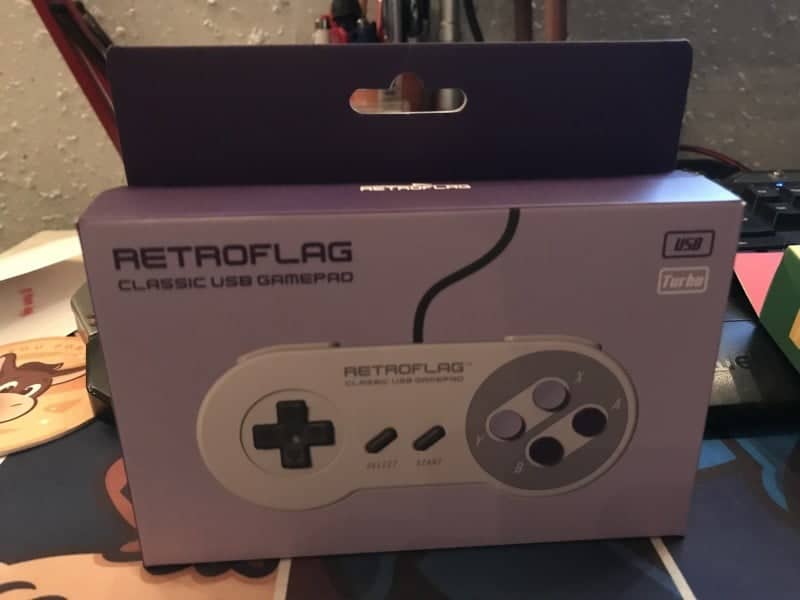
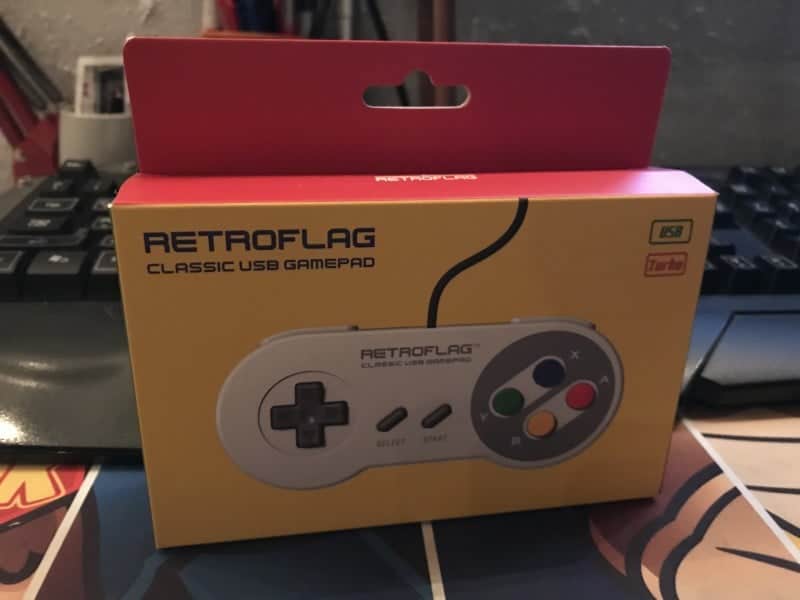
Deluxe. You can buy just a regular unit of either style if you’d like. Both are available now for purchase, actually. But if this is your first foray into emulation fun, then you might be interested in buying the Deluxe version. Buying the deluxe version gets you a USB SNES/Super Famicom style controller. It’s better than a regular USB controller styled to look like a SNES/Super Famicom controller. While yes, it looks the same, it also has X-input and D-input compatibility. Best of all you can use turbo as it has that built-in. The regular version of the case is $19.99, which is fine. But for just $10 more, you can have the Deluxe version. That is what they sent me for review and it makes the most sense. The quality of the controllers matches the quality of the cases!
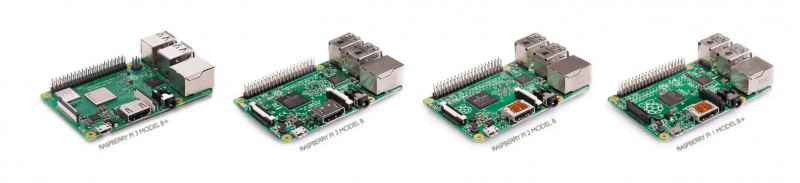
Compatibility. This part is confusing on the boxing and the site. Towards the top of each page it says Raspberry Pi 3 Model B+, Raspberry Pi 3 Model B, and Raspberry Pi 2 Model B. On the bottom of each box it mentions 3B+, 3B, 2B, and B+. That is one more than what it says at the top of each of the case pages. Then if you scroll to the bottom of the webpage, it shows more confusion. It says RASPBERRY PI 3 MODEL B+, RASPBERRY PI 3 MODEL B, RASPBERRY PI 2 MODEL B and then directly underneath it, it shows this picture. where it also mentions Raspberry Pi 2 Model B+. So, while it’s all confusing, you can see that the positive here is that there are a lot of models supported.
Cons:
Confusion. I have a problem with the single 3″x3″ double-sided printed sheet that these things come with. For more seasoned Raspberry Pi enthusiasts, maybe the lackluster instructions would be fine. But the instructions are definitely not sufficient enough for a first-timer. I am actually totally confused that these products don’t even have an entry on the Support section on their official website yet. Nothing should be for sale until it has some type of full-on instructions available. So either they should have an actual book of instructions in the box or link to videos on their site at the very least.
Storage. Storage cart idea while novel, isn’t executed very well. You literally have to put a double-sided sticker underneath the faux cart so that it sticks to the storage flap. Then you put a magnet just inside the storage flap so that it holds the cart more. This will not hold that faux cart for all time. It just pops up too quickly to get it to stay in place. It’s floppy and flimsy and it’s just better to forego the faux cart part altogether and just stick with the normal flap.
If they wanted to still insist on doing this with their units, there is a proper way to have done it. They should’ve just been a plastic cart that slides loosely into the slot. Then you press the eject button and it gives the cart a small lift. Then you grab the lifted cart out of the opening and open the cart up like a book and it has microSD card slots inside. But I still don’t think that using the eject button for this storage is the proper use for it at all. The eject button should’ve been purposed differently. It should definitely have just been a button that is a hotkey for exiting a game back to the main menu.
Reset. The reset button is my last complaint. The reset button doesn’t function the way that I think that it should. If we’re going for the most realistic version of these systems, the reset button should just reset the individual game you’ve loaded. I’m not discounting that the current functionality of it. I’m sure there could be an instance for us to have to forcibly reset the whole RetroPi operating system. What I’m discounting is the chance to make this better. I think one press should reset the game you’re playing. I think a 3 second hold on the reset button should reset the whole OS.
Final Thoughts:
This thing is the greatest treat for yourself if you’re into retro emulation. Or a great gift for the retro fiend in your life. At just $19.99 for the case or $29.99 for the Deluxe package, there really is no reason not to do this. Toss out your old, weird 3D printed little Raspberry Pi shell and get your hands on one of these smooth operators. Since they’re not just cases and add some great functionality with little drawbacks, Retroflag has another Hackinformer approval!