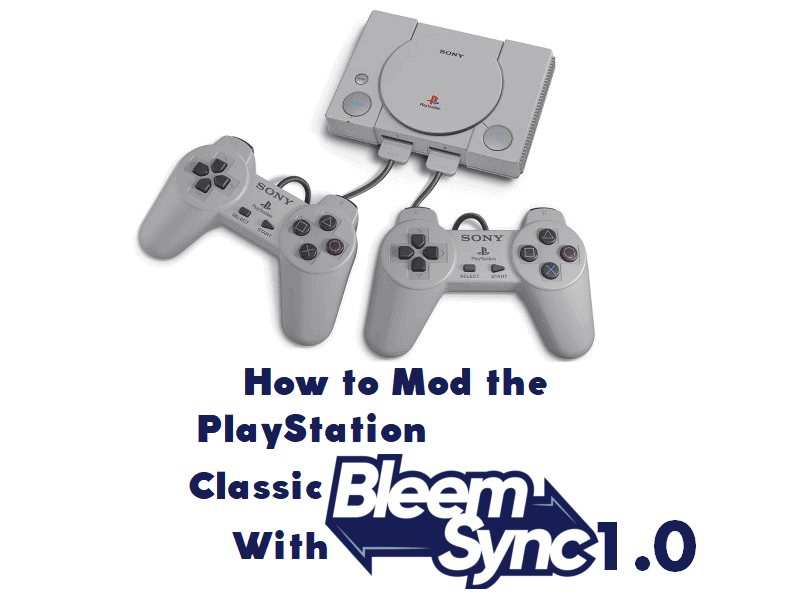
Hello and welcome to another tutorial for hacking Classic consoles. We’ve previously covered how to mod NES and SNES Classic consoles and everyone truly had a blast modding those. We’ve even made a post about this Bleemsync in the past. However, this BleemSync 1.0 is improved in pretty much every way over the old 0.4.x. A few notes, these releases are still considered beta, but 1.0 is the most stable and usable thus far. Additionally, this will only cover using a Windows PC. But all OS types are supported as well as all mainline browsers except Internet Explorer. Last note, if you’re on a previous version of BleemSync, just let it go and start from scratch. This new method is pretty different and changes files structures. Ok, let’s do this!
What Does BleemSync Do?:
- Create your custom PlayStation Classic experience by adding your own games, emulators, themes and mods.
- Easy to use, UI application to use to allow easy game adding/syncing, modification and configuring. (Compatible with Windows, Mac and Linux)
- Better FileSystem support (Ext4, exFAT, NTFS, FAT32)
- Multi OS support (Windows, Mac, Linux) (basically anything that has a RDNIS driver. Which is a lot.)
- Reliable and steady emulation performance.
- RetroArch support and Integration.
- Multitude of various controller support with RetroArch.
- Big community available to offer support to fellow users.
- And many more awesome features!
What You Need:
- RDNIS Driver Installed. Linux and Windows will automatically install it. If not, here is the Windows driver. And Mac users can find theirs here.
- A Fat32 formatted USB 2.0 flash drive. 3.0 draws more power, so little to no drives work. The capacity doesn’t really matter, just depends on how many legal backups or ROMs you’ll be running.
- BleemSync 1.0 downloaded onto your computer. You can find the download here.
Instructions for Modding PlayStation Classic:
- Extract the BleemSync download somewhere on your PC.
- Take your Fat32 formatted USB drive and plug it into your PC.
- After the USB is recognized, right click on the drive icon and choose to rename it. The new name will be SONY in all caps.
- Move the files from the extracted BleemSync folder to the root of you USB drive.
- Eject your USB drive.
- Go to your PlayStation Classic. Unplug every single cord and USB hub on it.
- Insert your USB drive into port 2 and then wait 3 seconds.
- Insert your controller into port 1.
- Insert your HDMI cord.
- Insert your power cord.
- Now wait a moment and the LED will display an orange light. Once that happens, press the power button once.
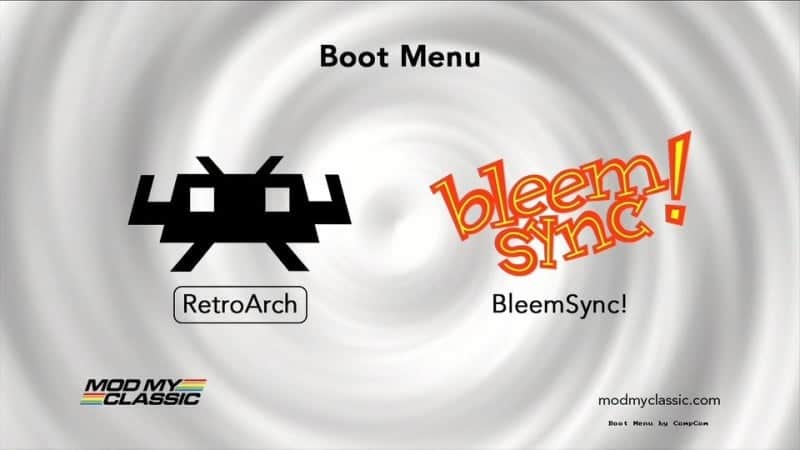
- For this step, watch the screen. It will walk you through the remaining steps. Once this process is complete, the light will blink red and the screen will say you’re all complete. The console will auto reboot.
- Once it has rebooted, you’ll see a RetroArch option and a BleemSync option on screen. So you’re officially modded and can power off the system now and add games!
New Instructions for Adding Games (you cannot just drag and drop onto USB any longer):
- Take the USB drive that you intend on using and format it to exFAT. This can be the same drive you used in the above directions.
- Once formatted, copy the BleemSync 1.0 files back to the USB drive.
- Now, grab your PlayStation Classic with its micro USB cord and bring it over to your PC.
- Plug your USB drive into port 2 on the PlayStation Classic.
- Plug the micro USB cord into the back of the PlayStation Classic.
- Plug the other end of the micro USB cord into your PC.
- Visit this site on a browser of your choice. It should work on most, just not Internet Explorer.
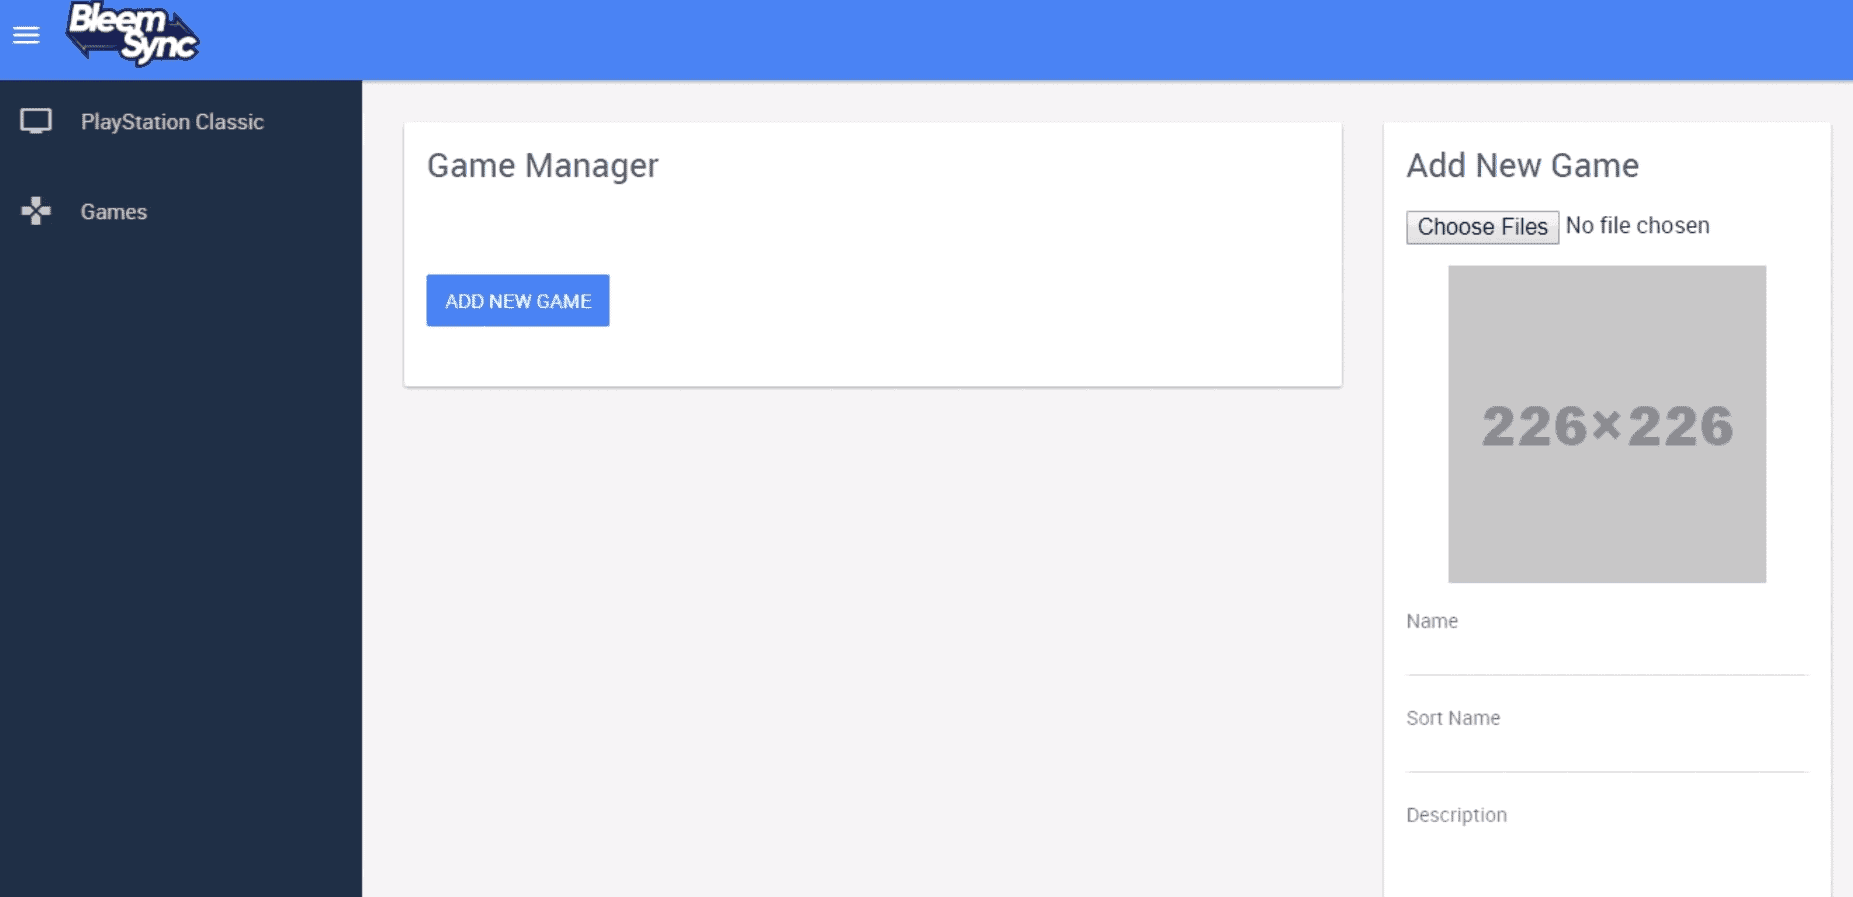
- If all is done correctly, you’ll see a screen with an option to Add New Game in the middleish of the screen.
- You can click that button any time you want to add a game. Click it now. You can also press the Choose Files button in the upper right hand corner.
- It lets you search your PC for properly dumped bin/cue files as well as pbp files! Pbp files are better because they’re smaller, they install faster, and they don’t run the risk of a bad cue file. Search for your game now and load it.
- You’ll see that on the right hand side that cover and all other info is automatically populated! Scroll down to the bottom and in the lower right hand corner you’ll have now have a Add Game button. This confirms that you want to send that game to the PlayStation Classic.
- Press that Add Game button. A loading bar will appear and this lets you know how long to not tamper with your set up.
- Once it’s done you’ll see your game is listed on the screen in the Game Manager section. This is where the games will be listed the more you add. You can also remove them by clicking it and choosing the Remove Game option!
- So now you can either add more games or you can unplug your USB cord and then your USB drive.
- Once you’re completely complete and want to play the games, remember to unplug everything. Then plug in your USB drive, your controller, your HDMI, then your power! And once you get to the BleemSync/RetroArch screen, just choose BleemSync and you’ll see your added games AND the original 20 games!
FAQs from ModMyClassic:
Q. Does 1.0 improve USB compatibility?
A. No – this will come with OTG support which is planned for 1.1 release
Q. Does this software modify my PS Classic?
A. Yes – This does mean that you have to install a very small payload to your console (2mb and 11 files). However this is completely safe and unless you hooked the PSC to the pc and tried to telnet to it, you wouldn’t know the difference. If you have no USB devices attached with the payload installed, it will boot like stock. The purpose of the payload is to enable FTP,TELNET,RDNIS, exFAT and NTFS drive support. You can still run older versions of BleemSync WITH the payload installed.
Q. I can’t make it work, whatever I try!?!
A. The likelihood is very much your USB is either outright incompatible or is “Browning Out.” This means that your USB during run time is exceeding the current limit of 100ma and is effectively cutting out. This can happen at any point and at any moment. This will cause the app to not work correctly. If you check the logs on the USB you can find log files missing/empty or just corrupted. (For example: http://prntscr.com/mazrmi and http://prntscr.com/mazubl) This has been no different for previous versions or other tools. However, it will be more apparent with BS1.0 as it does a lot more. We will be trying to reduce the risk of this happening but if in doubt. Grab a crappy old USB2.0 stick (regardless of size) and try it with that. 9 times out of 10 it will work just fine. Another solution that has been about for a while is to use a powered USB2.0 hub.
Q. I don’t like the new splash, boot menu or stock UI. Can I change?
A. Yes you can change this in the bleemsync Configuration in BleemSync UI. You can also swap out all the splashscreen images, themes etc
Q. I don’t like the new RetroArch theme.
A. Are you mad? Anyway, you can change it to monochrome in the RetroArch display settings
Q. Can I run different console games via the Stock UI with RetroArch in 1.0?
A. No – this is planned for future release. You can set an option to launch PS1 games via RA PCSX via the stock UI
Q. Can I use PBP with the stock PCSX emulator and not just the RA PCSX?
A. Yes – As shown here
Q. This seems a bit hit and miss, what gives?
A. BleemSync 1.0 is a huge step from older builds of BleemSync and aims to do a lot more than other tools out there. The decision was made by me (Swingflip) to release 1.0 as a public beta for people to try out and help us work out the kinks instead of delay any further release. 1.0 does not reflect the ultimate goal set by DoctorDalek and his vision for BleemSync but it should give you an insight of what is to come. We appreciate everyone’s support and we will be adding hotfixes to 1.0 as we can. The biggest downfall of BleemSync 1.0 is the 100ma power restriction. Throughout testing, we found that 95% of the issues (that weren’t bugs) was down to incompatible USB drives or drives hitting the 100ma limit and cutting out. Whilst this can be solved using an older USB2.0 or powered USB hub, mileage might vary depending on what hardware you are using. It’s our number one priority to resolve this and it will be done so in future builds. Again, please remember this is classed as a Public Beta so there will be kinks along the way but with the public’s input hopefully we can identify them and fix them as quick as we can.
Q. My game transfer cut out part way and said something went wrong?
A. The likelihood is that you hit the limiter and “browned out” Please read the paragraph above about the issue. You need to check your logs to check for anything that stands out or just try a different USB or use a powered USB 2.0 hub.
Q. I have bin/cue files that worked before but won’t work with the BleemSync UI when I am trying to add?
A. This is likely that your CUE file is bad for one reason or another. (Even if it worked before.) Use http://nielsbuus.dk/pg/psx_cue_maker/ to generate a new CUE.
Q. Why am I getting a “Not all binary files were selected, or they are misnamed.” error?
A. The filename in the cue file must match the spelling and case of the bin file exactly. filename.BIN must be spelled exactly that way in the cue.
Q. I connected my PSC to my computer and it turns on, but I don’t even hear the “device connected” sound, and nothing new shows up in Device Manager.
A. You might be using a power-only USB cable. Try a different cable.
Q. I changed the boot routine so it no longer boots to the boot menu. How can I now access the BleemSync UI?
A. Connect the PSC to the PC without the HDMI plugged in and it will boot to the bleemsync UI
Q. Is folder support in 1.0?
A. No – it was too much of an issue and due to time constraints it was axed from 1.0 to be included in newer builds
Q. Can I drag games in like I did before and it work?
A. No – You need to add them through the BleemSync UI for now
Q. Can I not bulk add games to the BleemSync UI?
A. No – This is however number 1 on our list to hot fix list, we will let you know when it’s possible.
Q. Can I change the art work?
A. Yes, drag and drop the image of your choice in the cover square.
Q. Power button is not working in RA.
A. It wasn’t working properly, so that functionality has been pulled out for now.
Q. Dual Shock is not working.
A. It does in RA, it doesn’t in Bleemsync
Q: How do I add multidisc games to BleemSync?
A: For games in bin/cue: Make sure all of the files are in the same folder. Select all of the bin and cue files. The amount of discs you have must match the original game or it will confuse the scraper. Ex: Lunar Silver Star Story Complete has 2 game discs and a 3rd documentary disc. You must still have the 3rd disc for the scraper to recognize it.
For games in pbp format: simply select the game.
Q. How do I add a multiple discs game in PBP?
A. Just make a PBP per each disc. Then, add them all at once from Bleemsync web browser UI
Q. Connecting a USB to the front port leaves me with only one free port. Can I connect a USB HUB so I can play multiplayer games?
A. Yes
If you like the author’s work, follow him on Twitter @V1RACY and don’t forget to enter the weekly giveaways!
And as always, stay tuned here on Hackinformer.com for so much more and follow us on Twitter @Hackinformer