Earlier today we reported on the newest inclusion to the hakchi family, hakchi 2.20 by developer Cluster_M. If you want to read all about the newest additions to the program and all of its features, click here. Otherwise, this article will have the ins and out on how to add even more SNES/Super Famicom ROMs to your SNES Classic or Super Famicom Classic. By the end of this article, you should have a fully improved device to get you so much more than your money’s worth. Again, this guide is for adding more SNES games and not a how-to on installing Hakch2.20 refer to this post here, we will have another guide for adding RetroArch cores for other consoles at a later time.
PART ONE: Setting Up Hakchi 2.20
Step 1:
Download hakchi 2.20 from here.
Step 2:
Install hakchi 2.20 on your PC.
Step 3:
Open hakchi, it should ask you which system you want to modify. Choose SNES Classic or Super Famicom Classic and then navigate to “Add More Games” in the lower left-hand corner.
*Note* If it does not ask you which system you want to modify, simply choose “Settings” at the top, then click “Console Type” and it will then give you the four options.
Step 4:
Point hakchi at the folder of your SNES backup ROMs. They can be either .SFC or .SMC.
Step 5:
Hakchi will now import all of your games in said folder.
Step 6:
Once it has imported all of them, look at the bar in the lower right-hand corner. If it’s green, then you’re kosher. If it’s in the red, you need to first unselect some games by unchecking them.
*Note* You can remove the games that it came with either by check marking “Original 21” at the top of the list or if you just want to remove some, you can uncheck specifics.
Step 7:
Once you’re in the green, you now simply need to download the box art for each game. Right-click on the list of games and click the “Download Box Art for Selected Games” option.
Step 8:
Once that is done, even if you’re in the red, you’re probably still Safe. Either way, you can save more space. Simply follow these instructions to compress the photos down.
Step 9:
Now you have all games that you want, they all have box art and you’ve saved as much room as possible, we can connect your SNES/Super Famicom Classic.
PART TWO: Hooking up SNES/Super Famicom Classic
Step 1:
Click “Synchronize selected games with NES/SNES Classic”.
Step 2:
Ignore the onscreen steps as they seem to be a little vague. Instead, plug SNES Classic into the PC with the USB cord.
Step 3:
Hold the reset switch up and switch the device on. After switching it on, count to 5.
Step 4:
Click “Install Driver” on the screen. It will open up a command window with some info.
Step 5:
Wait for another window to pop up asking you to trust the device software. Just click “Install”.
Step 6:
That window will then disappear, click back over to the command window. It should say to press Enter to exit. Do so now.
Step 7:
That window will also disappear and show you the 3 step instructions screen again that said “Install Driver”. You can now close this window and say yes if it questions you if you’re sure or not.
Step 8:
Go up to the Kernel section at the top of the program. In the drop down menu choose “Flash Custom Kernel”.
Step 9:
Turn your device on again the same way that you did before by holding reset and flipping on the power and continuing to hold reset for 5 seconds. You’ll know it worked because the program will take over.
Step 10:
After it finishes flashing the kernel you will have a window confirming you can now flash ROMS, power it off once again. You can now turn it on with just the power button.
Step 11:
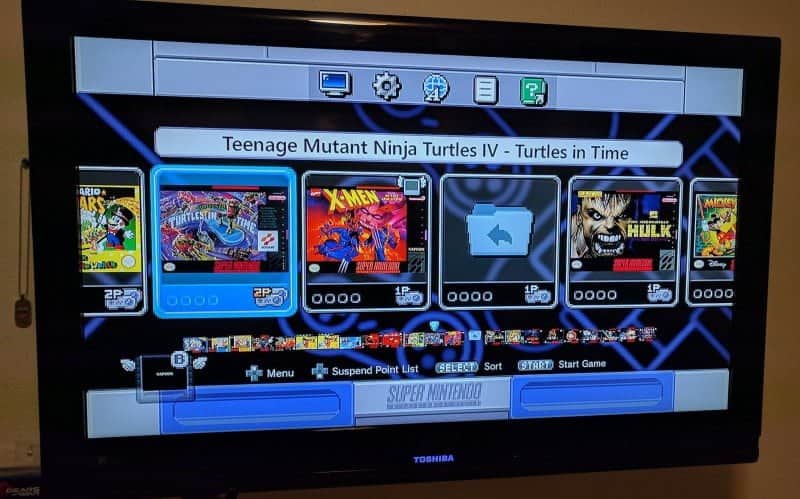
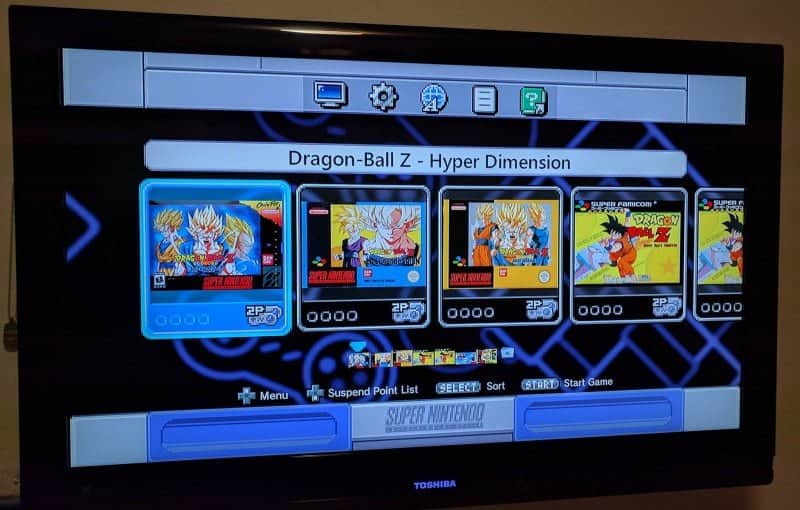
Choose “Synchronize selected games with NES/SNES Classic” again. It will now send over ROMs with the default folder settings.
*Note* If you want to change the folder settings, its all a matter of preference. You can always go to “Settings” then “Pages/folder structure” and play around with different combinations.
Step 12:
Once it finishes, power off the SNES/Super Famicom Classic and plug it into your TV as you normally would. Upon powering it on you should have successfully added more games!
PART THREE: Errors and Tips
Compressing Original 21 Games:
All of the games that you add to hakchi will become compressed thus giving you more games to flash onto your SNES Classic. However, the original 21 games are not compressed and take up too much room. Here’s an easy way to have your cake and eat it to. While your SNES Classic is powered on and plugged into the PC. Click on tools and make certain that “FTP server on 127.x.x.x” is check marked. Now open the “FTP client”. Once inside click on the usr folder. Then to the share folder and finally the games folder. Inside you will have your 21 original games folders. Inside of each folder is a .SFROM file, one for each game. It’s easy to tell what game it is by simply opening the .PNG file in that folder. Download the .SFROM file from the SNES Classic onto your PC and rename it accordingly. You can now add it to your list of games and it will compress it. Otherwise, it would stay on your SNES Classic uncompressed and take up more space. Make certain to uncheck the “Original 21 Games” option in the list.
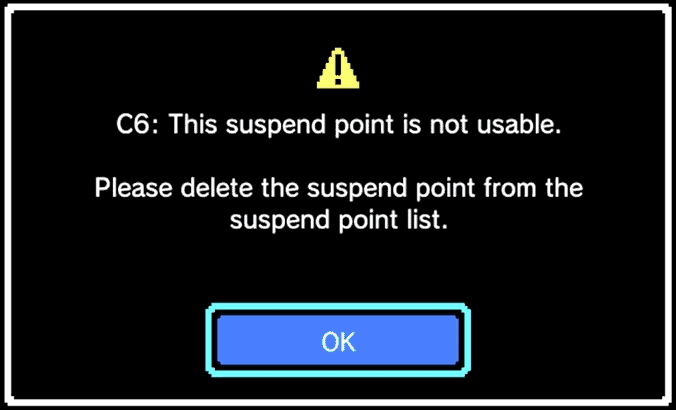
C6 Error:
I believe this has long since been resolved and is due to RetroArch, but if it pops up, do the following. Go up to “Kernel” choose “Uninstall” and this will wipe everything special about the SNES Classic. It clears the custom kernel, all new ROMS, and all save states and puts it back to the way that it was when you purchased the device. Now simply start again from “Part Two” in this article.
C7 Error:
This is again, usually caused by RetroArch, but it could be from a specific game (unlikely). If you start said game or RetroArch on your device and you get a C7 error do the following. Hook your device up to your computer as usual, remove the troublesome item. Redownload it, potentially from a different souce, and reinstall it. It could be that it was a corrupted file.
C8 Error:
This is usually when you have chose to have too many games per page/folder. Under “Settings” go to “Pages/folder structure” you’ll find the “Maximum Games per page/folder” option. If you want to maximize the amount you can do, just choose the next best option, sync the device and see if the error is gone. If not, go back and take it down to the next best option after that until you find that the C8 error is gone.
The aforementioned error resolutions are not an exact science, several different people have found different reasons and resolutions. If you have a specific issue and these do not help, Google may very well have your answer.
NES ROM Compression:
It’s worth noting that you can change the console type to the NES Classic or Famicom Classic and have the NES/Famicom ROMs compressed as well. This will give you more room for save states and such
Stay tuned here on Hackinformer.com and follow us on Twitter @Hackinformer
If you like the author, you can also follow him on Twitter @V1RACY