A lot of you have been asking how to use skillers tools or how to make more bubbles. Well our friend Dessel575 has written a great guide for you, on our forums and I thought this one will help a lot of people. So I figured lets put it on the front page so everyone could find it easily, that needs help with making bubbles on the PSVita. Specially if just got the new VHBL with the Papaton 2 exploit. Here’s Dessel575 helpful guide and he also updated it here recently.
– homebrew (in .ISO), or backup (.ISO) of your PSP game you can get the homebrew iso here.. HOMEBREW LOADER
– base game in your Vita
– Skiller’s tools (hackinformer.com) (he put together sign_np, npdpc, sboot, etc.)
– FileZilla (or another FTP Client)
– HxD (or another hex editor)
– PSP Brew (dl.qj.netl)
– PBOOT.PBP
First off, you may have to try different base games (PSP GAMES), as some of them work and some of them don’t. So this tutorial is for those on FW 3.18 & 3.36,
Step 1 – Signing your ISO
1) Obtain EBOOT.PBP which is going to be a base game for your ISO.
For 3.18 FW: Use either FTP (PSP → GAME → NPXX00000 [ Make sure to write it down the ID/remember it; this is a placeholder name, your base game’s ID will be different] → here’s EBOOT.PBP),
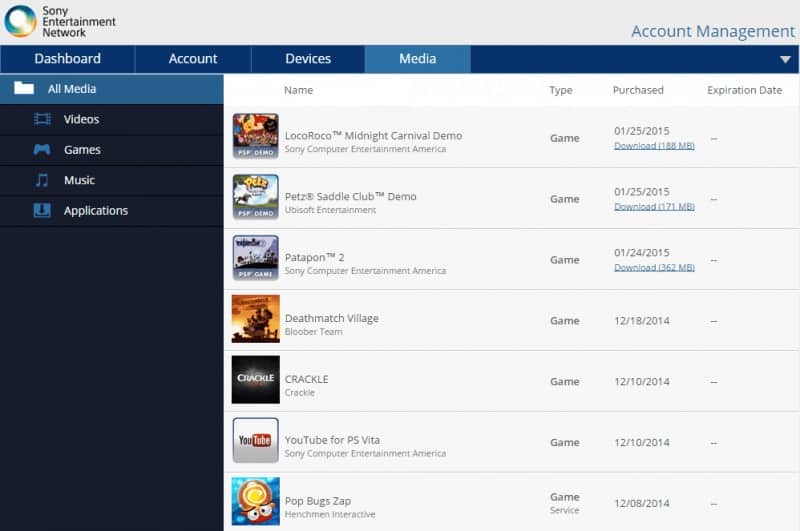
For 3.18 & 3.36 FW: Go to the Sony website here account.sonyentertainmentnetwork.com → *Sign In* → Media → Games → choose a base game and download it. You will download .XPD fle → open the .XPD in Notepad → find URL (http://zeus.dl.playstation.net/cdn/…/…/….pkg) → paste that url into the address bar → . The PKG will download → extract EBOOT.PBP from .PKG using PkgView_1.3.
2) Extract the “Sign.rar”, now you will have a “Bubbles” folder.
3) Then, here’s an official text from Skiller’s README.TXT, my comments are in []:
Put your base game’s eboot [the one you obtained in Step 1] inside this folder [Bubbles].
– Rename EBOOT.PBP (base game) to NP.PBP
– Open the SignCFIG.txt file. set your compression to either 0 for
compression or 1 for no compression, I let be with no compression. Save and close.
– Drop your Homebrew or Game.ISO on to SIGNNP.bat
– Now Check the FIXGAME folder […/Bubbles/FIXGAME] for your new EBOOT.PBP
Sounds too easy? Well, that’s how easy it really is.
Step 2 – Creating PBOOT.PBP
1) Download this PBOOT.PBP (https://mega.co.nz/#!vEByhYoZ!ksGHyo4Rss7rsz36_kxFmOcsMJYUGhidjA7UH478GiY)
2) Open it in PSP Brew.
3) Put there ICON0.PNG (Main Icon) and change the Title to whatever you want, then save.
4) Open this PBOOT.PBP in HxD, locate “BASEIDXXX” and change it to yout base game’s ID (NPXX00000 in our case, check ‘1)’ of Step 1 if you don’t understand)
5) Save.
1) Open FTP for Vita (from TN-V, VHBL, or ARK)
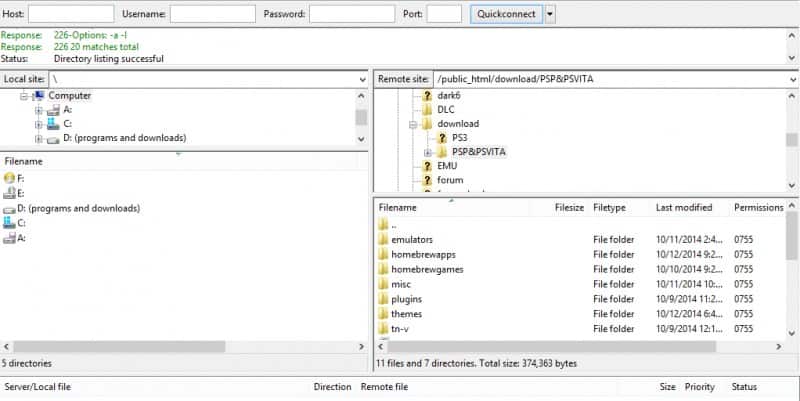
2) Connect to the FTP server with FileZilla, go to PSP → GAME
3) Change your base game’s name from NPXX00000 to NPXX00000&, paste there PBOOT.PBP
4) Create NPXX00000, paste there EBOOT.PBP (the one from FIXGAME folder, check ‘3)’ of Step 1 if you don’t know)
5) Check if everything’s where it should be, then close TN-V, VHBL, ARK.

1) Shutdown PSVita.
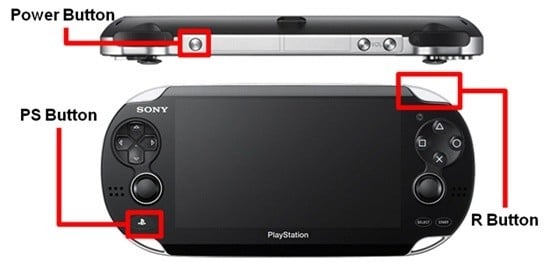
2) Boot into recovery mode. Press the Power button + R + PS button.
3) Rebuild database.
4) You should have a custom bubble.
That’s it, it’s really easy, but if you run into any problems, contact me on twitter.
As I sad in the beginning, if you did everything right and it didn’t work, try a different base game.
Credits to:
-Dessel575 for this guide
-Hykem, Proxima and tpunix for sign_np
– Skiller for putting things together and making everything a lot easier
– Major_Tom for his method to create custom bubbles


