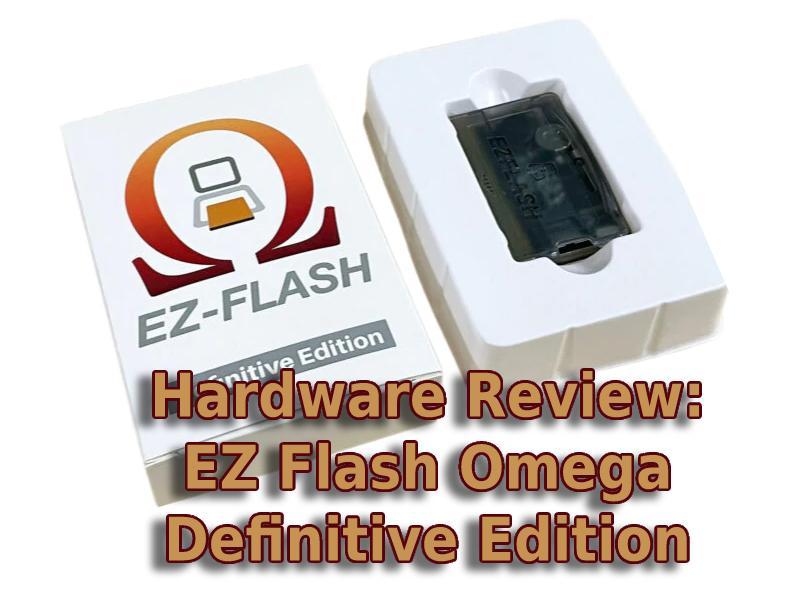
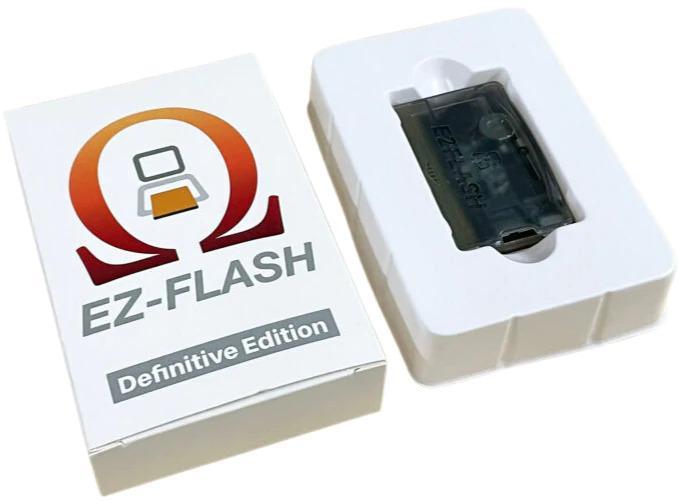
Today’s review is the EZ Flash Omega Definitive Edition. The GBA is a very personal handheld for me. I had a GBA that I shared with my foster mom when I was 16 or so. She would make me and my foster brother get up Saturday mornings with her and she would drive us to her weekly Weight Watchers meetings. We couldn’t stay home alone but we also couldn’t go inside with her for the hour. But in her purse, she always had her GBA and I loved playing Tetris Worlds on it. My foster brother would be asleep in the back. This review is for her and all the good that she taught me. I love the GBA today because of her and I hope she’s playing a Nintendo Switch nowadays!
Features/Description:
‘Basic features:
- GBA game copy and play, no client needed
- Fast patch engine, instant game load speed, additional manual patch engine to support modified rom
- Cheats
- Save states
- Real time clock
- Sleep
- Hotkey customizable
- 256Mb PSRAM supportS all games, instant load
- 512Mb Norflash, keep your favorite games
- GB/GBC/NES game copy and play, compatible based on emulator
- System on chip level recovery mode, prevent upgrade death
- Support FAT32/EXFAT, 4GB-128GB SD card
- Firmware and kernel both are upgradable
Definitive Edition Features:
- Using Ferroelectric RAM to keep save, absolutely safe
- Dual working mode
- Rumble function for GBA game and NDS game
- Support GBA-DS Link Transfer
- Support DS Web Browser
- Support DS RAM Expansion Pack
- Power Save design
- Button Battery replaceable
- Support 512Mb GBA movie rom’
Unboxing Video:
How to Set Up EZ-Flash Omega D.E.:
NOTE: There’s a part of it where I can’t find my microSD card reader, you can skip past that by about 3-5 minutes. So when you hear me start talking about needing to find it, you know that’s when to skip forward.
Pros/Cons:
- Pro-Build Quality. Right away I want to talk about the physical nature of this GBA flash cart. The EZ-Flash Omega Definitive Edition is great. I’ll work from the inside of the EZ-Flash Omega Definitive Edition, outward. By the way, from now on, I’m just going to call it the EZ-Flash.
.
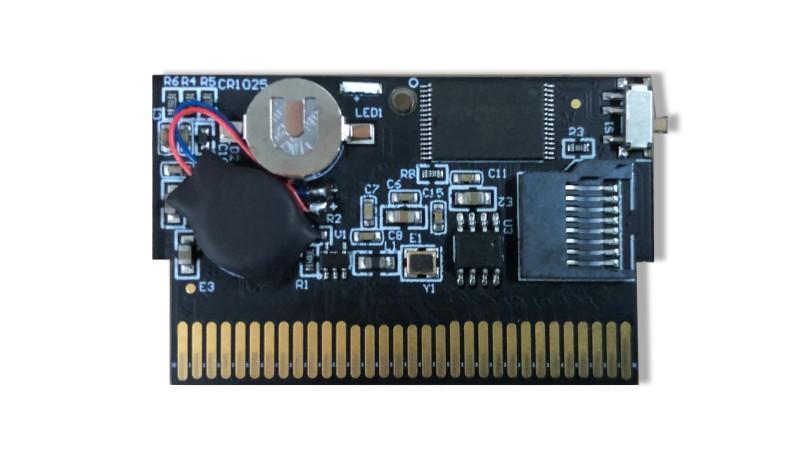
First, let’s start with the battery inside. The purpose of which is to not maintain the save files as it is on retail GBA cartridges. The purpose of the battery here is to keep a real-time clock for functions in certain games that need it. There are not too many of them, but this helps maintain compatibility with those titles. Don’t worry about saves though as the EZ-Flash has several methods for keeping your saves and they all end up on the microSD card.
.
Speaking of the microSD card, you should be cautious putting it into the cartridge. The fit of the shell isn’t quite accurate. It doesn’t sit flush against the top of the microSD card slot. This leads to you being able to accidentally put the microSD card into the cartridge itself and not the slot. It’s not a huge ordeal, but again, be cautious.
.
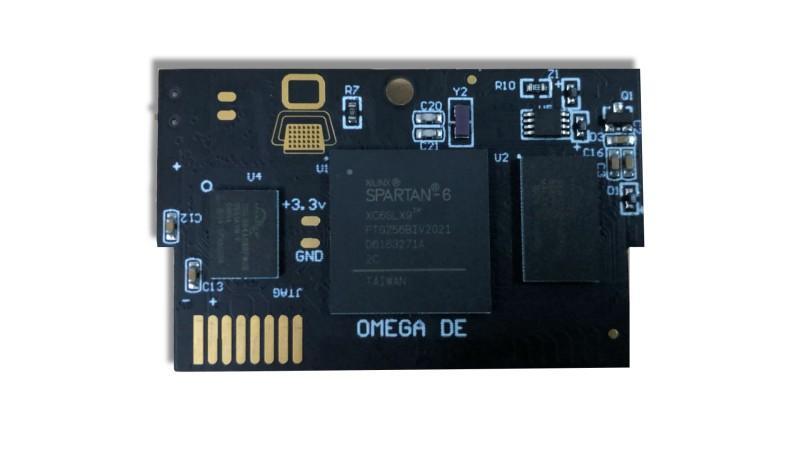
Yes, let’s talk about the GBA/DS functionality right quick. We’ll come back to all of this and how it works a little later. But for now, I wanted to mention that there is a physical switch to toggle between feature sets. If you want to have it do all of the GBA features, flip the switch one way. You want the DS features, flip the switch the other way.
.
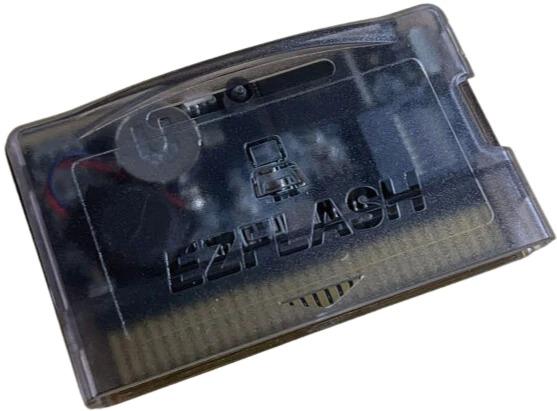
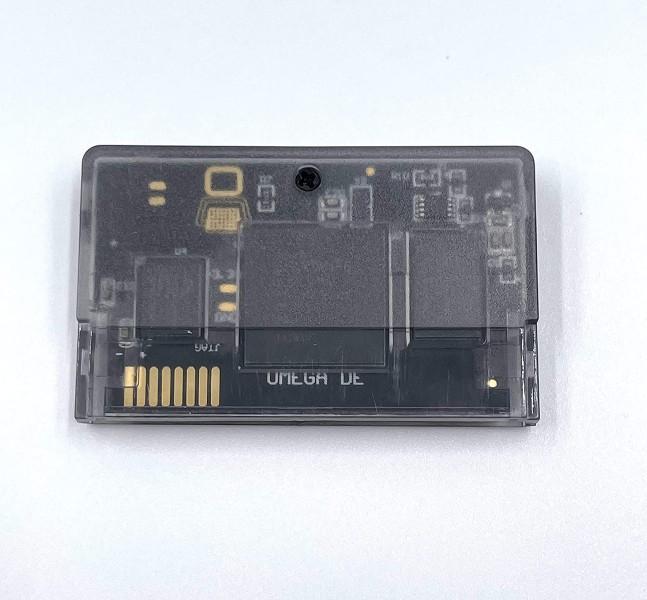
The outside of the cartridge is incredible. It’s a mixture of opaque and transparent plastic. The color is a smoke grey and really looks great in the back of any color GBA. Well, at least any of the ones that I put it into. It’s still a grey color and at the end of the day, most retail GBA games were also grey. The fact that you can kind of see inside of the cartridge doesn’t matter, it’s mostly hidden inside the cartridge slot. As far as its sturdiness, it’s very strong. If you had told me it was an official Nintendo product, I would straight up believe you.
.
- Pro-Lots of Menu Options. The operating system that is running on the EZ-Flash is very robust. For the cost that it is, I would think that you would just get a menu with a wall of games that you just choose and play. But no, this not only shows you games, but it gives you much more. Don’t worry, we’re going to quickly go through them all.
.
Starting on the main screen, you do have your wall of games. You can, from here, not only choose a game, but you can also hit a button to see your list of recently played games. This helps you avoid having to search your game list over and over for the same game. One of the menu items, enabled on a different screen, can turn on your game icon that is on the microSD (if you included it from the instructions). This gives you an image for each game title. Nice in concept, ugly in execution. It’s one of my small gripes and since it doesn’t force it on you, I won’t dog on it.
.
There are a few options that show up when you tap on a game to launch. You can simply boot it as is or you can boot it with addons (more on that in a moment). You can flash to NOR with or without addons. And you can change how the saves are created.
.
Now, there are secondary screens. You can press the L and R triggers to go along them. Pressing R once takes you to the next screen that shows a little microchip for the image and the word NOR on it. I’m not entirely certain of the purpose of this feature, but it works as follows. On your game list, choose a game. Once you do, you will get a menu for launching the game. If you choose to write to NOR, it will write it to the flash ROM. Then when you press that R trigger to go to the NOR tab, it will be written there. In other words, it loads the game into memory for you to play on a dime later. This game can take up to 30 seconds to flash. It will stay in the NOR memory until you delete it.
.
If you press the R trigger a second time, you’ll be on a tab with a game controller as the icon. This lets you set several in-game options as well as some that affect the menu system you’re on. You can change the time/date at the top. You can change the addons for the games (the game can be booted with or without those on launch). The addons are the ability to reset back to the main screen, savestates, sleep mode, and cheats. As an aside, if you enable the cheats functions, you have to have the official cheats folder from EZ-Flash’s website on the root of the microSD card. It will add a cheat option to the menu that appears when you launch a game.
.
The next option on this screen lets you set the language. You can enable the “Fast Patch Engine” next. I didn’t touch this option as it’s enabled by default and I’m guessing it patches the game on the fly. The next options down let you customize both how the Sleep and pop-up menu options are enabled in the game. And finally, you can toggle the real time clock.
.
On the fourth R trigger press, you’ll be on a screen that has an RGB color logo. This screen has only a few options to sift through. First off, you can enable the autosave feature. This is different from the standard save points in games. This is also different than making savestates. This feature is for when you exit back to the main EZ-Flash screen. By default, it will ask you, before exiting the game, if you want to make a save. This option makes it so that the answer is always yes, it will ultimately never ask you. It’s smart to enable and just have it make an extra save versus accidentally hitting no when you mean yes.
.
The next option on this screen is about mode B (more on that later). It asks you to specify which of the three features that mode B has that you want to enable. The next option pertains to the LEDs on the EZ-Flash. One option is to simply disable the LEDs entirely. If you don’t do that, you can choose how you want the LEDs to move (stationary or “breathing). And lastly, you can choose if you want all RGB or if you want to specify the colors that are active.
.
The very final screen that you see when pressing the R trigger tells you how to operate the menu. There is also a QR code that you can scan and it takes you to an online manual. I still think that they should also include a physical manual for the times you just need a simple answer and don’t want to scan a QR code, then go to the site and scroll through the page until you find it.
- Con-Saving Settings. I believed my EZ-Flash Omega Definitive Edition came with a battery that is already dead. I never play Pokemon, so you’d think that the lack of battery wouldn’t matter. However, it appeared that it was either the battery was dead or my review unit of the EZ-Flash is broken. For posterity, I reviewed the EZ-Flash as it came to me. So I didn’t replace the battery and just dealt with the consequences of that.
.
When it came to being able to save the settings that I set in the menu, it wouldn’t do so. This was disappointing to discover and I was certain that it’s the battery. But that’s the bummer of it all, isn’t it? They don’t say in the marketing material that the battery is used for anything except the real-time clock. So I felt a bit lied to.
.
Now’s the point in the story where I admit that it was neither broken or had a dead battery. It needed a firmware update. This was done quite easily, and we’ll talk about that process in the next section, but that’s not really the issue here. My complaint is the casual user. One who buys things and expects them to work out of the box, and rightfully so.
.
This is nothing a casual user ever would’ve gone and checked for. I had already updated it when I first received it, but even they might not necessarily do so. The ability to save your operating system settings for persistent use is not something that should be missing. The casual user likely would’ve changed the battery and found the issue was still there. I hope we don’t see a bug like this again.
. - Pro-Easy to set up. The EZ-Flash is very easy to update and use. You’ll simply download the most up to date kernel from here. Once that is done, put the kernel file (it’s a .bin) onto the root of your microSD card. Now put the microSD card into your EZ-Flash. Then insert the EZ-Flash into your GBA. Before powering it on, hold the R trigger. Once you power it on it will look for the .bin file and load it for you. Wait for it load 100% and then it will ask you to press A to install, do so now. Once it’s installed, you’ll see to turn off the system. Now just leave the .bin file on there and load your ROMs to anywhere you’d like on your microSD card. Once you put it back into the EZ-Flash and power on the GBA, it will work!
. - Pro-Compatibility. And again we’ve reached a section with a lot to talk about. I’m definitely just going to list all of the games that this device can play. You can figure out how to load them all if/when you buy an EZ-Flash Omega Definitive Edition. First off, I want to point out that it goes above and beyond any other GBA flash cart that I’ve owned. It can run the GBA video ROMs. This means either the TV show cartridges or the ones with full on movies on them. So now you can watch anything from Spongebob to Shrek.
.
Next up, it obviously covers GBA titles. Or at least all of the ones that I had tested on it. But not only does it run retail games, but it also can do GBA homebrew. Well, all of the homebrew that I tested, anyway. Your mileage may vary when it comes to games made in someone’s house. Lastly, it can cover all of the retail Game Boy and Game Boy Color ROMs that I tested too. And if you’re wondering about homebrew and fan translations for these systems too, the answer is yes. From what I tested, it ran them just fine.
.
There are likely other systems that it can run. As the community gets larger and larger for this flash cart, you’re likely to see more. But out of the box, it can also run NES ROMs. Probably Famicom ROMs too, but I didn’t think to test that until just now. I only tested a handful of NES ROMs, but all were functional once set up correctly. And finally, yes, homebrew and fan translations of NES ROMs also work. And all of the aforementioned games that I tested load fast.
- Con-MicroSD Card Loading. I can look past a card slot that doesn’t have a spring-loaded release. My complaint is not actually about that. No, I’m mad about the placement of the microSD card slot. See, to take out the microSD card, you have to remove the EZ-Flash and take the microSD card out of the side. See where I’m going with this?
.
Doing this will add more degradation to the contacts of the EZ-Flashover time. And while I’m sure most of you are planning on putting everything you need on the cart and then not taking it out ever, it likely won’t work that way. Since there isn’t a wifi function for FTPing, you won’t find a way to transfer saves back and forth from your EZ-Flash to the PC.
.
What if you want to use those saves on an emulator or another handheld device that plays GBA ROMs? Maybe you want to take a save backed up from your physical version of a game that is maxed out. Now you have to remove the microSD card again. This requires you to remove the flash cart and thus scratch the contacts even more on them. This will eventually lead to death or at least repair.
.
Why did they put it onto the side of the cartridge? Was it to make it look like an authentic cartridge when viewing it in the GBA cartridge slot? That can’t be since it is transparent and has bright RGB LED light blaring into the outside world. Maybe it’s to further make sure that your microSD card doesn’t accidentally come out in transit or play. This is possible, but I don’t think so. I think it just comes down to not wanting to look like the GBA Everdrive, honestly. But I guess we’ll never know. I would rather have the slot on top and then be able to remove the microSD card at will and leave the EZ-Flash in the GBA.
- Con-That Damn LED Light. Oh yeah, let’s talk about that LED light, shall we? Who is it for? Yes, we have already discussed that it can be customized or disabled entirely. This complaint is not about that. Who’s idea was it to add in three LEDs to represent data movement? Is an average user going to know how to disable the LEDs? The menu, because of hardware limitations, is a bit clunky. Are they all going to figure out that you can disable/enable the three separate LEDs on both read and write? Likely they aren’t. They’re more likely to deal with the three bright-ass LEDs and just never play in their bed in the dark before sleep.
. - Pro-Definitive Edition. Let’s talk about the extra features for using on the DS. With the flip of a physical switch on the side of the EZ-Flash, you will have access to more features while disabling others. So how does it work?
.
Well, first, let’s discuss what the flip switch enables you to do. You can swap between Mode A and Mode B. And for sake of representation, I will show you exactly how the company themselves describe these modes. ‘Mode A is equivalent to the original EZ-FLASH OMEGA function, through the graphical interface to operate the game card. Mode B is set with the DS model additional functions, such as rumble pak, memory expansion pak, DS-GBA link transfer function.’.
.
So, to answer the lingering question in your mind, “Can I use this in Mode A in my DS?”. Why yes, you can use this the same as you would on the GBA. The real purpose of Mode B is that with the flip of a switch, you can do the things that slot-2 was designed to also let you do. You could pop in a rumble pak, or a memory expansion pak for internet browser, or even linking a GBA-DS via the link function.
.
This is great because you no longer need to take out the GBA cartridge and put in a rumble cartridge for instance. Simply swap to Mode B and then on the EZ-Flash menu, navigate to the 4th tab and choose which function you want Mode B to supply. Then it will save it and when you do play a game that needs rumble or browse the internet or transfer to DS stuff, you’re set.
. - Pro-Button Battery. Not too much to write home about here, but it is still a pro worth mentioning since I will likely have to do it. But the battery within the EZ-Flash is entirely replaceable. It’s a CR1025 battery, so it’s quite tiny. Lucky for us though, that means it’s also quite affordable. Best of all, they should last for a very long time. They usually come in a pack of anywhere from two to five of them. So when you buy a pack, you will likely never need to buy another pack again.
. - Pro-Size. The EZ-Flash is only a little bit longer than a standard retail GBA cartridge. This means it will not be terribly noticeable in the GBA or DS. In my testing, it doesn’t protrude from the standard GBA, the GBA SP, the GBA Micro, or the original Phat DS. But if you use a DS Lite, it’s pretty funny how much it protrudes. It doesn’t bother me, but I wouldn’t be using it in a DS Lite anyhow. So all in all, this device is almost identical to the retail GBA cart.
Final Thoughts:
If you don’t own a DS or don’t plan on using this in a DS or don’t plan on buying a DS to use it on, I actually don’t recommend this EZ-Flash Omega Definitive Edition. If your sole purpose is to play it on a GBA of some kind, I recommend that you get the other product from Senko Games. It’s also an EZ Flash Omega, but it’s the standard version. It’s like being in Mode A at all times. It’s also more affordable and is identical in every single way except there’s no Mode B. It also has NO LED LIGHT, which is fantastic.
One last point. I can’t compare this to the Everdrive GBA X series. I don’t own any of them, but it’s worth noting that this is cheaper and plays every single game I tested. I couldn’t find anyone online complaining of compatibility errors. And the build of the EZ-Flash Omega Definitive Edition is just tremendous. My points against it are all mainly points that an inexperienced or casual user would have to deal with. If that’s not you, this product is an ace in the hole!
Purchase Link: