If you’re big into the retro gaming scene you’ve probably noticed over the past year or two up scalers have been all the rave. Allowing you to use your original hardware on your brand new fancy OLED or QLED TV and bringing these retro systems into the 21st century of digital displays.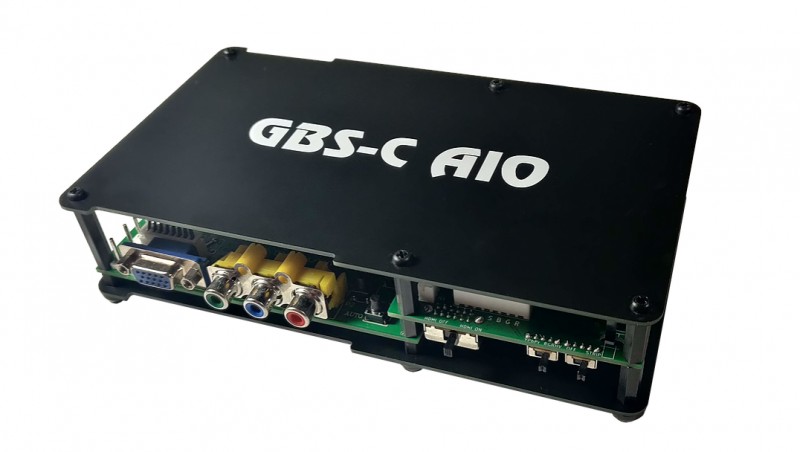
Now some of us just don’t have the money to drop on one of these up scalers when they can cost $200 to $1,000 depending on what you’re looking for. If you just started looking for something that’s going to do the job and convert the video signal for you a $20 adapter from Walmart will work perfectly fine but if you want to have that same crisp clean quality that you see out there on the internet. Then it’s time for a real up scaler like retro tink 5 or the OSSC is a great way to get that picture quality that you’ve always wanted out of these old retro consoles on these new displays. What, if you don’t want to drop $200 to $400 on an up scaler. Well Voultar, has made a how-to video on how to make your own up scaler for $47 in parts. This up scaler can actually compete with some of the ones that are on the market right now and looks like it doesn’t amazing job.
In his video, he explains the whole nine yards on how to get it working from the beginning all the way to the end and does a fabulous tutorial. Let’s say you’re not that person that can do that type of technical work but would still like to have one. Well there are some people on the market that do sell them and of course, you’re going to have to pay a little bit more but nothing compared to those real up scalers. Our senior writer Riddle43 has found some units for $50 to $100. So if you’re not technically inclined and would just rather purchase it they are all over eBay and Riddle43 actually owns three or four of these devices and loves them.
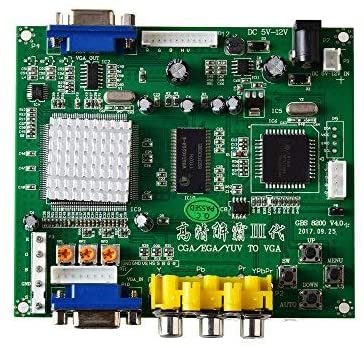
Arcade Game RGB/CGA/EGA to VGA HD Game Video Output Converter Board: https://amzn.to/3z1Hc7T
High-Frequency Signal Generator: https://amzn.to/3zZySH5
So if you’re in the market for getting one of those up scalers or a little nervous and don’t want to spend that money on one of those big boy up scalers I would say the GBS is a great way to get your feet wet without having to commit to something that may cost you a little too much money. The GBS up scaler is for the people that are looking for that little bit of extra clarity and scan lines etc, compared to those $20 RCA HDMI adapters and don’t really want to go all the way out.
The GBS-C AIO (Gonbes Control All In One) is by far one of the most feature-packed and easy-to-use scalers for retro gaming and retro computing.
The GBS-C AIO key features are:
-
Very low lag, less than 1 frame.
-
High quality upscaling for nearly all retro game systems and computers – anything pre-2000s
-
Fast resolution switching between 240p and 480i video signals – output to the display never drops sync
-
Motion Adaptive deinterlacer that engages automatically and is superior to most BOB deinterlacing and BOB deinterlacing is available should you want it
-
Easy to navigate interface via the web browser
-
Color reproduction with auto gain and auto offset for the triple 8 bit @ 160MHz ADC
-
Zero Lag bypass capability for transcoding video
-
Simplified power management compared to other DYI GBS-C setups
-
Acrylic and PCB style case options
-
Inputs: SCART(RGBS), Component (YPbPr), VGA(RGBHV)
-
Outputs: VGA/YPbPr 1280×960, 1280×1024, 1280×720,1920×1080, 720×480/768×576 and Source Pass-through.HDMI 720P/1080P. only one VGA or HDMI output at a time on the GBS8200
-
Fast downscaling at 240P via VGA/YPbPr
-
Built-in Sync Strike that can be turned on and off
-
Open Source (All files to be released shortly)
It is our strong aspiration to see the GBS-C AIO as an open-source project. We make available all files needs to create your own GBS-C AIO add-on board from scratch just bring your own GBS 8200.
Our github repository is https://github.com/amoore2600/GBS-C_AIO
Our github repository includes a basic BOM, Gerbers (PCB plates and AIO Board), KiCad source files and acrylic plate files.
The recommended additions and modifications to the GBS 8200 Scaler are:
-
Remove the pots
-
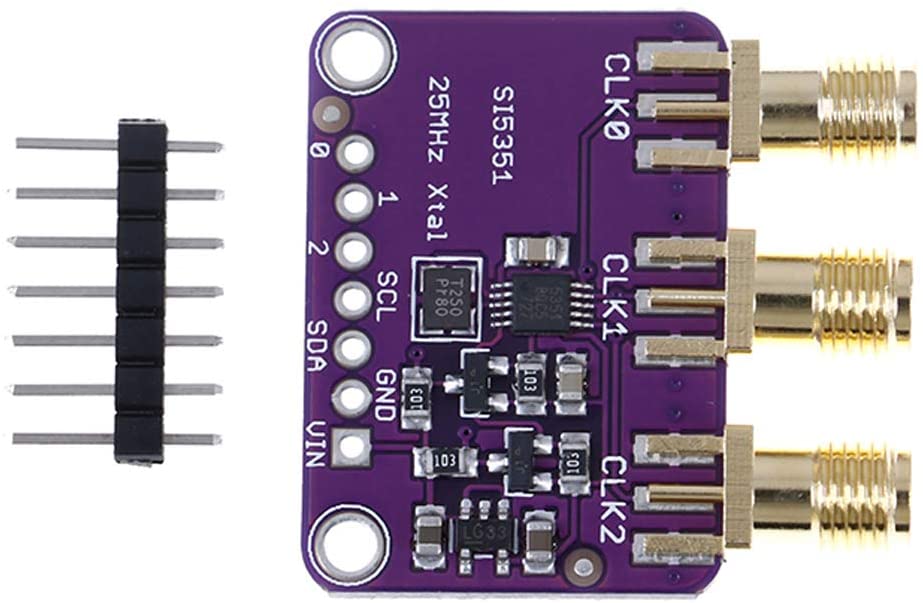
Clock mod – https://github.com/ramapcsx2/gbs-control/wiki/Si5351-Clock-Generator-install-notes use SDA and SCL pads on the AIO board for easy installation.
-
Replace c47 with a 22uf cap to compensate for the increased power draw from the clock mod.
-
Add a a resistor value in parallel with r26 to correct the ypbpr output brightness.
-
Replace the 150 ohm resistor on r26 if it is outside of 1% tolerance.
This project uses the GBScontorl firmware by Rama – https://github.com/ramapcsx2/gbs-control
AIO board inspired by amoore2600, design by Jacob Proctor (Arithmaldor) https://twitter.com/Arithmaldor