Heya everyone,
did you ever look at some TVs with an Ambilight integrated and told yourself “Dang that’s looking cool I want that too”? I’ve had that happen to me so I’ve went and searched for ways to put one behind my TV. It works really well and looks solid but the drawback with my approach ist that you can only use it in combination with your PC and its Video Output and it doesn’t work with any protected content like Netflix. The good part is that the parts for it only cost me roughly 35 Bucks and the light effects are simply stunning when you’re also playing Games with your PC on your TV.
What parts you need for this self-built Ambilight are the following parts:
Arduino (doesn’t really matter which one. I chose an Arduino Nano clone)
WS2812B LED Strip (I used a 60 LEDs per Meter version in black)
A stable 5V Power Supply
You’ll also need the following tools:
Soldering Iron (or simply some clamps if you wanna do it a dirty way)
Prismatik Unofficial (This software later interfaces with the Arduino for the colors)
Arduino IDE (For uploading the code)
So without further ado let’s get started on building our Ambilight:
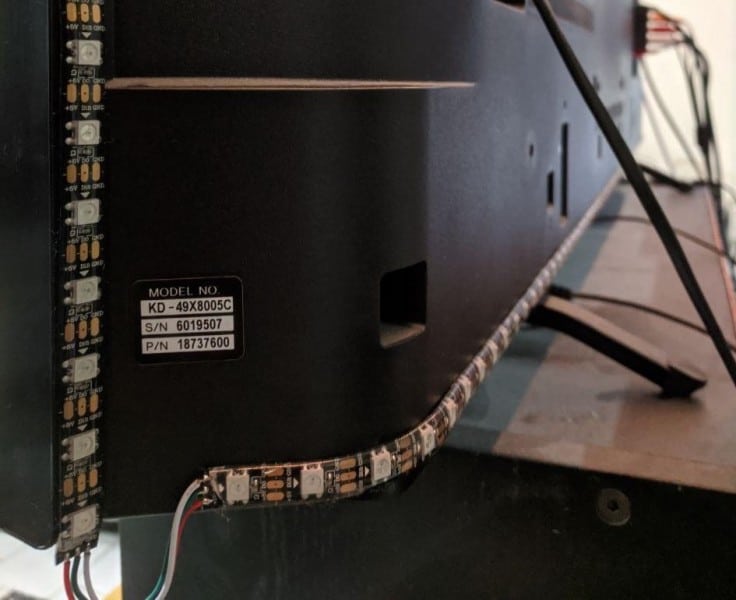
- Cut the LED Strip to size and glue it to the back of your TV. I’ve put LEDs on every side of the TV but it’s your choice if for example you only want LEDs on the sides and top but not on the bottom. Make sure to solder them together correctly and leave one side unconnected where you can later solder the Arduino to.

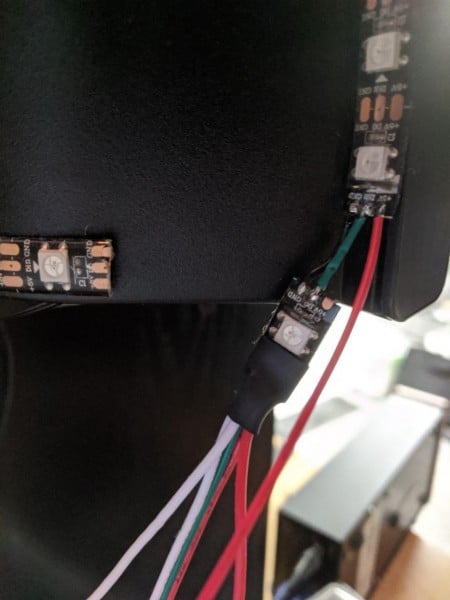
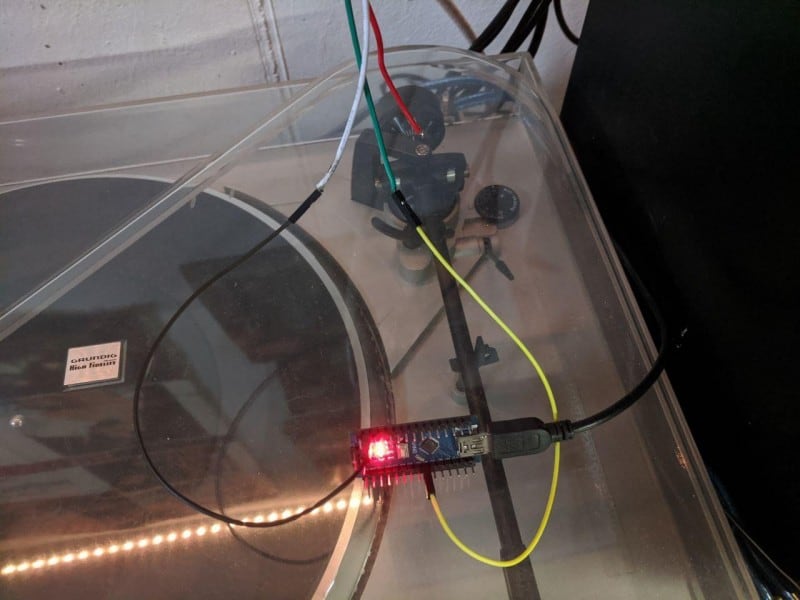
- Cut off one LED since we’ll need to use it as a step up regulator for the data pin of the Arduino. Without it the LED strip won’t function correctly later. Solder the Power Supply 5V (Red) and GND (White) directly to it as well as a cable for DATA (Green). On the other side solder GND and DATA to the Strips on the back of your TV. Also solder another 5V Cable from your Power Supply to the LED Strips on the back of your TV. Take a look at the picture to see what it should look like.
- Now install the Arduino IDE on your PC. You’ll also need to download the following Library: FastLED. Just press on “Zip” under the version number to download it. Then extract it and copy the folder to your Arduino IDE libraries folder. It is normally located in “C:\Program Files (x86)\Arduino\libraries”
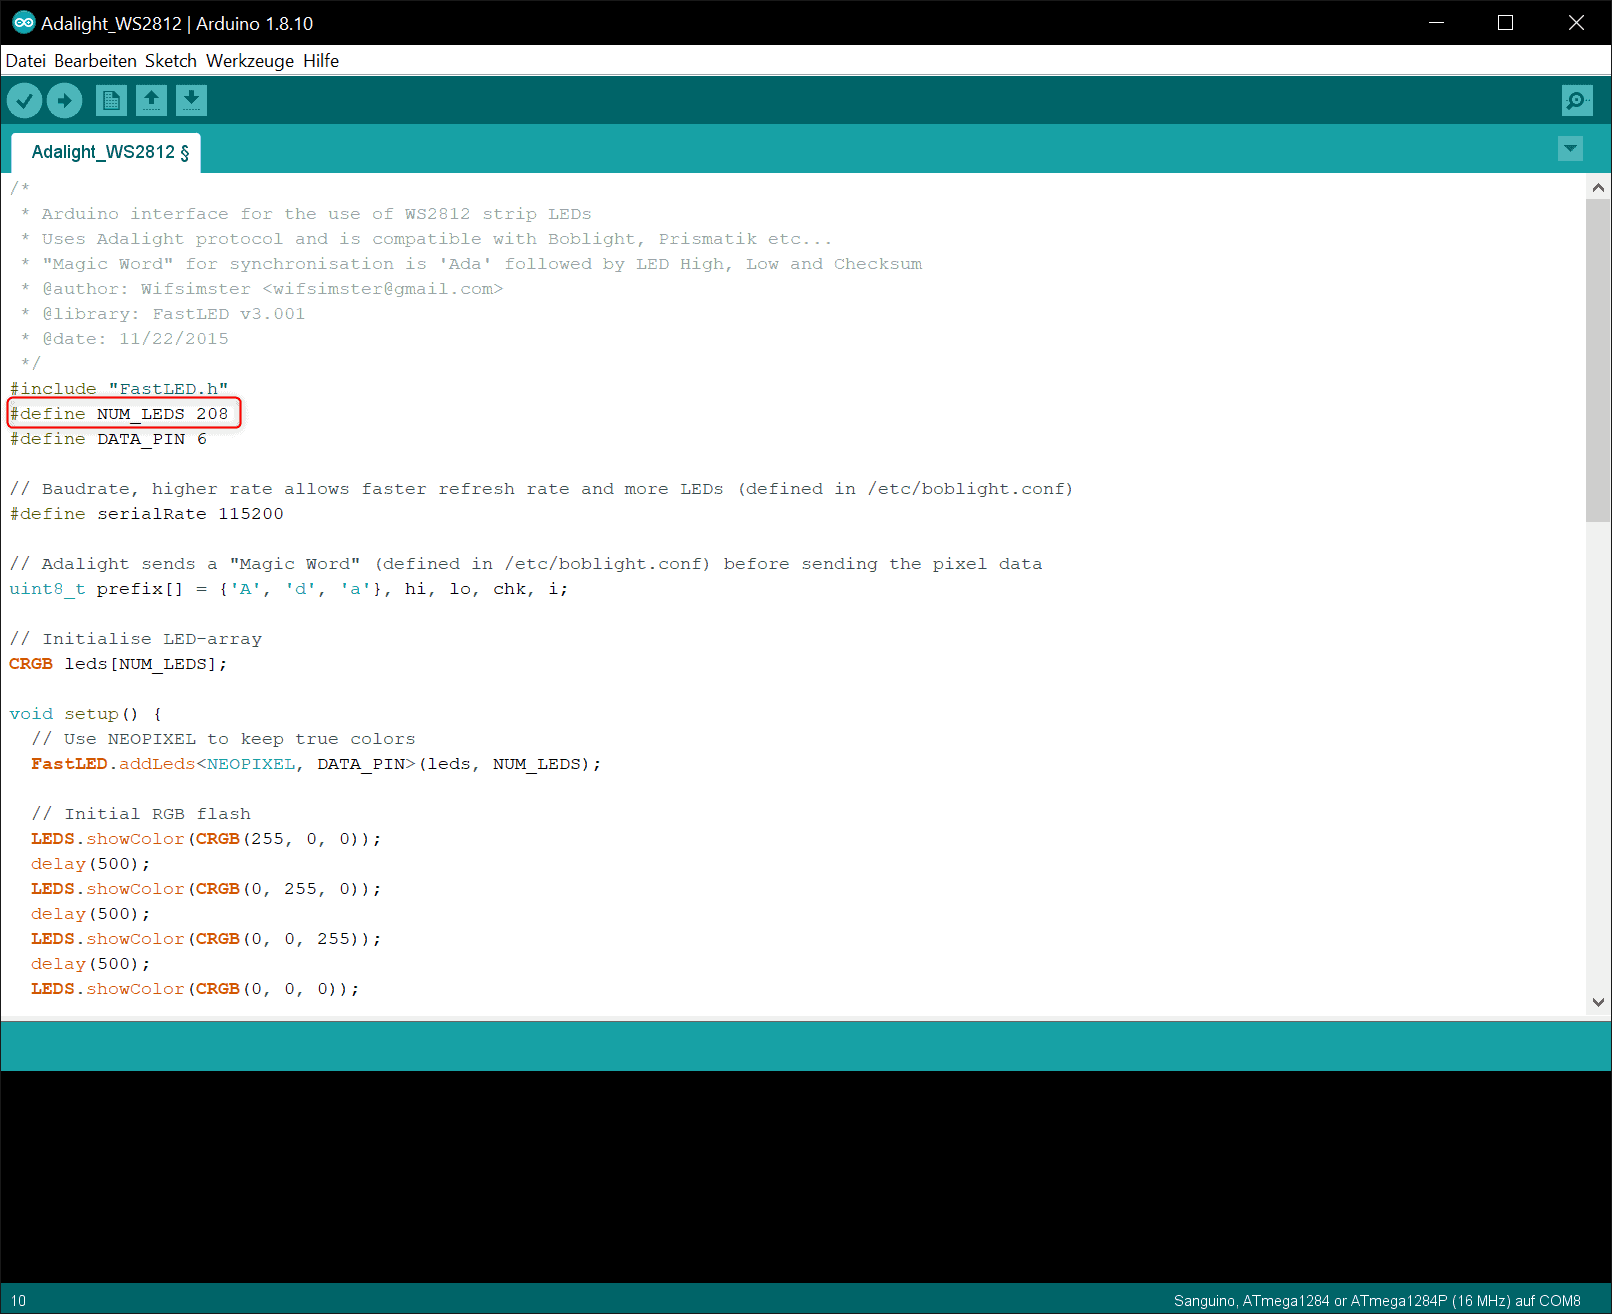
- Next up download the Adalight WS2812 Code for your Arduino so that it can interface with the LED Strip. Open the “Adalight_WS2812.ino”. Now we need to change a few things in the code. Now enter the Number of LEDs that you have behind your TV in “#define NUM_LEDS”. Then upload the sketch to your Arduino.
- Now connect the DATA Pin of the LED Strip to Pin 6 of your Arduino and also put a cable from the LED Strip GND to GND on your Arduino. If you plug in your Power Supply and then the Arduino the LEDs behind your TV should turn Red, Green, Blue and then turn off. If it doesn’t recheck your wiring OR check the voltage that comes out of your Power Supply. The first Power Supply I used broke down to 3.2V once the LEDs turned on which caused lots of signal errors. Make sure it’s actually 5V.
- Now install the Prismatik Software. Once it’s finished open it up and go to “Device”->”Run configuration wizard”. When it says “No Lightpakcs connected” just say “Next”, then “Adalight”. Now enter the COM Port that your Arduino listens on. You can check this in the Device-Manager. Make sure that Baud rate says “115200”. Color format RGB should be fine for most LED Strips but you may need to adjust it later on if the colors turn up wrong
Press “Next” to choose the Monitor that will be used for Illumination. If you only have your TV connected to the PC this is easy and just press “Next”. You can now choose to create a new Profile. Just click “Next” for now. Your TV should now get lots of grey boxes and a “Zone Placement” Window in the Wizard.
Here enter the Number of LEDs you have on one side in “Sides” and then enter the number of LEDs you have at the top and bottom of your TV. Then press on “Custom”. New grey boxes should now turn up. When you press one of them an LED behind the TV should now turn on. If an LED turns on but at the wrong location you will need to mess with the Start Offset until the Numbered Grey Boxes Start and End where you’ve started the LED Strip.
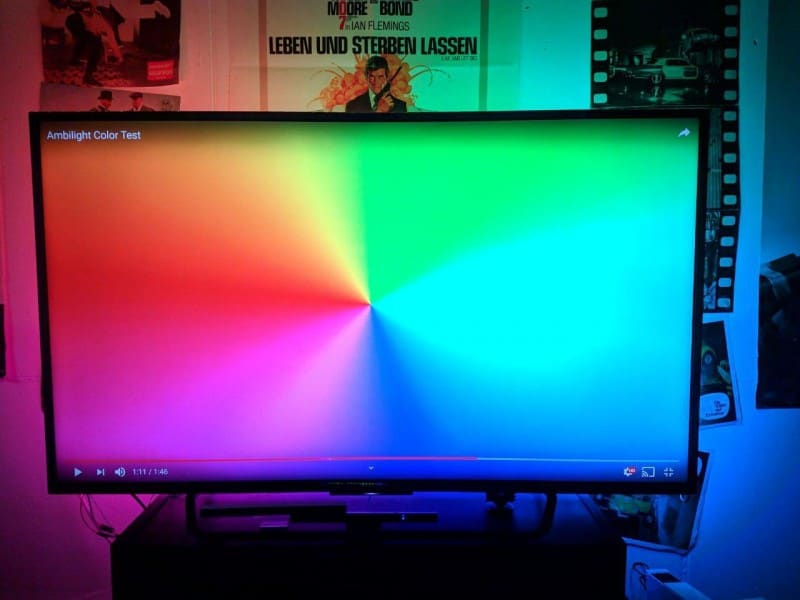
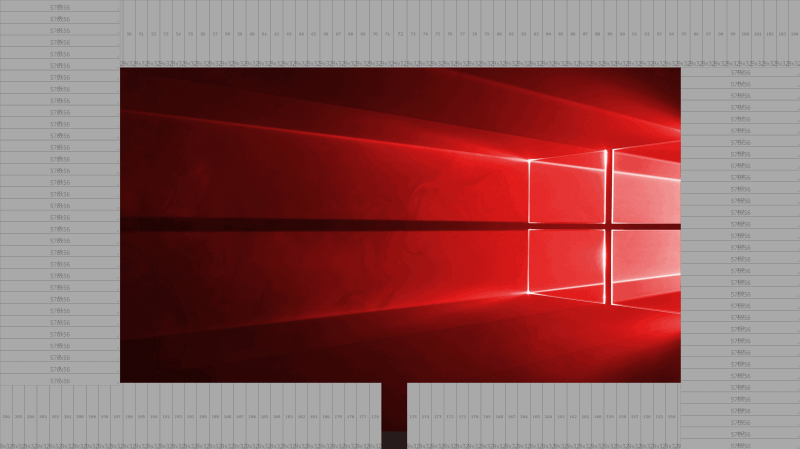
When you’re done press “Next” to calibrate the White Balance. Try to achieve a good enough white touch so that the colors of the LEDs will later match the colors of the Movies and Games better. Finally press “Finish” to close the Wizard. The colors should now turn Red, Green, Blue and then start displaying the colors that are currently on the sides of your Screen. In case of my Wallpaper it would be red all around the TV
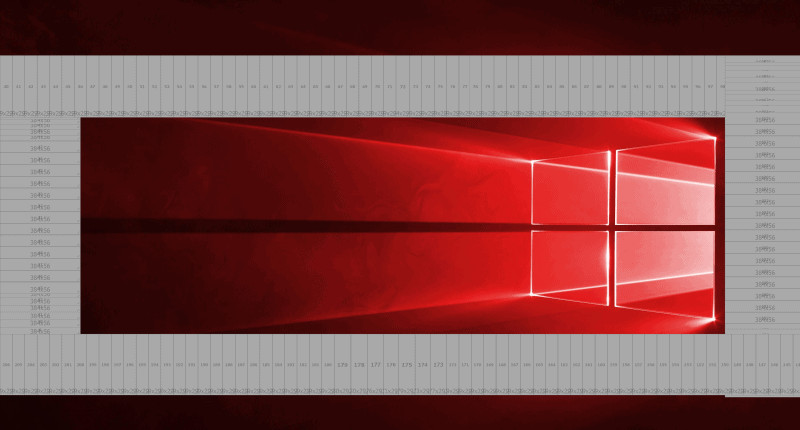
For Movies I would advise to create a Second Profile called “Movies” with a Box Layout like this since Movies are almost always in Widescreen Format:


If you’ve reached this Step and the LEDs are now displaying the Colors on the Screen you have a fully working Ambilight. Here’s a good video to test the capability of your new Ambilight. BUT if you’ve used your fair share of LEDs it will very likely be out of sync by a big margin and look really bad. That’s because of the Arudino’s normally realtively low Baud Rate. To set a higher Baud Rate and fine-tune some settings just follow these steps:
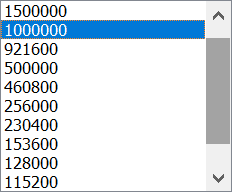
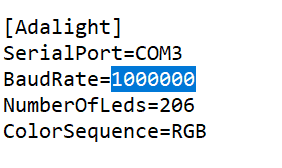
- Open the “Adalight_WS2812.ino” again but this time also change the Baud Rate to something higher. Here’s the list of Baud Rates the Arduino “could” support.
I say “could” since it differs from Arduino to Arduino. Mine runs perfectly with a 1000000 Baud rate and so should most but you may want to try different Baud rates if this one doesn’t work. If you just want to go for it, set yout Baud Rate to 1000000 and upload the Sketch to your Arduino. - Next up close Prismatik and open it’s config file to change the Baud Rate from 115200 to your chosen Baud Rate (in my Case “1000000”). The Config file is located at “C:\Users\<YourUser>\Prismatik\main.conf”. Just open it with Windows Editor.
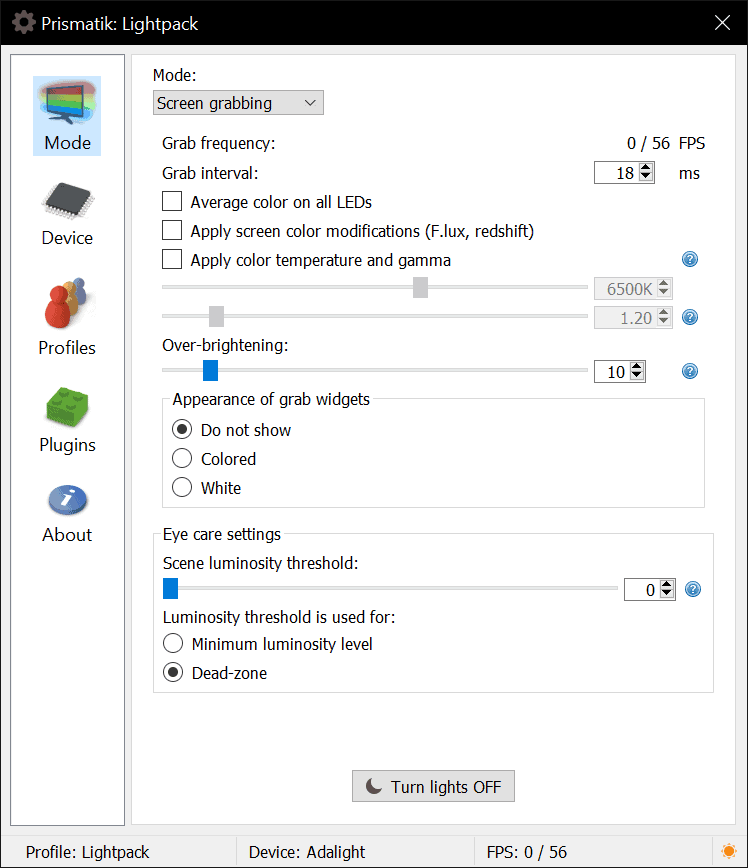
- Save the file and open up Prismatik to see if the LED Strip behind your TV still functions correctly and doesn’t display any weird colors. If the colors still show up correctly you will now want to change your Prismatik Settings to allow for higher refresh. Just use my settings as a Default for now and see if it suits your Tastes. If not you can simply mess with all the Color Settings until it does 🙂
That’s it. You now have a DIY Ambilight behind your TV that allows yout to delve into Games and movies even more.
If you have any questions or problems with this Ambilight please comment and I’ll try to help you out 🙂