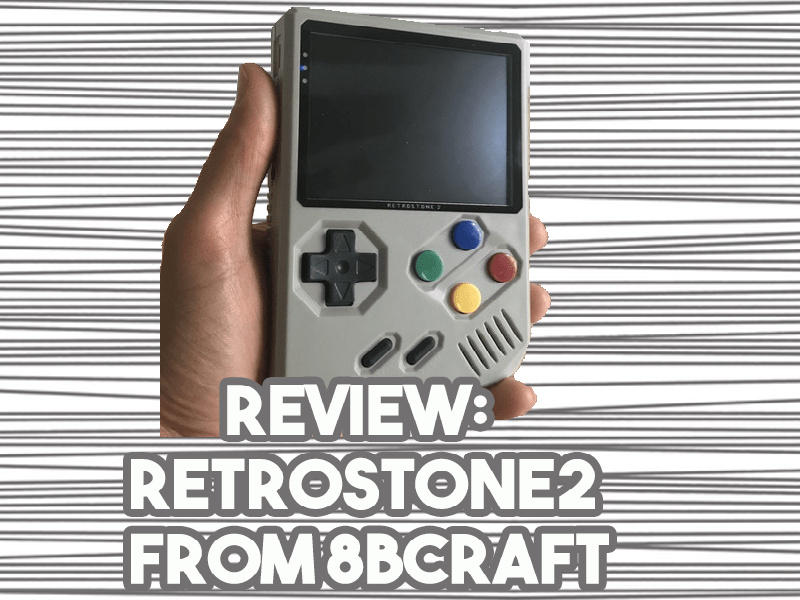
It’s been a while since we’ve reviewed anything from 8BCraft. In fact, so much time has passed since we reviewed the RaspiBoy, technology has gotten better (and more affordable). So let’s take a look at the standard model of RetroStone2 ($156, 8BCraft) as it’s bound to be heaps better than the Raspiboy!
Description:
‘RetroGaming is constantly gaining in popularity, especially with the developments of single boards computer (raspberry pi, orange pi…) that enabled us to make homemad retrogaming consoles. However those required lot of knowhow on electronics and DIY. You may have seen “Gameboyzero” projects on internet and understand how difficult assembling one can be! RetroStone 2 is here to bring you the best and most simple retrogaming experience.
You can use it to play to over 50 old video game systems : Gameboy, Gameboy Color, Gameboy Advance, Super Nintendo, NES, Megadrive/Genesis, MasterSystem, gamegear, Atari, MaMe and so on. You can have a look here to all the supported systems. In more technical terms they are basically SBC (single board computers) with all the peripheral needed to make a handheld console (screen, speaker, battery…), making it perfect to run Emulation Station/Retropie.
So yes, all your childhood video games on one handheld console, that you can plug to your TV, and play multiplayer. Yes that’s a high five to my-10-years-old-self!’
Features:
‘This is designed to be compatible with Armbian distribution of Linux, as well as with Retrorangepi the Allwinner version of the famous Retropie emulation software.
- Play on TV
- Play up to 4 Players
- Take it anywhere!
- Screen is 3.5″ IPS 640*480 Digital screen.
- PC screen protector added for product durability.
- Battery is a removable.
- Battery capacity has been increased.
- ON/OFF button is push type now.’
Unboxing Video:
Pros:
- Size. This product is large, as it fits a Raspberry Pi inside with a custom PCB. It measures to be 5.11″x3.54″x1.25″ so it sounds like it may be too big, it isn’t. Just know that it isn’t too large for comfortable playing and it isn’t too small that an adult wouldn’t have fun using it. That includes the buttons on the back as they’re not impossible to reach. It doesn’t matter whether you use one finger from each hand and alternate the buttons or if you use two fingers from each hand cover each button. I hope that keep this size for the RetroStone3 (if there ever is one) as anything bigger or smaller would put me off.
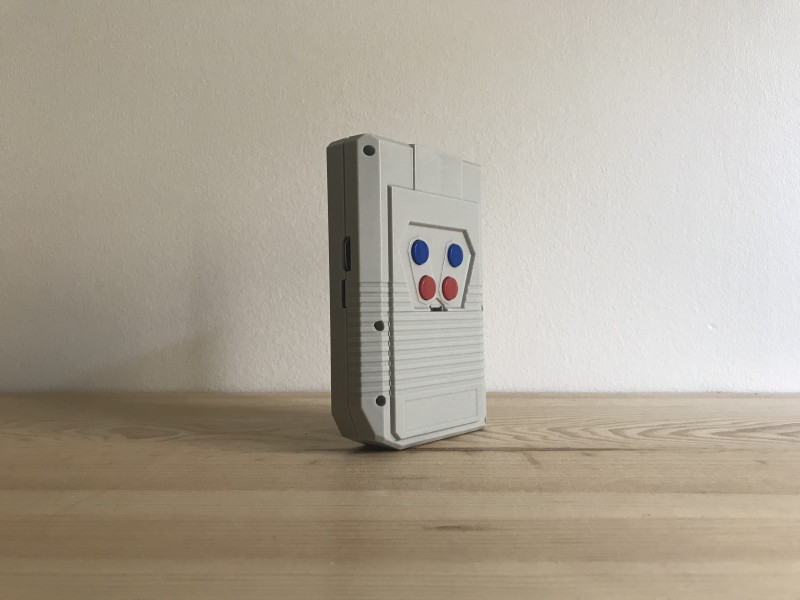
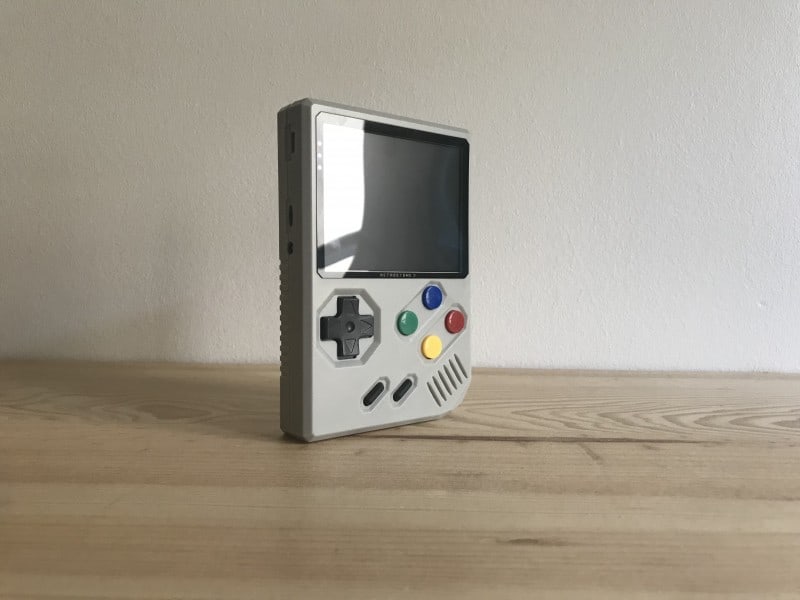
- Build quality. This is a territory where 8BCraft absolutely dominates. While I trust them and their ability to make a quality product, I still want to take you on a tour of the buttons and ports in and around the device. The outside shell seems to be some kind of hardened plastic and has been injection molded for sure. It’s much thicker than the likes of the PS Vita 2000 series and those hold up. The buttons face and back buttons total in eight and they feel one to one with a Super Famicom face button. The D-Pad is supposed to mimic the NES/SNES D-Pad and it does so in spades. Although, I would state that it looks and feels larger than those D-Pads. Maybe, at most 10% larger, either that or I’m crazy. The Select and Start buttons feel just like those throwback Nintendo Start and Select ones.
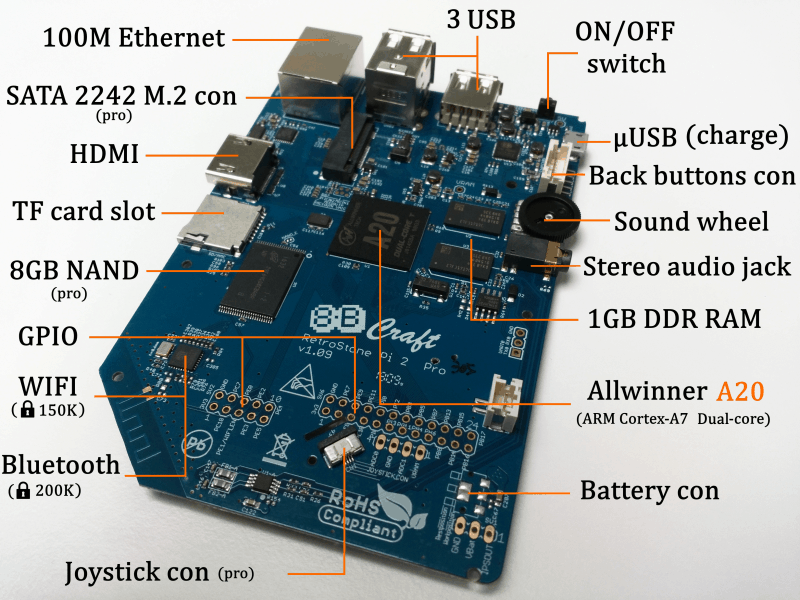
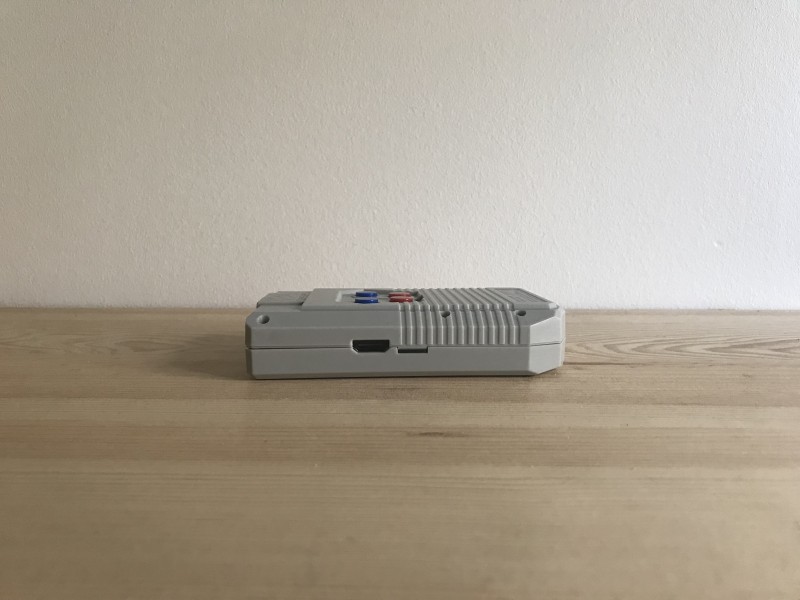
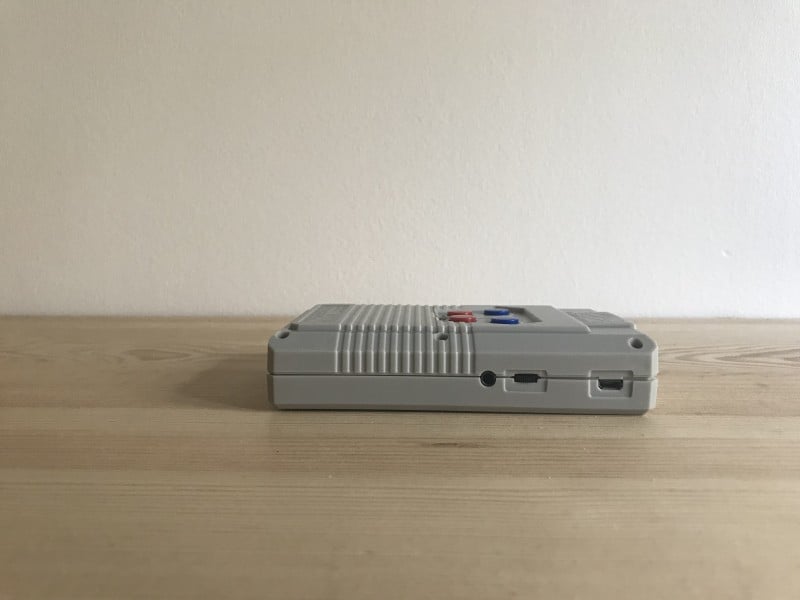
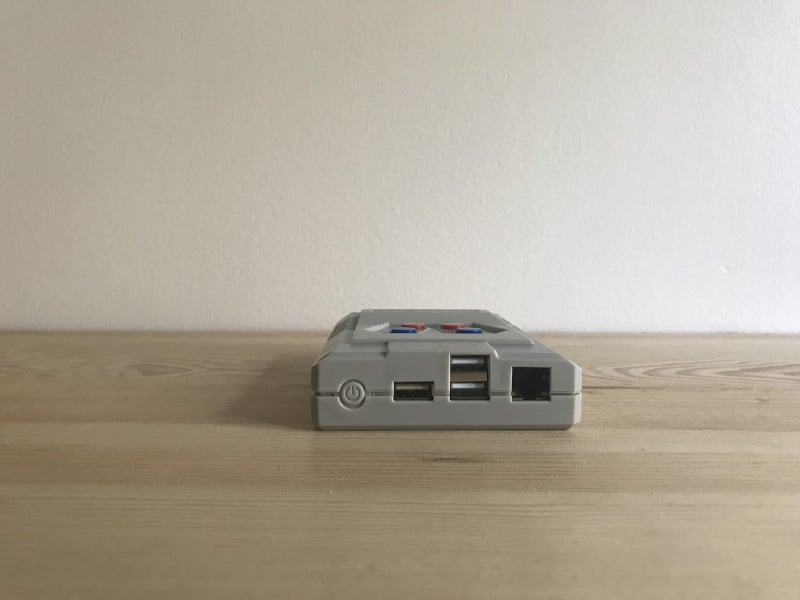
On the left side of the device, you’ll find three features. You have the charge port which is a microUSB. There is also the volume wheel and last of all is the 3.5mm headphone jack. On the right side of the RetroStone2 is another three features. The microSD card slot, the full sized HDMI out port, and the “GPIO” buttons. I called it GPIO because that’s what the instructions call it. It’s nothing I have needed to use, but it looks to me to be a brightness rocker. Finally, on the top is the power button. Next to that, you’ll find three USB 2.0 ports and an ethernet port. These are all part of the single-board PC inside the RetroStone2. So all in all, a lot of features and a great build! - Removable battery. Previously, some of the products that 8BCraft churned out didn’t let you remove the battery. This irked people that wanted to replace or improve the battery. Now they officially can do so if they’d like. There isn’t a whole lot to say on this matter. It would be good if 8BCraft offered replacement batteries as something you could buy from their site. The batteries appear to be larger than a Nokia battery. Even when googling the model number of the battery I come up with nothing. So I’m not entirely certain what good having a removable battery would be other than forcibly powering off the system if the power button doesn’t work.
- Preassembled. There have been instances in the past where 8BCraft required that you had your own Raspberry Pi and knew your way around craft/home kits (I’m looking at you RaspiBoy). With the RetroStone series of handhelds, these worries are out the window. If you didn’t already notice, you don’t have to have a Raspberry Pi already and you don’t have to know how to assemble the parts given or sift through an instruction manual. You just get the product at the front door and it’s usable. The only “heavy lifting” you’ll have to do is to flash the microSD card. We’ll have a tutorial for doing so within a day of today, so hold tight.
- Power button. Previously, issues would arise with the power button. You had to jump through hoops to get your 8BCraft product to go to sleep versus power all of the way off. This could cause corruption on your microSD card if done incorrectly. These worries are out of the picture now that there is a home button you can gently press to put it to sleep without installing extra functionality to your Emulation Station. If you want to power the whole thing down safely, you can also hold it for 10-15 seconds. So there is a win/win overall with this new power button. It definitely takes some getting used to as there is almost no travel to it. It barely feels like a button at all.
- Buttons galore. Yes, we’ve already talked about the fact that there are eight buttons on the front and back. Now let’s talk about what that means and how that adds or detracts from the compatibility of ROMs. Basically, if you’re playing any game from the original Atari through the NES, you’re going to have a fun time with this. If you’re playing on a retro game that is from a console that has six buttons, things could get tricky. You may find that while the SNES has four buttons on the front, it has two on the back. This could be slightly uncomfortable for you to have L and R shoulder buttons on the back.
The Genesis controller has up to six on the front and a mode button on top. This means you are going to have to have four buttons used on the front, two on the back (in whatever configuration) and one set as the mode. You can see where I’m going with this, it could be tricky depending on the console. No matter what, none are going to be the way they felt back when you were a kid. Having said all of that, I will state that if you can get used to these controls, it could be great. You could be in a world of paradise carrying around a handheld that supports all of the games you’ve collected that came out over the last four decades.

- Screen. The screen has been upgraded from previous iterations and looks great now. Before there would be the potential for tearing, ghosting, and artifacting. Now with a digital IPS screen, you lose most if not all of that. Now what you have is a big fat screen with beautiful viewing angles. The IPS screen is 3.5″ on the diagonal and boasts a 640 by 480 resolution on the screen. I have nothing else more to say on the matter, it’s just a really great screen and deserves its point on the list of reasons you should get a RetroStone2.
- Screen protector. This device is now fitted with a screen protector preinstalled on the screen. This is going to help you keep the screen safe since you’ll be taking it on the go. Don’t do what I did (you might’ve seen in the unboxing video) where you think it’s just a scratch guard and needs to be peeled off after unboxing. It’s all one piece and while it may look a bit strange when the system is asleep or turned off, it’s going to help you in the long run. I think it adds more value to the cost paid as you don’t have to worry about buying a screen protector and it keeps your current screen going great. Which is a beautiful segway into our next topic.
- Extra Screen. You now get an extra screen in the box to help you out. This is for those booboos that occur when no amount of screen protector could save the screen. Whether it’s dropping it on concrete or accidentally stepping on it. You have an extra prepped and ready to go for installation, complete with 3M adhesive on the back. To change the screen, gently pry up the screen after heating it with a hot gun or hairdryer. Then remove the 3M sticker off of the new screen and put it into place. This is an absolutely great touch that 8BCraft included and it adds more bang for your buck!
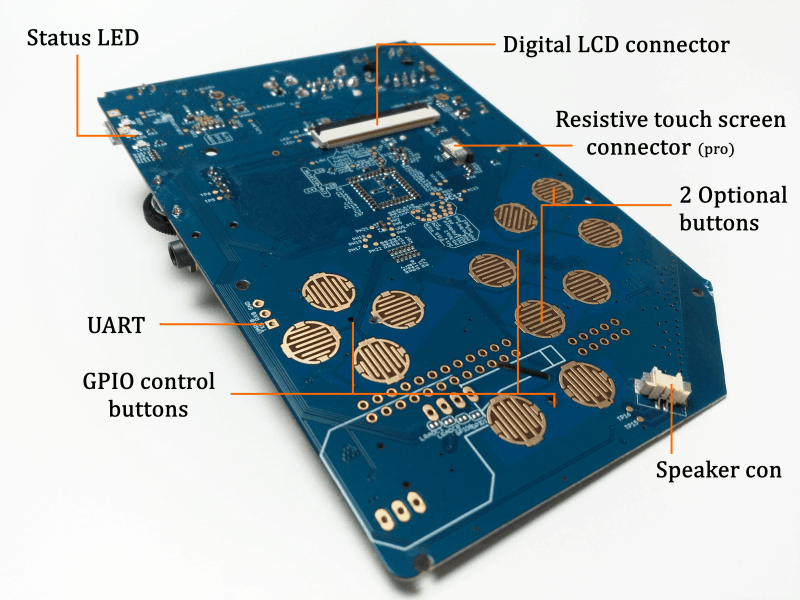
- LEDs. There isn’t much to say in this regard, 8BCraft has always installed LED lights to help you know things about the internals of the system.o The indicator LEDs are just to the left of the screen. There appear to be three of them in total. The lights let you know when it’s powered on, when it’s dying, and what the RetroStone2 is thinking when the device is resting on a blank screen. This is particularly useful to me because I might be staring at a black screen that’s still backlit. But since I see that there is still activity from the lights, I just remain patient with the device.
- Battery Life. The battery in the RetroStone2 is 1000 mAh over the previous version. So we’re already off on the right foot with this new iteration. However, there’s no way that we’re going to be able to tell you how long a 4000 mAh battery will last in the RetroStone2. It depends on screen brightness, volume, how many players are plugged in, how intensively taxing the game you’re playing is, just so many things. What I will say here is that I always left it on medium brightness, medium volume, played 2D games only, and used the screen (not HDMI out) and got 3-4 hours of playtime for 3 days. So your mileage will vary depending on what you do and how you do it, but I think you’ll be pleasantly surprised if you’re playing sensibly.
- Multiplayer. While this isn’t a feature that I’ll be using myself, it’s still a feature worth mentioning as it just works. Yes, you’ll have to have your own USB controllers already, but if you do, you can plug them in, configure them, and you’re good to go. This means that any ROM that you have legally obtained for use on your emulators that supports multiplayer can be played here. The maximum amount of players possible is four, which is great as most games support that. There are some games on some systems that support more than four, but it’s rare and most of them were…not great. So, as I said, I intend on using this exclusively for singleplayer games on the go. However, if you love multiplayer games with friends and family, you’re in for a treat!
- Emulator compatibility. In the features it mentioned that over 50 retro systems were able to be emulated on the RetroStone2. This is true and I want to show you everything possible right now to prove it! Amiga, AmstradPC, Apple II, Atari 2600, Atari 5200, Atari 7800, Atari 8bit (models 400 800 XL XE), Atari Lynx, Atari ST, Bally Astrocade, BBC Micro, Channel F, Colecovision, Commodore 64, Creativision, Dreamcast, Final Burn Alpha, Frotz Infocom, Game and Watch, Game Boy, Game Boy Advance, Game Boy Color, Game Gear, Intellivision, LaserDisc Emulator (Daphne), MAME, MasterSystem, MegaDrive/Genesis, MSX, Neo Geo Pocket, Neo Geo Pocket Color, NeoGeo, Nintendo 64, Nintendo NES, Nintendo DS, PC (DOS), PC Engine (TurboGrafx), Playstation 1, Playstation Portable, SAM Coupe, ScummVM, Sega32x, SegaCD, SG-1000, Super Nintendo, TI99/4A, Vectrex, Wonderswan, ZxSpectrum, and the Zx81.This also means that you can run homebrews that have been ported to the RetroStone2 such as CannonBall (Outrun engine), Cave story (lr-nxengine), Doom (lr-prboom), Duke Nukem 3D, Goonies 20th anniversary, Open Beats of Rage (OpenBOR), Prince of Persia – SDLPoP, Quake (tyrquake), Quake 2 (yamagi quake), Super Mario War, Wolfenstein3D, and of course Zelda engine – Solarus.
If you’re wondering about the compatibility of the emulators, that’s not anything that I’ll be covering while talking about the RetroStone2. The compatibility comes down more to the singleboard PC that they added in, which 8BCraft doesn’t manufacture themselves. But if you’re wondering if I had any slow downs, skips, or incompatible games thus far, the short answer is no. I haven’t found a game across the 25 that I’ve tested so far that didn’t work. But I didn’t bother with PS1, PSP, N64, or DS games as I figured that the compatibility would be low.
Cons:
- microUSB. Those of you out there who read my articles know that I’m very much on the bandwagon of EVERYTHING SHOULD BE USB-C BY NOW. That’s all I have to say about that. The fact that it’s so prevalent in our devices means we have plenty of USB-C cords to charge with. Or at least it should be another customization option upon ordering. They state on their website that the RetroStone2 doesn’t come with a microUSB cord as you probably have a lot of them in your house. I’m actually starting to doubt that. If your house is the same as mine, you probably have less and less as the devices that used microUSB are becoming less and less. I use them for PS4 controllers and that’s it.
- Mono. There isn’t much to say here. I’d love another speaker to be in the RetroStone2 so that the games that support stereo sound can be properly represented. I understand that this isn’t possible on the “Pro” model (more on that later), but if you get the standard model, you should have an option to add a second speaker in the lower lefthand corner of the device.
- ABXY. I loathe how far apart the front face buttons are. If the left and right face buttons were brought in half an inch, I’d be much happier. That said, I do realize that the idea here is to cater to adults that have large hands. I feel as though your mileage may vary with this, as it’s all relative. However, I would love if they gave you a button placement choice. Nintendo nails the button size and placement and I would love a button layout closer to Nintendo’s SNES controller as an option.
Final Thoughts:
I only reviewed the standard version of this handheld. There is a pro version of it for those of you who feel that this version is missing things. Click the purchase link down below, you’ll see what the Pro version has to offer. As for the overall thoughts of the standard RetroStone2, I think it’s an absolute winner. If your aim is to just have a casual product that can play every game on your shelf (in ROM form), this is it. I haven’t held such a refined piece of retro tech from a non-first party company ever. I know that there is emulation on PSP, PS Vita, and 3DS, but there’s just something special about this product. I mean it’s made exclusively for playing your retro games. The fact that 8BCraft keeps honing and refining their products means we can expect to see even more greatness come out from them in the future. If you can deal with the button layout, the microUSB port for charging, and the price point I’d say stop reading and just click the link below.
Purchase Link:
Click here to buy a RetroStone2. Feel free to customize it further, if your wallet allows!
Follow Up Articles:
Click here to read about flashing an operating system onto your newly acquired RetroStone2 (this must be done first).
Click here to read about flashing ROMs on to your newly acquired RetroStone2 (this comes after the OS).