After Team Xecuter has announced their AutoRCM Method it was largely discussed how this would work. The initial idea is pretty simple though and has already been thought about over and over from Team Reswitched. AutoRCM works because of a design “Mistake” by Nintendo. If boot0 in the boot chain is broken for some reason the switch panics and automatically boots into RCM without the need to press VOL_UP and a jig. This also means that as long as boot0 is broken you can only boot Payloads booted over RCM and not into the normal Horizon OS.
This Payload by Rajkosto does exactly this. It corrupts the first bytes of every Public Key in boot0 and therefore the Switch is unable to boot normally and auto-boots into RCM.
At the moment it is not advised to use this since both Hekate and Atmosphere are not user-friendly enough to be used daily (Both, for example, lack the ability to use warm-boot/Stand-by)
If you still want to try this all you need it a PC with USB 3.0 Ports or if using Linux you can also use Patched USB2.0 Drivers, any fusee launcher of your liking (For Windows I use TegraRcmSmash) and the briccmii payload.
First off if you’ve never used RCM on your Windows PC before you’ll have to install the correct Drivers to even be able to use RCM.
1. Get your Switch into RCM mode by either bridging Pin 9 and 10 on the Joycon or by bridging Pins 1 and 10 on your Switch and pressing VOL_UP. While doing that plug it into your Windows PC. It should show up somewhere (like Device manager) as “APX”
2. Download and run Zadig driver installer from https://zadig.akeo.ie/
3. From the device list, choose APX (if it’s not showing up in the list, go to Options menu and check List All Devices)
4. For the driver type, cycle the arrows until you see libusbK (v3.0.7.0) in the text box (IMPORTANT!)
5. Click the big Install Driver button. Device manager should now show “APX” under libusbK USB Devices tree item.
Next up we can brick our Switch to only ever start in RCM Mode.
Just to be on the save side I would still advise anyone who wishes to try this to always keep a raw NAND Backup somewhere save if you don’t have one anywhere yet even though you can revert this.
1. Boot your Switch by briding Pins 10 and 9 on your Joycon or pin 1 and 10 on your Switch. Then Hold VOL_UP on your Switch and insert the USB-C Cable.
2. Now just drag and drop the briccmii.bin payload on TegraRcmSmash.exe
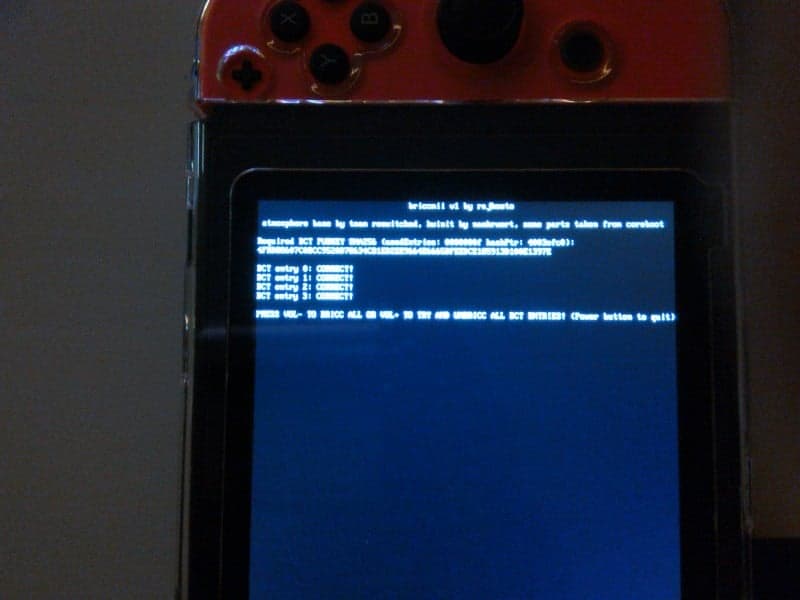
3. If everything worked you should now see this menu on your Switch

4. Just press VOL_DOWN now to brick your Switch or if you want to restore your Switch to normal functionality press VOL_UP to restore the bricked keys. If you just wanna exit without doing anything press the Power Button.
This is pretty great for those people that don’t like shorting their Pins by themselves or who just don’t wanna buy a jig but else I’m rather hesitant to brick my Switch on Purpose
I do look forward to playing Splatoon 2 and my 3.0.1 copy of Zelda BOTW though when Atmosphere gets released


