As I have been on a Switch accessory tangent recently, I figured, why stop now? Today’s accessory of discussion is the GC to SW Controller Adapter from Brook Accessory (aka Brook Design). This is a converter for your Gamecube controllers that allow them to run on the Switch. It is a less expensive option that exists than the official release of the Gamecube to Wii U adapter that now works on the Switch, from Nintendo. It also has some additional features. So I’m going to discuss every little nuance, issue, and feature of this device. You in? Let’s do it, then!
 Here is a list of the features that this device touts:
- ‘The best accessory for SUPER BOMBERMAN R!
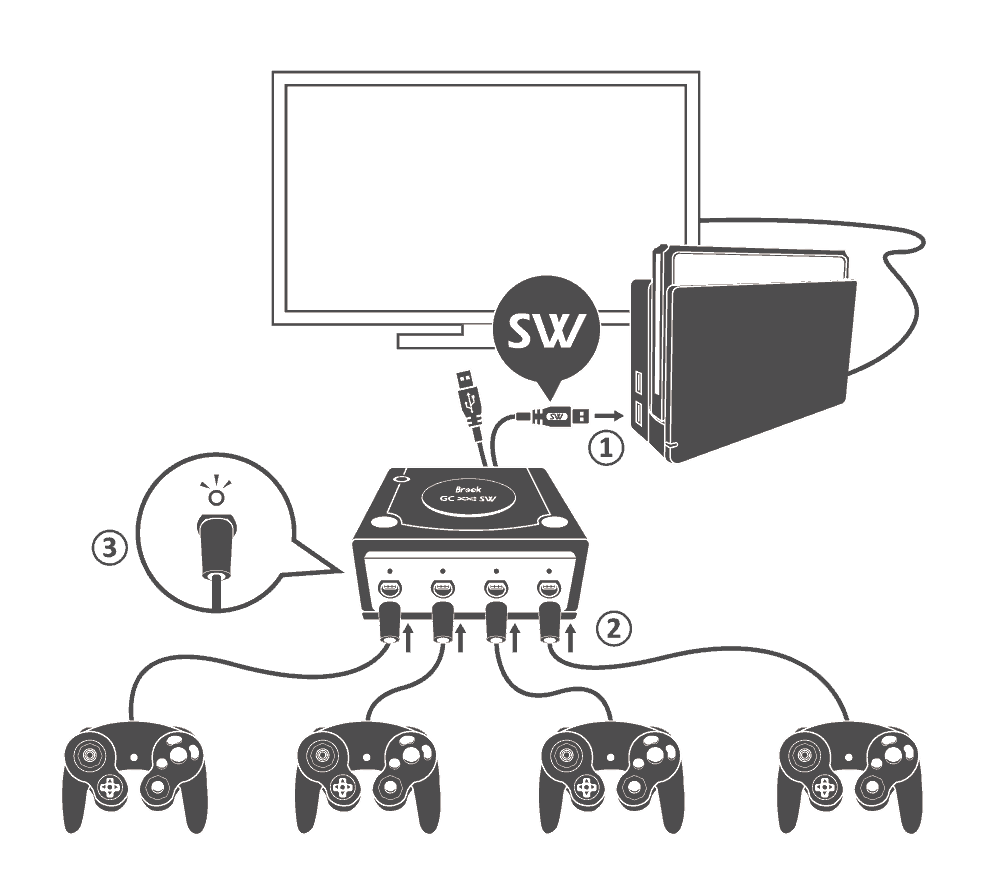
- With the GC to SW Controller Adapter, you can connect 4 Gamecube controller to your Switch.
- And if you connect 2 GC to SW Controller Adapter,
up to 8 friends can play at the same time! - Support Turbo fire function!! ‘
What all comes in the box?:
The very short answer is…not much. Usually, as gamers, we’re used to having a multitude of cords or ports to worry about which cords to insert. This time around, as you’ll see in my three-minute unboxing video below, you get precisely what the cover shows you.
Buttons, Ports, & Cables:
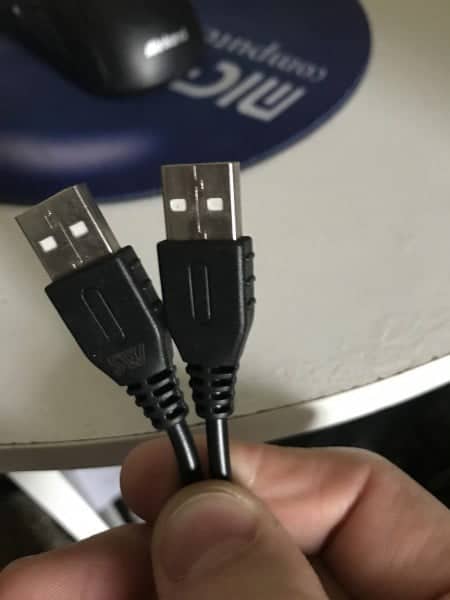
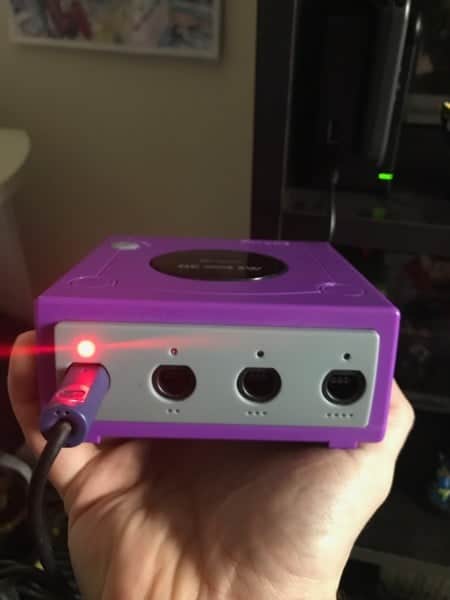
As you saw in the video (and if you didn’t watch it, that’s fine too), this device is quite…plain. It has two USB cords coming out of the back of the device. One is presumably for the PC and one is for the Switch. On the Wii U version of this, they had the USB different colors. This was so that you could know which cord was for which. On this version, they are both black cords and the way that they indicate what is what is different. They don’t mention which cord is for the PC functionality at all. What they do instead is just simply label the other USB cord with an “SW” on it. It’s engraved in the black plastic and very hard to see (see the picture below this paragraph). Also, on the topic of these cords, they are quite short. At their longest, I would say that they are 6″ (15.25 CM). This may have been a great idea when they were originally designing this to work on the Wii U. But I would say that given some setups and locations of the Switch dock, this is a bad idea. It should at least be double the length. There are just tons of people who have their Switch docks on small tabletops/countertops/desktops and this means limited space. Not to mention the people who have their Switch docks mounted to a wall and don’t want to mount an accessory to the wall as well. If the cord were longer, they could just rest the GC to SW Controller Adapter on the floor or another surface.
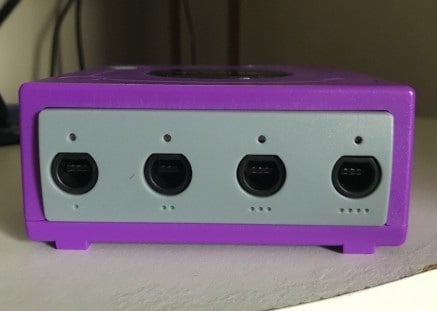
There is a turbo button on the top of the Gamecube-esque designed box. This is precisely where the power button is on a standard Gamecube. So I definitely like the thought that they put behind the button. There are four Gamecube ports on the front of the box as well. There are other circles on the top where on the Gamecube would be a reset button and an open button accordingly. However, this device just is hard plastic where those buttons would be since there is no need for a tray to open on it for example. There are four screw holes at the bottom, but even in terms of modifying this device, I can’t see any reason of wanting to open it up.
Design:
The design, as mentioned before is stylized as a Gamecube. This is for so many reasons. I think the first one is marketing, naturally. But I also think that they did this so that younger people might understand the correlation and know that they need to grab the miniature Gamecube device and plug it in to be able to use their Gamecube controllers. It too has four feet on the bottom much like the original Gamecube. However, the feet on this device are simply plastic and are only there for the illusion. They simply do nothing if you or someone you’re playing with tugs too hard on their controller. This not only can pull the GC to SW Controller Adapter but potentially can pull over your whole device.
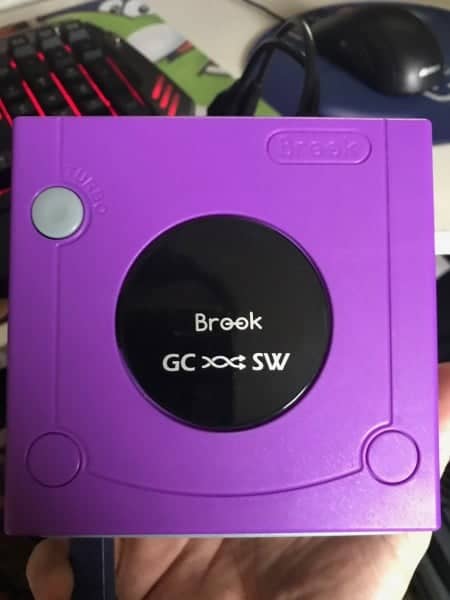
The black circle on the top that reads “Gamecube” on a standard Gamecube says “Brook GC ~ SW” on this one. The one released for the Wii U I’ve noticed simply says “Brook” on the top. So that’s another easy way to know that you have bought the Wii U one that does not work on the Switch. Above each of the Gamecube controller ports are LED lights. They illuminate in red when a compatible controller is plugged in, more on that a little later. Each of the four controllers, just as the Gamecube has, have little, numbered indentations below the ports. This is to let each player know where they fall numerically so there is no on-screen confusion.
Switch Functionality:
Straight off the bat, when you put a Gamecube controller into the port, you’ll notice a tight connection. There is a nice little “pop” when you get the controller into the port. This is comforting to those who fear that the controller might come out of the device if tugged too hard. Once you look over the instructions for making this work, you see that it is the same as all other accessories of this type. All that you do is use your normal Switch controls to navigate down to the Controllers icon on the Home Screen. You’ll then choose to Change Grip/Order. Once you’re in there, simply press the L and R buttons together on the Gamecube controller and it should show up. Once it does, just press B on the Gamecube controller until you’ve backed out. One thing worth noticing was that the Wavebird controller simply does not work, don’t even bother trying.
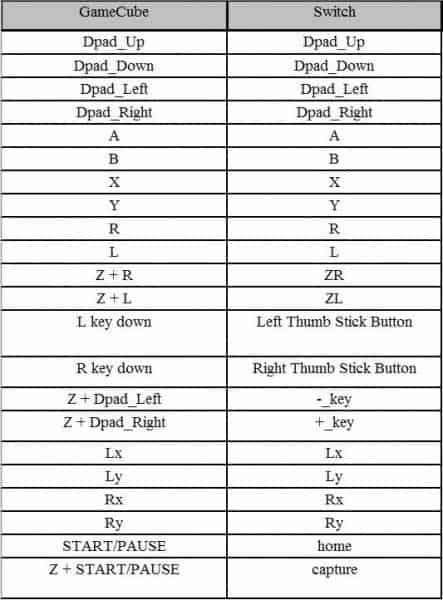
So out of the box, the Start button on your Gamecube controller will now function as the Home button of your controller. It’s kind of nice that they changed the configuration around a bit. How do you pause, you may wonder. Usually, that is done by pressing the + button on your Switch controller. On the Gamecube controller, that is done by pressing the Z and Right D-Pad button, which isn’t terrible. I wish it was Start and Right D-Pad so that it felt more natural. To use the minus button (-), you just press Z and Left D-Pad button. If you want to take a screenshot, you can do that as well. To invoke the screenshot button, simply press Z and Start together.
I have to say, it’s pretty smart of them to give us the buttons back that we lost by using a Gamecube controller. However, there are other buttons that we lost. Fear not, they’re all remapped somehow! But I’m not going to sit here and list all of those off. Here is the list of what does what, that way if and when you buy one of these, you have a full knowledge of your buttons.
PC Functionality:
This is almost a moot point. You’ll read more in my overview down below, of course, but let me give a quick rundown. I couldn’t find any instructions, documentation, or drivers for this device. There was no auto recognizing of it from my Windows PC. It didn’t even perceive the device as a generic USB. Now maybe it’s because of the version of Windows that I’m running. I don’t have Windows 10 and everyone mentions how 10 is great for gamers. But other than that, it was just defunct. It could be that my model was broken in some way. But I truly doubt it. This box is solid and durable. The cords on it are thick and don’t seem to crack or fray easily. I just think that they added the PC ability for people who know what they’re doing and can make USB controllers work on their PC’s. But this device is not for the computer layman.
But to make up for lack of true PC support here is a video of 8 player multiplayer in Super Bomberman R!
Overview:
I would say that this device is pretty decent, despite its shortcomings. The cord length is one of the biggest issues for me. Where you save money buying this device versus the official Nintendo version, you spend more needing to get a USB extension cord or just outright letting the whole box dangle. I also think that they could’ve absolutely added a Turbo Reset button may be in the location of the Reset button of the original Gamecube. This saves you from the aforementioned having to unplug that Gamecube controller and plugging it back in. Maybe just hold the Z button on the controller and press Turbo Reset at the same time. It would not be that hard to remedy.
All in all, if you’re in the market for something like this for your Switch get this one. I personally believe that this device is leaps and bounds better than the current Nintendo offerings. It also surpasses (at the time of this article) the Mayflash Gamecube to Wii U/Switch adapter. I couldn’t get more than the first slot to work on that device when using it on the Switch. The fact that they replaced the missing buttons with simple remaps helps beat the competition. Along with the inclusion of a Turbo button so that you can cheat your way through shoot ’em ups (and other games) if you so choose! The fact that you can use two of them simultaneously does not hurt either. Especially because this box is currently the only one that offers that feature.
If you’re getting it only for PC use though, I think you’ll find other solutions that are easier on the wallet. It’s also rare that you would ever need to have four controllers plugged into your PC at once. The trouble of getting it set up on a standard PC due to its lack of drivers is frustrating. Windows didn’t even understand this device as a generic USB controller. Furthermore, it only mentioned PC compatibility on the box in the lower right-hand corner on the front. It doesn’t mention it anywhere else and like the Switch instructions in the box, it comes with zero PC instructions.
Here is a quick walkthrough of the GC to SW Controller Adapter:
So you’re interested in this accessory? Click here and use code INFORMER.
If it’s sold out on Play Asia, no worries, click here.
Stay tuned here on Hackinformer.com for more reviews and follow us on Twitter @Hackinformer
If you like the author’s work follow him on Twitter @V1RACY