This article is part one of a two part review. I’m covering both of 8bitmod’s newest MemCard PROs and once the second half is live, I’ll put the link here so you don’t have to search for it. Speaking of which, I already have a review for the first MemCard PRO for the PS1, you can find that here. And now, without further waffling, let’s get into it!
Description:
‘The brand new MemCard PRO2 for the original PlayStation 2 and PlayStation 1 consoles is the last Memory Card you will ever need!
No more piles of memory cards, no more guessing where your precious save is, and no more corrupt saves!
The MemCard PRO2 solves the problem of storing your game’s saves forever!’
Features:
- Larger 128×64 Monochrome OLED display that shows the loaded virtual memory card, status icons and other information
- Supports any microSD card, from 1GB to 2TB. Each 1GB of storage provides enough space for 8192 PS1 memory cards or 128 8MB PS2 memory cards
- WiFi connectivity and remote features through a WebUI and FTP Server
- Cloud backups / cloud saving (multiple providers supported – details will be announced at a later date)
- Switch active channels and navigate through the virtual memory cards with two physical buttons on the device
- Easy wireless network setup from a wireless device’s web browser, by connecting to the MemCard PRO2’s access point.
- Supports a special set of instructions for automatic loading, game info and remote control (GameID & GameDB via ODE for PS1 / OPL for PS2)
- High quality manufacturing with an injection molded shell and hard gold plated PCB contacts.
- USB flash drive support (externally powered)
- USB host mode lets the MemCard PRO2 connect to your computer and act as an SD card reader.
- Load and manage stored memory cards remotely through the WebUI
- Easily access and manage the physical files on your MemCard PRO2 microSD card over an FTP client
- Launch FMCB directly from a virtual memory card!
Unboxing:
Pros:
- Build Quality. Well, I just want to start out by apologizing to you, the audience. I incredibly sorry for promising several pictures of the inside of the device. There wasn’t much too look at other than the side in the picture below. If I took it apart any further, the other side would’ve been hard to put back together. It’s screen is located on the opposite side and the screen is both latched and glued in place. Once you remove the glue, it’s hard to get back in. That’s a story for my part 2 review in which I discuss the MemCard PRO GC. But anyway, I didn’t want to take it apart and not be able to have it have structural integrity upon putting it back together.
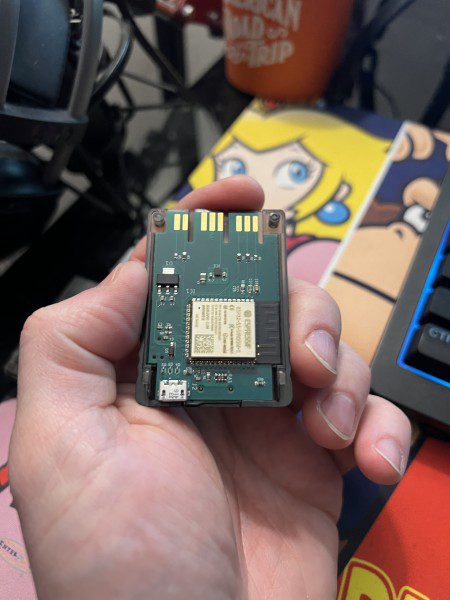
- That story alone should lend itself to you understanding how sturdy this little guy is if you just leave it assembled. What I also found interesting is the fact that the screws were very thick and quite snug in their holes. Even more interesting was the fact that they’re not magnetic. I thought if metal was thick and hard that it meant it is magnetic and if it’s a soft, pliable metal that it’s not magnetic. Either way, getting into inside the MemCard PRO2 may actually be possible, but I’m not going to risk breaking mine to find out. In my part 2 review, I’ll see if I can get the MemCard PRO GC open. If so, then that one will have images of it internals.
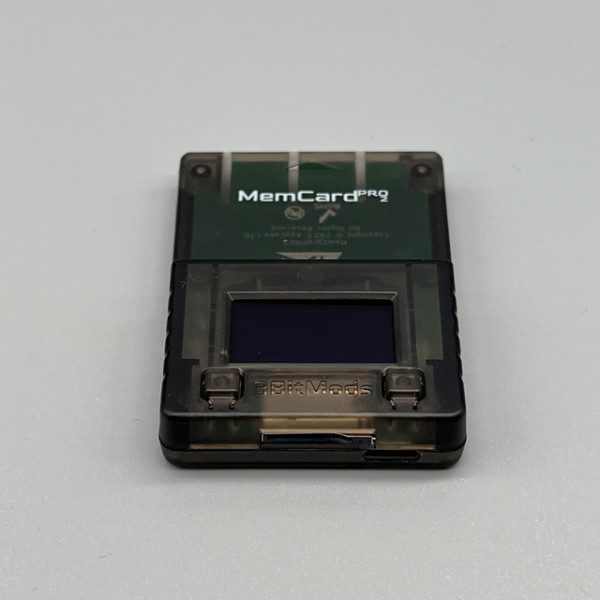
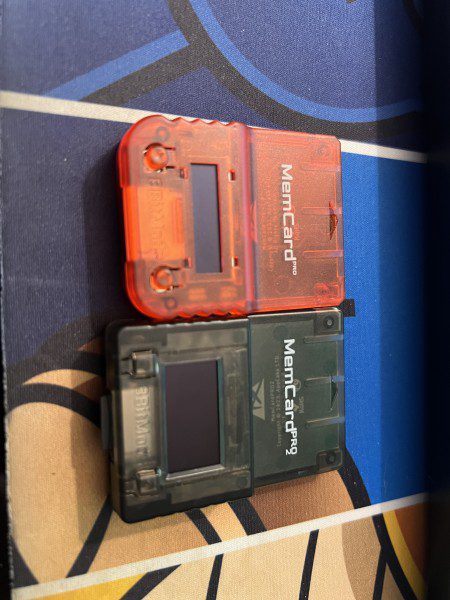
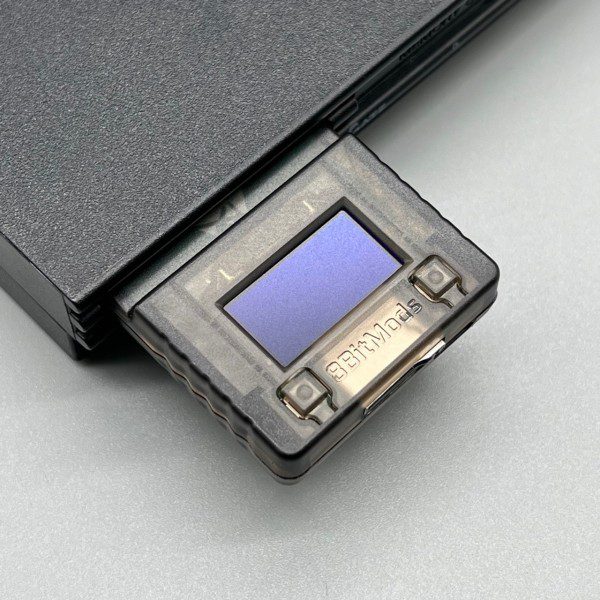
The screen, as advertised, is actually larger than their previous MemCard PRO model that works exclusively on the PS1. This does increase the overall length of the device sticking out from the front of the console, but it is indiscernible unless you have the both of them side by side to compare. It’s almost exactly, if not exactly, double the height of the previous screen. This makes reading icons and information simpler. Especially because I’m willing to bet that the PS2 has more information to show especially if you’re using OPL (more on that later). But if you’re using this on PS1 and you don’t have an ODE, it’s likely that the half height screen is enough. The double size screen looks brilliant in every light since it’s an OLED screen with a matte surface. The only comparison the the MemCard PRO 1 is that there isn’t any ventilation on the bottom. I’m not certain that it was even necessary on the first model though.
Continuing on, you’ll find buttons below the screen on every model they’ve made thus far. They are side by side with some space in between, and they serve a few different purposes. These clicky buttons can be both used for navigation or to activate certain menus. Finally, at the front center is where you’ll find the microSD card slot and the microUSB port. The microSD card slot is one of my favorites. It’s spring and click action is absolutely solid and thus yield a solid connection when inserted. The microUSB port is there for expandable storage like external drives whether mechanical or solid state, both should work as long as they’re formatted correctly in the first place. Just make sure that your external drive is powered by another source otherwise the MCP2 won’t recognize it.
- Compatibility. This console works on many things that Sony has released onto the world. And since, if you’re reading this, you likely have one of those consoles, you may also own additional consoles. So if you have one of these, you’ll get your money’s worth. If you have more than one to use it on, you’ll increase your value. The MCP2 is advertised as working on PS1/PS2. But because Sony is so prolific, what that should actually mean for you is that it works on at least eight devices. PlayStation, PSOne, PSX, PlayStation 2, PS2 Slim, PS2 Dev, PS2 Test, PS3 (using adapter) and very likely the Sony Bravia (PS2 TV) shown below. They don’t advertise the TV or PSX, but I just can’t imagine that they wouldn’t work, and if I get the confirmation that they for sure do not work, then I’ll update this article!

- Setup. The setup of the device is incredibly simple. In fact, it’s so simple that I’m going to walk you through it right now so that you don’t even need to worry about looking that part up. Step one is to “Quick Format” a microSD card of your size choice using the SD Card Formatter program. Next you download the current update (link at the bottom). Extract the contents of the “mcp2” folder into the root of the microSD card. Now insert the microSD card in the MCP2 and plug it into your PS2. Once you power on the PS2 it installs the firmware and immediately boots into your very first virtual memory card.

- WebUI. The best feature of this whole device, in my opinion, is the fact that you don’t have to rely on the PC. If you want to you can absolutely take out your microSD or external memory and then plug it into your computer and transfer stuff back and forth. And you can go about doing things the longer way if you’d like, some people prefer the thorough methods. I personally prefer the webUI that they’ve built. You can use it to do a few things such as FTP or change settings on the MCP2 itself. The fact that you can use your PC to queue up FileZilla and transfer your favorite saves from your PS2 games you’ve been emulating rocks. Heck, maybe you just can’t get past a certain point in your ongoing game and you download a save from GameFAQs to use on your MCP2, you can also transfer it to it. This also lets you backup saves from your console to the safety of your PC if you’d like.
The only step you need to do is setting up the wifi, but don’t stress, they’ve made it simple as can be. Use your phone or wifi connected computer, then hold the left button on the MCP2 until you see it give you a menu. Then navigate down to wifi setup. It then creates a wifi signal that you can connect to on your phone/pc. It will prompt you for the password of mcpadmin and then you’ll successfully connect. It then gives you an IP address to type in on your browser to finish the connection. Once you do that, then you can connect to your standard wifi and use the new IP address it gives you, each time.
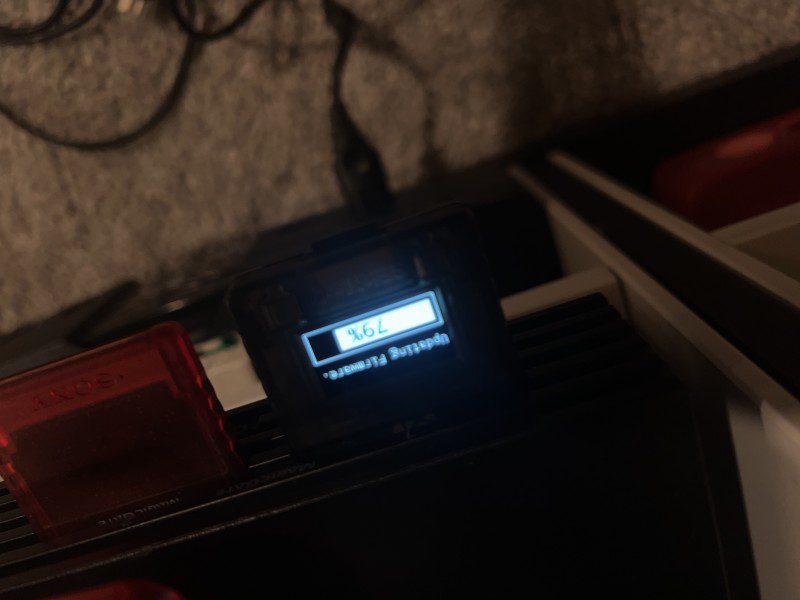
- Updating. You know how much I love my segues, ladies and gents. Well, updating is yet another thing that the webUI can do. But that’s not the only way that you can update. Let’s talk about both methods and then you can hear me contradict myself from earlier. If you want to do it the way that is outlined in the manual, it is exactly the same as what you do the very first time that you setup your MCP2. The other method, as alluded to, is using the webUI. Go to the webUI by typing the IP address that it gave you for using each time. Once you’re in the webUI, you’ll click/tap the lower right icon that has a gear on the image called “Settings”. Now scroll to the bottom where it mentions the firmware version. It will tell you the current version on the left and if there is an update available, it will be on the right. You just cannot miss it, it’s a giant yellow button that will say “UPDATE AVAILABLE!”. Then you tap it and let it run its course. And if something goes wrong, during the process or if a feature no longer works, you’re not out of luck. You can always manually reinstall the update just by putting a fresh copy of it on the root, popping it into the MemCard PRO 2 and letting it run its course.
Now, I’m going to contradict myself here, as promised. In the last section, about webUI, I said I love using it over doing things the long, manual way. Having said that, I only like using it for the features and moving saves. When it comes to updates, after the minor hiccups I had using webUI to update, I am going to stick to doing it the manual way. To each their own, and it’s probably just a “once bitten, twice shy” sort of scenario. But I’ll keep doing it manually from now on.
- Abilities. So, out of the box, what abilities does the MCP2 even have? Well, technically, out of the box, it doesn’t have any abilities. You will have to do the initial setup that we talked about in order to get it up and running. You’ll be started with the beginning “Memory Card 1”. If you’re trying to use a storage device over two terabytes, it won’t work apparently, so stick with one that is one gigabyte up to two terabytes. Once that is in order, you’ll now have it be able to create one memory card and each memory card has 8 channels. If that single memory card with 8 channels doesn’t end up being enough, you can create another one on the fly. You can tap the left button on the MCP2 to go to the next channel or you can press and hold the right button to go the the next full virtual memory card. Additionally, you can manually change the channels or which virtual memory card is mounted using webUI, so you don’t have to get off of the couch while playing your game. Although, if you’re getting up to change discs anyway, it’s just as easy to press a button. These features work on both the PS1 and PS2 without any extra fuss or setup. One final note about the default abilities, I should mention extending the size. You see, to start with, it makes 8MB cards, but you can use a webUI option to have it automatically now have it create 16MB and even 32MB. According to the MCP2 box, the ability to create 128MB cards are eventually coming. Just be sure you’re using a class 10 card, as class 4 may not be quick enough. And the other caveat is that while most games support sizes larger than 8MB, some do not. So if you have an issue with one, change it back to 8MB, start the game again, let it create the smaller card, and then set it back to 16 or 32 megabytes for other games.
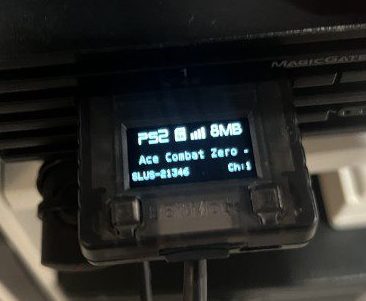
- Extended Abilities. And now the next segue is a deep rabbit hole! We have two different consoles to talk about with the extended abilities. What I’m meaning by that is basically what the MCP2 can do for you on PS1 and PS2 if you have mods/hacks present on the console. I want to start off by saying that I don’t have a PSIO or an xStation (yet) for my PS1, so I’m not certain how it works on there. But I do know that it should automatically detect the game name and show it on the little OLED screen all while automatically creating a virtual memory card with 8 channels for that specific game. But I can go into deep detail of what it can do on the PS2 with mods!
On the PS2, if you have a harddrive installed and use Free McBoot to launch into OPL, the MCP2 is your buddy. (If that last sentence made no sense to you, hold on, I’m coming back to you.) If you set it up to be a secondary card slot memory card, then you’ll update your OPL to have the GameID feature and it will automatically show up on the MCP2 screen. This, again, also means it will make an all new memory card with 8 channels upon detecting the new game. And if you’ve already played the game, it will simply load the created virtual memory card and show the game name on the little screen again. With both consoles, you have an option in webUI to have it reboot either already loaded with that memory card or to have it start from Memory Card 1 which by default is the boot card. I turned that off for a reason I’ll get into later.
Now for the people who didn’t know what I meant with all of the jargon about the PS2 mods, I have good news for you. If you are wanting a way to mod your PS2 to load Free McBoot or Fortuna which are effectively a PS2 jailbreak and you need a way to launch Open PS2 Loader, you can do all of that with the MCP2. And you can leave it in the first memory card slot. I won’t be describing here how to do so, because that is more hoops than this review can cover. If you want an instructional guide on it, leave a comment and if I get at least 10 comments requesting it, then I’ll absolutely post one.
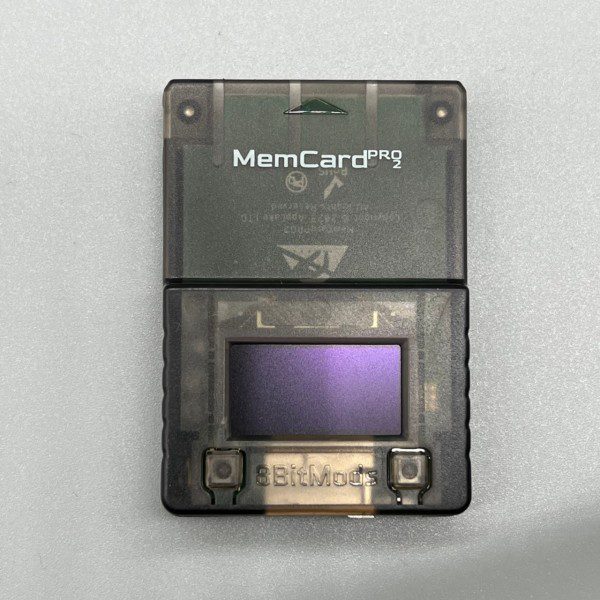
- Colors. This topic isn’t overly complicated, but I did want to quickly touch upon it. It seems that with the original MemCard PRO they wanted to match the fun colors of the controllers that were released for the PS1. With respect to the MemCard PRO2, they seemed to go with the route of matching the PS2 console that you loved the most. To that end, they only have two colors for the MCP2. They have the solid, charcoal black and they also make a smoke black. The charcoal black is flat and matches most PS2 models. The smoke black, is still black and matches most PS2’s but it also has a transparent edge to it. This is to make you have ooey, gooey nostalgic memories of a time when practically everything was transparent. The one that they sent to me for review is the smoke black. It’s really nice to look at and you also get a little sneaky-peeky inside of the device to see a little of its inner workings!
- Brightness. There is a feature in webUI that lets you adjust the brightness and darkness of the screen. I just wanted to quickly state that I couldn’t get it to go brighter or darker. But then I took the time to actually read the manual and not bother anyone at 8BitMods about it. Upon reading the manual, I found that there is a setting that is above the brightness that you can turn on or off called “Dim”. This feature is great because if you enable it then your OLED screen will dim after 30 seconds to help avoid burn in. It turns out though, that if you have it enabled, you cannot change the brightness scale. So if you want to turn the brightness all of the way down, then you have to turn the dim feature off. Same goes if you want it to be as bright as possible. If you have it set to dim it is already on the lowest setting of the brightness scale. If you turn dim off, then you have nine more steps of brightness above it to increase the brightness. So there is a lot of customization. Having said that, I just realized that leaving it on dim makes more sense for myself. I want to keep burn in out of the question for as long as possible, you know?
- Fit & Finish. And finally, the last positive that you can take to the bank, how it feels. Now feeling isn’t just the subject of moving something around in your hand and seeing if you like the texture. In this context, feel also matters in terms of how it feels putting it in and pulling it out of a card slot. So let’s start with the hand feel and talk about the texture. It’s a really nice and smooth matte texture all over. I wouldn’t mind if my console’s controllers felt this way in my hands. But just be warned, it doesn’t match the texture of the PS2 console itself. That has a few more bumps and pits all over so it’s a bit more grippy when carrying it. And yes, the buttons on the front of it feel nice and clicky. There’s not any resistance from them and no force needed from you.
When it came time to putting it in the memory card slot of the PS2, it was a bit interesting. Upon my initial insertion of it, it kind of fought me on it. I don’t know if it was the PS2 or the MCP2, but it felt a bit “crunchy” and like I had to force past something. To be clear, there had just been a memory card in that slot, so there couldn’t have been anything jammed in there that didn’t belong. The previous card went in and came out easily. I will say that once I took it out, it came out smoothly. I checked the screws on the bottom of the card to make sure they were flush with it and they were. Upon the second insertion, it went in just fine. I don’t really intend on ever taking it out of my PS2 again, but I thought I’d bring it up. The first time you put it into the memory card slot, do it patiently and gently.
Cons:
- IGR. This one is a sticking point for me, but I was assured that they’re trying to do something about it, even though the issue isn’t really on their end. This one is all about “IGR” or in-game reset. It’s a feature used in the Open PS2 Loader so that you can reset back to the game selection screen instead of getting off of your butt to reset the console manually. Typically you can do this and have it read the OPL elf file from the memory card and it will reset. But since the virtual memory card within the MCP2 is on whichever game you’re currently playing, the PS2 cannot find your elf file, so it resets back to the main PS2 operating system. This causes you to have to go to the PS2 and manually reset it anyway. A way around this is to not use the GameID function of the MCP2 and also use webUI to make it to where it automatically defaults back to the boot virtual memory card. But then you have to trade off organization for comfort and who knows how long we’ll have to do that.
- MicroUSB Port. Let’s be real, this should be a USB-C port, amiright? Maybe a future iteration down the road will have it, but on the flip side of the coin, it wouldn’t change the purpose or functionality of the port. If they ever future proof the MCP2 by adding a USB-C port, then I’ll very likely buy a new one for my main PS2 and then use this one for the slim PS2 that I own.
Final Thoughts:
The more that I experimented and discovered, the more I loved the MCP2. I am always of the mindset that there is good in every product, that there is a silver lining, and that the glass is half full. But with this product I didn’t need to find the good in it. I didn’t have to look high and low to find good or even great things about it. I started using it and was never disappointed and when I came across two hiccups, they were both things that are very likely to be fixed. Not only that, the downsides are even that big of a deal to me. They’re certainly not deal breakers. This product is priced too low in my opinion, but I’m sure they’re happy with the price point and I hope to see them make more memory devices in the future. I’m thinking Dreamcast and maybe even a low height save cartridge for Saturn that has a USB-C port and a microSD card slot?! What can I say, I like to dream big.