We’ve covered a lot on our site so far with the Sega Genesis/Mega Drive Mini. From buying a preloaded USB stick from True Blue, to loading games yourself with Project Lunar, to the rise of Hakchi2 CE supporting Genesis Mini now. Well, now we’re at the point where we get down and dirty and give you the instructions for Hakchi2’s process. So I’m ready if you’re ready, let’s do it!
Preamble:
This article assumes that you’ve done no previous mods to your system. If you’ve already used Project Lunar, this article is not for you. This is for virgin consoles that just want the simplicity of Hakchi2 for their Genesis.
What You Will Need:
- Sega Genesis Mini/Sega Mega Drive Mini
- A different microUSB cord that actually transfers data. The one supplied with the Sega Genesis Mini is not capable of data transfer, nor is the Playstation Classic microUSB cable. Make certain that the one end is already plugged into the PC.
- A Windows PC.
- Hakchi2 itself. Click here to download the installer. Make certain you install it now. Leave the default options marked and simply install it as is.
- Start up Hakchi2. Let it do what it will and don’t click anything just yet.
Instructions:
- First off, you should have a small explanation window popped up. It’s a hello window that mentions the simplicity of Hakchi2. We’ll definitely cover in depth that it mentions in 2 sentences. For now, just click the “Ok” button to proceed.
- There will be one more window that pops up, click “Ok” on it as well, we’ve already covered what it’s discussing.
- Now we need to connect our console to the PC in FEL Mode. So on the program in the top left corner is a “Kernal” tab. Click it and in the drop down menu you’ll see “Install/Repair”. Click it and then press “Yes”.
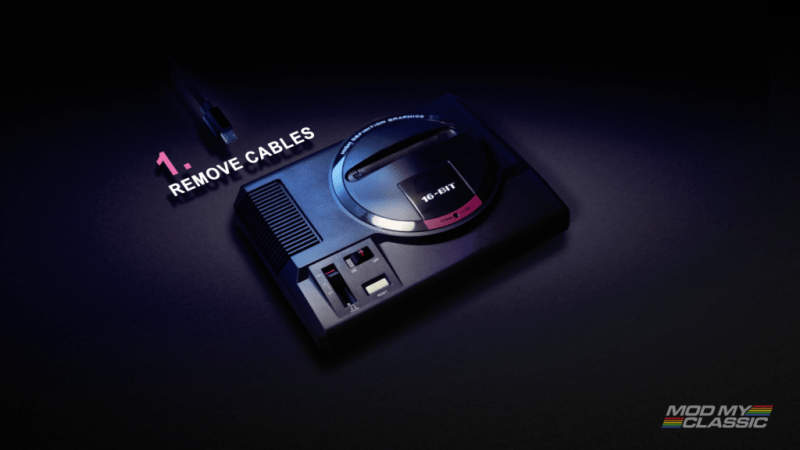
- The screen will pop up a new small window that says “Waiting for your mini…” so, now you’ll need to do the following.
- Remove any and all cables from your Sega Genesis Mini.

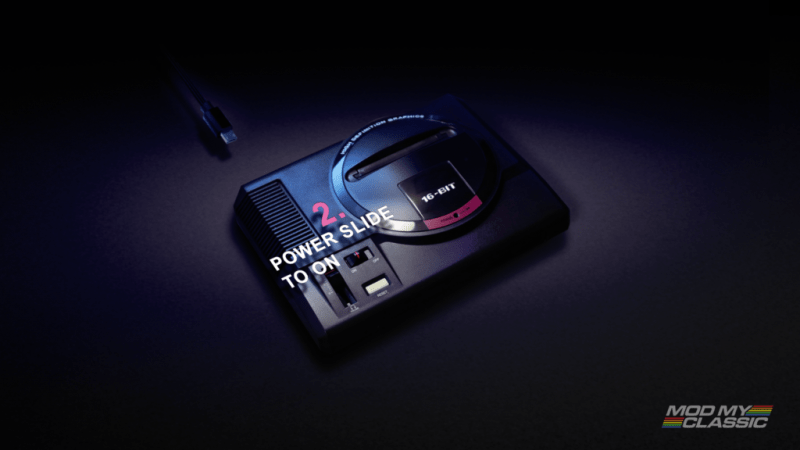
- Slide the power switch into the “ON” position.
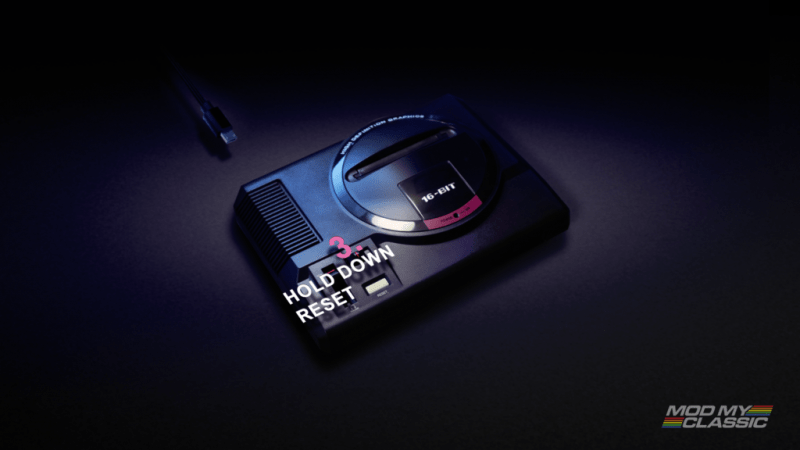
- With your non-dominant hand, hold down the “Reset” button.
- With your dominant hand, plug your data capable microUSB cord into the back of the Sega Genesis Mini.
- You will see the LED flashing. Once it finally stops flashing, you can then let go of the “Reset” button.
- Now you’ll see the PC screen show a loading bar stating that it’s uploading the kernel and such. Wait 5ish minutes for it to finish. It may ask you about permissions and such along the way, just keep saying yes and accepting the pop-ups.
- Once that has completed, you’ll have a window with a big green checkmark logo. Just press “Ok” to proceed. You’ll see in the lower left-hand corner of the main program a green circle and it will be flashing a small message “SSH Online”. This is what you’re looking for. If it’s still red, redo the above steps.
- We can now add games to the mini. You’ll notice on the left you’ll have every game on your Mini listed (in all of their regions). Just ignore them, you can leave them alone and proceed to add more games on top of them.
- To add more games, click the “Add more games” button under the list of games on the left side. You can also drag and drop into this window.
- You can now search for wherever your legally dumped Genesis ROMS are. Simply select as many ROMs as you would like to add, it accepts any Genesis game extension by the way, so no worries there.
- Once you’ve selected all of the games, click “Open” and a loading bar will happen as it queues the games into the list. Bear in mind the space of the NAND is limited to 192MB in total, so if you’ve chosen too many games, it will show you that it exceeds the capacity of the Genesis. So choose your games wisely.
- Once your games are in the list on the left-hand side, you can add default box art, you could add custom boxart, or you can just let it remain with a stock generic image and not worry about boxart. To do the minimum, you can highlight the new games you added, then right-click and choose “Download boxart”. It scrapes the artwork from Google.
- Now once you see the done menu, just know that it has the best the Google can find as the covers. If you want to further customize them, that’s on you, it will look great, but it is very tedious. The quick and dirty direction to do this is to click on an individual game you’d added, then click on the “Browse” button on the right to choose another Googled cover”.
- So after the boxart is in place and you’re ready to send the games to the system press “Synchronize selected games with mini” in the lower right-hand corner of the program.
- You’ll get a new pop up window, from here just press the “OK” button.
- There will be a new loading bar that comes up, from here simply wait while it transfers those games.
- Now you’ll have a green checkmark logo on a Done! window. Press the “Ok” button. And now you’re all done!
- Unplug your system, make certain it’s entirely powered off. And then plug it up into your TV to play it!


Final Notes:
Yes, there are extra features in Hakchi2. Folders, USB support using USB HOST, overclocking, emulators/cores for other console games, etc. We’re only really covering how to do the standard operation of Hakchi, adding games.