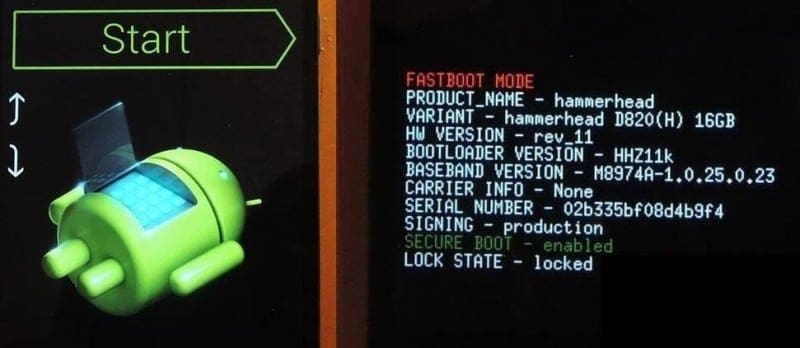
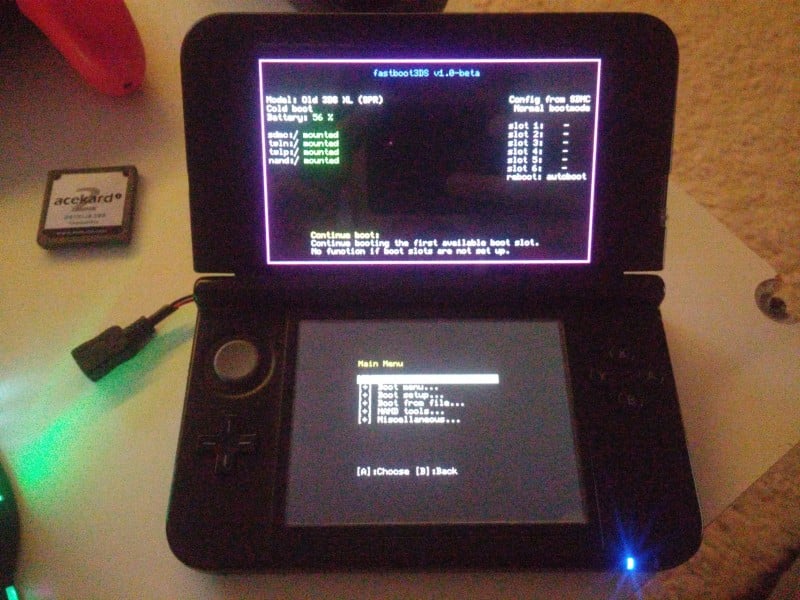
Merry Christmas everyone. Today derrek, profi200, and d0k3 have given us a really sweet present for our good old 3DS. Some of you may own an Android Device and are familiar with the fastboot mode. The functionality differs from manufacturer to manufacturer but simply said it allows for restoring the firmware, booting into other modes and so on. And thanks to derrek, profi200 and d0k3 we can also have such a sweet menu on our beloved 3DS from coldboot. What a fastboot looks like on an Android device.
This essentially replaces the need to use Luma3DS’s chain-loading (You can still use it though), using GodMode9 or Decrypt9WIP to backup or restore and nand backup or you can even boot a random firmware file from your SDCard thanks to the built-in File Browser. All of this is achieved by replacing the normal 3DS firm0 with this open-source alternative firm0. That also means that our 3DS needs to already be hacked so that you can install this. The good thing is that compatibility extends even up to people that still use a9lh on their 3DS.This software is still considered Beta but doesn’t actually contains any known feature-breaking bugs. These are the currently known bugs:
- Older releases of GodMode9 freeze when they are chainloaded via fastboot3DS. Use the nightly for now.
- Chainloading certain payloads from the menu cause temporary artifacts to pop up on the screen. This is a purely cosmetic issue and won’t affect fastboot3DS or the chainloaded payload in any way.
- Rebooting to TWL_FIRM / AGB_FIRM does not work in certain CFWs (among them Rei-Six and Cakes FW). When attempted, the system will softlock and you’ll need to hold the POWER button to exit.
If you happen to stumble over another bug, please open an issue in the official fastboot3DS repo on GitHub or contact the devs via other platforms.
So how do I install this? Pretty easy and straightforward. You only need the following:
– A 3DS with either Boot9Strapt(SigHax) or Arm9LoaderHax installed
– OpenFirmInstaller
– Fastboot3DS
1.) First off download both OpenFirmInstaller and Fastboot3DS and extract the archives.
2.) Depending on whether you use Boot9Strap or Arm9LoaderHax there are two different ways:
– Boot9Strap: Copy the OpenFirmInstaller.firm to either your Luma Chainloader folder or to the root of the SD and name it to boot.firm (I recommend putting it into the Luma chain-loader folder). Then create a folder on the root of your 3DS SDCard called “ofi” (without the quotation marks) and copy the fastboot3DS.firm inside it. Now continue with Step 3.

– Arm9LoaderHax: Copy the OpenFirmInstaller.bin to either your Luma Chainloader folder or to the root of the SD and name it arm9loaderhax.bin (I recommend putting it into the Luma chain-loader folder). Then create a folder on the root of your 3DS SDCard called “ofi” (without the quotation marks) and copy the fastboot3DS.firm inside it. Next, you’ll also have to copy the file called “secret_sector.bin” inside the ofi folder. I can’t link you to where you can download it but the MD5 for the file is 97eb0410ed2002a49ba221c0915d3f58.
Now continue with Step 3.
3.) Hold “start” to boot your Luma Chainloader and select OpenFirmInstaller or just start your 3DS to boot into OpenFirmInstaller. Now just wait for it to check all prerequisites and when it asks for the button confirmation just do it. When it’s done just press “A” and it will reboot.
 That’s it, you now have fastboot3DS installed on your 3DS. But now we will also have to set it up. If you had Arm9LoaderHax installed before this you will first have to update all your Payloads with the newer .firm payloads (Luma3DS, GodMode9, Decrypt9WIP if you don’t want to change, and so on)
1.) Press on “Boot Setup…” and then “Setup [slot 1]…”. There press on “Select [slot 1] firm” and select your Luma3DS (or other CFW) payload. It will automatically be set for auto-boot. If you want to continue using Luma3DS’s chain-loader you can skip the following step.
2.) Now we will also want to put GodMode9 and all the other helpful tools inside of there. Now press on “Setup [slot x]…” (Where the x is a slot number from 2-6) and press on “Select [slot x] firm”. Now just select the payload you want to be associated with. But instead of leaving it to autoboot we will want to assign a key combo for the payload. To do that just press on “Set [slot x] key combo” and hold the buttons you want to use for the key combo to launch the payload until you get kicked back to the Menu. Then just go back and do this for every payload you want to add. Just remember to use different key combos :P.
3.) Now you can choose which boot-mode you would like on your 3DS. To choose the boot mode go to “Boot Setup…” -> “Change Boot Mode…”. There you can choose between “normal boot” which will present you with the fastboot3DS Menu every boot and you’ll have to manually boot your payloads, “quick boot” which will display the fastboot3DS Splash at the 3ds boot and then autoboot your selected autoboot payload (In this case Luma3DS) or use “quiet boot” which will hide the fastboot3DS splash screen and autoboot your selected autoboot payload (In this case Luma3DS).
And that’s it for the configuration. Now just press on “Continue boot” to boot into your CFW and have fun playing games like you normally do. If you ever want to access the fastboot3DS Menu again just hold the “Home” Button while turning on the 3DS until the Menu pops up.
Thanks a lot to derrek, profi200, and d0k3 for this awesome piece of software which replaces the original 3DS Bootloader with a self-written one that can boot multiple payloads, boot payloads from a file-browser and backup and restore the NAND. This is another very useful addition the blown wide open 3DS eco-system
Source: Derrek (Twitter)

