If your looking to install RXTools on your 3DS and want a Gateway free solution, look no further. Before you use this tutorial read everything first then proceed.
Requirements:
- Old 3DS FW4.X – 9.2
- New 3DS FW 9.0 -9.2 (Not Stable)
- SD Card
- Entry Point to launch Homebrew/RXTools
- RXTools Nightly Build
- RXTools Nightly Build (Mirror)
- RXTools 3.0 Beta
- Python 2.7.11 (OLD 3DS & NEW 3DS Beta Build)
- homebrew launcher Starter Kit
- cetk
- Find the firmware.bin needed for reiNAND 2.1 (New 3DS only) [Github is your friend]
- slot0x25KeyX Generator (old 3ds FW6.X – 4.X) [you still need to find the KeyX]
- key_0x1B.bin and key_0x16.bin (New 3DS Beta Only) [pastebin is your friend]
- 3DS Multi emuNand Creator
- Database Files
- FBI
Setup OLD 3DS
The current state of 3.0 beta is not stable and will fail to boot multiple times. We at Team Hackinformer recommend using the nightly build for the OLD 3DS for the time being. Once it becomes more Stable I will update this article completely. If you chose to use the beta 3.0 build the setup instructions are the same.
- Connect your SD Card to the computer.
- Download the needed files and unzip them all.
- Install Python on your PC. Look in your RXTools nightly folder and run cdn_firm.py and is located in [rxTools_Most recent build\release\Tools]
- This will generate a FIRM folder in [rxTools_Most recent build\release\Tools]
- Rename the CETK file to 0004013800000002_cetk.bin and place it in [rxTools_Most recent build\release\Tools\firm]
- If your 3DS is FW6.x – 4.x, you need to run the slot0x25KeyX Generator and add the KeyX number and generate the slot0x25KeyX.bin
- Place slot0x25KeyX.bin in the root of your SD Card.
- Now move the firm folder to [rxTools_Most recent build\release\RXTools]
- Move the RXTools folder to the root of the SD Card [rxTools_Most recent build\release\RXTools]
- Move the homebrew launcher starter kit to the root of the SD Card.
- Move the RXTools homebrew into the 3DS folder on the SD Card [rxTools_Most recent build\release\ninjhax\RXTools]
- Move the rxinstaller.bin to the root of the SD Card and is located in [rxTools_Most recent build\release\mset]
- Now make a backup of the SD Card on the computer.
- Place the SD Card back into the 3DS.
SETUP NEW 3DS
The Beta 3.0 Build is recommend over the nightly release. However be aware using the RXTools Menu options are broken. It can randomly crash and fail to boot emuNAND alot. The beta build has the advantage over reiNAND by including region free cia installs.
BETA 3.0 TUTORIAL
- Connect your SD Card to the computer.
- Download the needed files and unzip them all.
- Install Python on your PC. Look in your RXTools nightly folder and run n3ds_cdn_firm and is located in [RxTools-3.0-beta\Tools]
- This will generate a FIRM folder in [rxTools_Most recent build\release\Tools]
- Add key_0x1B.bin and key_0x16.bin in the root of your SD Card.
- Now move the firm folder to [RxTools-3.0-beta\rxTools]
- Move the homebrew launcher starter kit to the root of the SD Card.
- Move the RXTools folder to the root of the SD Card. [RxTools-3.0-beta\rxTools]
- Move the RXTools homebrew into the 3DS folder on the SD Card [RxTools-3.0-beta\ninjhax\rxTools]
- Make a copy of the rxtools.3dsx and place it in the root of your SD Card. Located in the SD Card directory [3DS\RXTools\rxtools.3dsx] (Needed for CTR Boot Manager)
- Make a backup of the SD Card on the computer.
- Place the SD Card back into the 3DS.
NIGHTLY TUTORIAL
- Connect your SD Card to the computer.
- Download the needed files and unzip them all.
- Create a data folder in [rxTools_Most recent build\release\RXTools]
- Find the firmware.bin needed for reiNAND 2.1
- Rename the firmware.bin file to 0004013820000002.bin and place it in the data folder you made. [rxTools_Most recent build\release\RXTools\data]
- Move the homebrew launcher starter kit to the root of the SD Card.
- Move the RXTools folder to the root of the SD Card [rxTools_Most recent build\release\RXTools]
- Move the RXTools homebrew into the 3DS folder on the SD Card [rxTools_Most recent build\release\ninjhax\RXTools]
- Make a copy of the rxtools.3dsx and place it in the root of your SD Card. Located in the SD Card directory [3DS\RXTools\rxtools.3dsx] (Needed for CTR Boot Manager)
- Make a backup of the SD Card on the computer.
- Place the SD Card back into the 3DS.
ENTRY POINTS
Now that your setup is complete with all the proper files, your ready to launch RXTools. There plenty of options to boot RXTools and use the method that works best for you.
Be sure to hold L when booting RXTools to go straight to the RXTools Menu. If you don’t RXMode will automatically load. If you plan to use the MSET exploit, be sure to use another method first to make a backup of your sysNAND. Then place a copy of it on your PC for safe keeping!!
Web Browser (Old 3DS only) [FW9.2 – 4.X]
Launch the Web browser on the 3DS and navigate to its settings. Then clear all the savedata and go to this URL https://dukesrg.github.io/?rxTools/sys/code.bin
Homebrew Launcher [FW9.2 – 9.0]
This method involves running RXTools from the homebrew launcher. There are plenty of options available here
MSET Exploit [FW9.2 – 4.X]
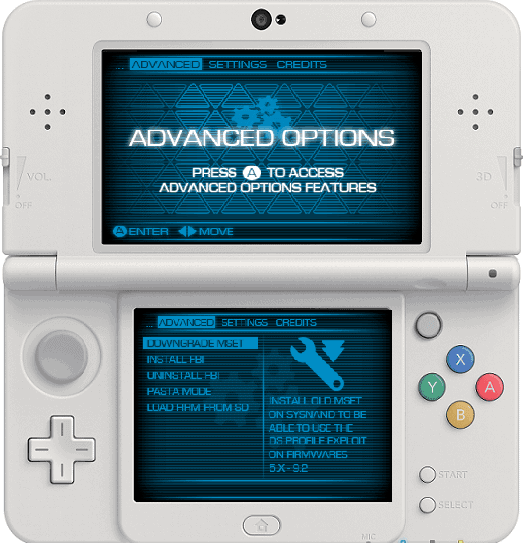
If your 3DS is above FW6.X, then you need to launch the web browser entry point first. From there you need to access the rxTools menu and select the MSET Downgrade option.
This uses the DS Profile Exploit and offers an internet free option. To install you need to launch the Web browser on the 3DS and navigate to its settings. Then clear all the savedata and go to this URL https://dukesrg.github.io/?mset/rxinstaller.bin Afterwards, you have the option to install either the 4.X or 6.x system settings.
CTR Boot Manager [FW9.2 – 9.0]
This offers the fastest way to boot RXTools and is the more reliable method to boot RXTools for the NEW 3DS. You need to install Themehax first to use this method. Our buddy Darthsternie has a done a great job to set this up here
BACKUPS & emuNAND SETUP
Once you open the system settings app and exit, you will be booted back to sysNAND. You have to boot RXTools again to launch emuNAND again.
Remember you can only update and use the latest emuNAND on the NEW 3DS using the Beta 3.0 Build Only
Once you have selected your preferred method to boot RXTools you will be greeted by message saying its installing the initial files. This will help boot RXTools faster and now we need to backup the sysNAND. Backups are important and should be done before any installing on either emuNAND or sysNAND. Boot RXTools Menu and navigate to the Dumping option and select Backup NAND. Select the sysNAND option and once its done place the NAND.bin on the PC for safe keeping. Your backup will be located in the RXTools folder on the root of the SD Card. Now that your have your backup made its time to setup emuNAND.
- Connect your SD Card to the computer.
- Run 3DS Multi emuNand Creator and select your 3DS model.
- Select the drive with the SD Card on it (Triple Check to make sure its the right drive)
- Select Start Format and it will ask for the NAND.bin file you placed on your PC. Use that file and shortly you should see a warning appear and click yes.
- The program will now start the formatting process and once its done the SD Card will be wiped.
- Restore the files with the backup of the SD Card you made earlier.
- Place your SD Card back into the 3DS.
- Now go the dumping options again and make a backup of the emuNAND.
- Connect your SD Card to the computer and place a copy of it on the PC for safe keeping.
- Place the SD Card back into the 3DS
- Boot RXTools Menu and run RXMode then select emuNAND.
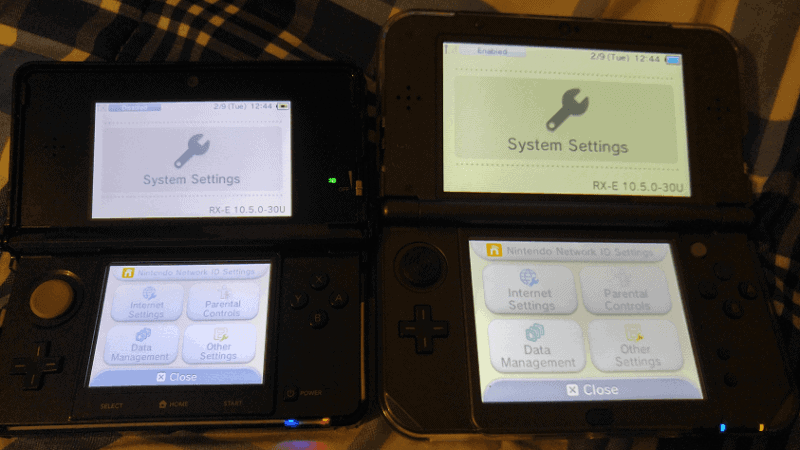
- Go to the system settings app and check your system version. If you see RX by your version your good to go. If you don’t start over again and repeat step 11.
- To update your emuNAND to the latest version be sure to setup an internet connection and check again if the RX is by your system version.
- Update your 3DS how your normally would and the 3DS will reboot after updating.
- Boot RXTools Menu again and run RXMode then select emuNAND.
- Check the system settings app and you will see the latest version with the RX in front of it.
- Now you have access to the eshop and other goodies.
- emuNAND 10.5 is latest working on the OLD 3DS and NEW 3DS (Beta 3.0 Build)
FBI SETUP
Now that your RXTools is ready to go, we need setup the application to install files on your emuNAND/sysNAND. You have the option to install this setup on either NAND or Both
- Connect your SD Card to the computer.
- Open the database folder.
- Copy title.db and import.db to the SD Card in the dbs folder. If it doesn’t exist create one [Nintendo 3DS\Various Numbers & Letters\Various Numbers & Letters\dbs]
- Place the SD Card back into the 3DS.
- Open the System Settings App.
- Select Data Management and then 3DS.
- It will rebuild the database and now your ready to setup FBI.
- Repeat the steps 1-7 for both NANDS. (Optional)
- Connect your SD Card to the computer.
- Open the FBI folder.
- Move the FBI cia file and 3DS folder to the root of your SD Card.
- Let it overwrite all files.
- Place the SD Card Back into the 3DS and boot RXTools Menu.
- Navigate to Advanced options and select Install FBI.
- Select the NAND you wish to install on and select check TMD only.
- Check your region and version number of the system. Write down the version number
- Open up your RXTools nightly folder and find the fbi_injection folder in [rxTools_Most recent build\release\RXTools\Tools]
- Open your region folder and then select your version number folder.
- Move fbi_inject.app and fbi_inject.tmd to the root of your SD Card.
- Place your SD Card back into your 3DS and boot RXTools Menu.
- Navigate to Advanced options and select Install FBI.
- Select the NAND you wish to install on and after it installs, select the keep option.
- Boot into the NAND you installed FBI on and open the Health & Safety App.
- FBI will now boot and install the FBI cia file.
- Exit the app with the home button and unwrap your new official FBI app.
- Boot RXTools Menu.
- Navigate to Advanced options and select Uninstall FBI.
- Select the NAND you installed FBI on and after it uninstalls, select the keep option.
- This will restore the Health & Safety App to its original form.
You are now ready to roll and enjoy the wonders of a completely FREE CFW!!!!
Team Hackinformer signing out


