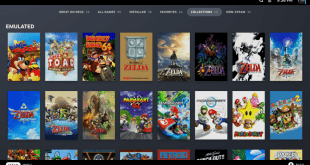
If you ever wondered what it takes to make a custom GameBoy system? To add lights, color, and personality to one of the most beloved handhelds of all time. Roarke is the name of a man who has a lot of love for the GameBoy and shows it by modding this old classic.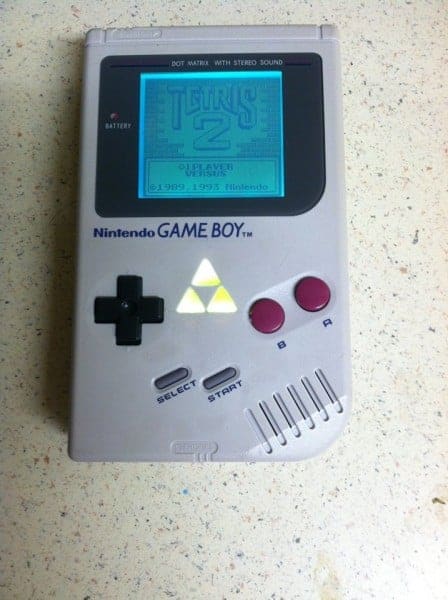
Recently I had the opportunity ask a few questions of Roarke, GameBoy modder and admirer of all things custom. He has offered some insight into his practice with some encouraging words for all of you up and coming modders out there.
Without futher ado we at Hackinformer are happy to interduce you to Roarke.
A few words with Roarke…
- riddle43: What first got you into Gameboy modding
- Roarke: At the time I had been really into Aquaponics and was looking to automate my system with sensors and an Arduino. However I didn’t know the first thing about electronics or building a circuit, and I figured the best way to learn would be trying to repair cheap broken electronics. I started buying broken NES, SNES & N64s on Ebay for like $10 -$15 shipped and see if I could get it to work, and then post it back on Ebay and make enough money back to buy some more broken consoles, I was hooked. At a certain point though having a bunch of giant NES’ in an apartment gets hard to store without feeling like a hoarder, and that’s when I decided to focus on one system and it had to be something smaller, the Gameboy DMG-01, focusing mainly on one system helped me to understand each component and it’s specific application in the circuit. Ultimately I got rid of the aquaponics garden and fish to focus on Gameboys.
- riddle43: What were some of the challenges you found when you began modding?
- Roarke: Hahaha everything about modding is a challenge when you first start, but the biggest challenge for me now is finding the time and energy to keep up with everything while still having a healthy relationship, raising a kid, and maintaining a job, and the most rewarding challenge is everyday trying to learn something new, or further your understanding of a concept and push your skills a little more each time.
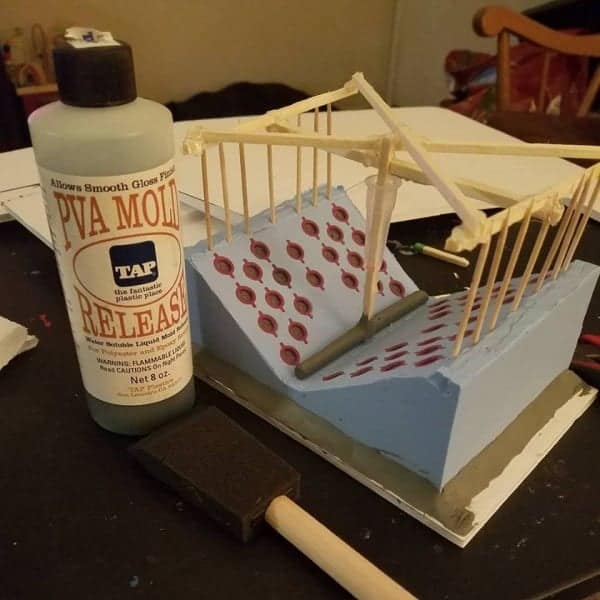
- riddle43: What were some of the challenges you faced in creating the mold for your buttons?

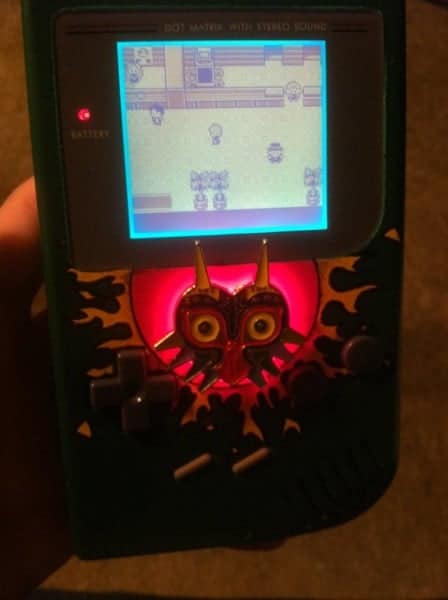
- Roarke: Man I have really loved molding and casting from the first mold that I made and failed with. The thing about molding and casting is it’s a never ending pursuit to make the next mold better, every mold that has ever been made is made with some degree of imperfection, and the goal each time is to reduce that degree as much as possible. So in the beginning my molds were pretty bad, and each time I would look at the cast and think about what I could do different in the next mold to resolve the problem. The next mold would be incrementally better, but still flawed. Eventually Matthew from Jelly Belly Customs reached out and gave me some amazing tips, and explained some of the flaws in my mold design which really helped me improve. A few iterations later and I have my current 44 button mold, which I love, but still look at and see what I could do better, I can’t wait to make the next improved mold.
- riddle43: Are there any other systems that you would like to tackle with your customizations?
- Roarke: Yeah actually I love the N64 and have a lot of things I want to do on that system. Once I finish up everyone’s custom orders I’ll be freed up to start working on other systems, and making molds for lots of other consoles.
- riddle43: Where did you come up with the idea for the touch sensors for your light controls?

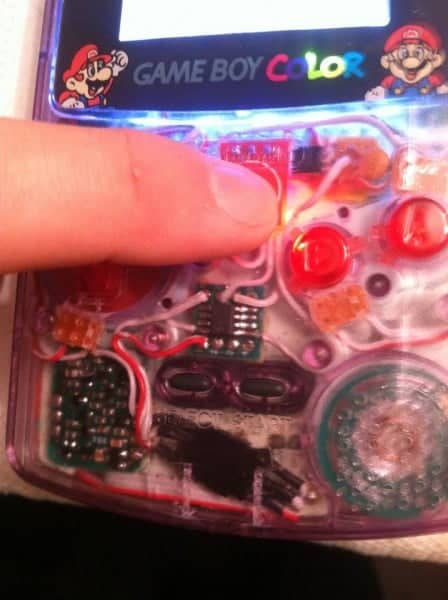
- Roarke: I didn’t actually! I had been installing RGB Backlights with dip switches or potentiometers hidden in the battery compartment because I hated having to dremel/drill the shell. I wanted it to look stock I stumbled across a video series by Shawn Maxwell on Youtube. (his channel is SJM4306) He was developing a touch sensor controller for an RGB Backlight in a GameBoy. “I nearly shit my pants when I saw it”. I watched all of his series and immediately reached out to him to get my hands on these controllers. At first we were literally soldering this tiny surface mount PIC12f629 chip directly to the legs of C2 on the LCD Board and dead bug soldering directly to this little chip. But before long Shawn designed and had some PCBs manufactured, and started working on more features.
- riddle43: How long have you had your storefront up?
- Roarke: I’ve had my website up about two years now, and officially became an L.L.C. in April, but I started selling repaired and modded consoles about 3 or 4 years ago. Basically got tired of Ebay’s fees.
- riddle43: How difficult would it be for a novice user to install an RGB bivert with components on your site?
- Roarke: Well the hardest part with a backlight is removing the rear polarizer/reflective film without damaging the LCD. If you can do a backlight, then our kits is pretty easy. Not many people realize that this kit doesn’t have to just control RGB backlights. They can also control RGB LEDs in any console with 5v available, I’ve even used it with single color Backlights or LEDs to get a brightness controller.
- riddle43: What would you recommend to start for anybody wanting to customize their very own GameBoy?
- Roarke: If you are new to electronics the best thing you can do in my opinion is to buy a cheap working electronics that no one cares about from your local thrift store (just don’t start with a CRT T.V.). Disassemble it and take pictures of everything. desolder every component, googling what it is and what it does as you do. then solder every component back into place, respecting the polarity when applicable. Turn it on and see if it works, if not keep trying to get it to work until it does. Doing this a few times will put you in a good place to start modding.
- riddle43: Do you have any plans to work with sound reactive LEDs or possibly even sound reactive El wire in the future.
- Roarke: Yes actually, I am very interested in both of those, in fact It is a DIY Kit that I hope to start working on soon! Years ago I made a gameboy with a photoresistor controlled backlight that changed the brightness of the backlight based on the ambient lighting, it was very cool, but proved to be pretty annoying with actual gameplay.
- riddle43: Did you have any part in designing or creating any of the components that you sell on your site?
- Roarke: So the RGB controller and the RGB/Bivert boards was designed entirely by Shawn Maxwell (SJM4306), a few of the other boards I sent Shawn a homemade circuit on protoboard and he mocked up a PCB, and improved the layout, the buttons and custom shells I do by hand, but the majority of things on my sight and services that I offer are either of Shawn’s design, my own design or efforts, or some collaboration of efforts between Shawn & I.
- riddle43: Do you have anything you would like to say to our readers out there
- Roarke: Follow your nose, wherever it goes, unless you’re a coke head. Research everything that fascinates you, cause anything and everything you learn will be useful to you at some point.
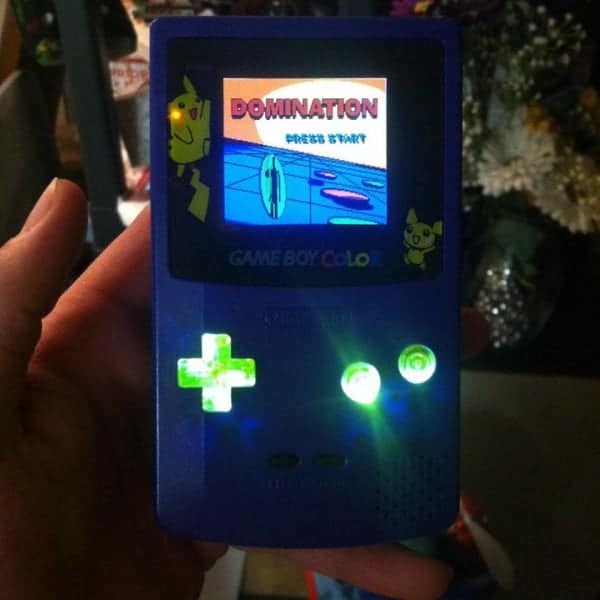
Testing the mods on a very cool Gameboy Color build
Posted by Roarke Murdock on Sunday, April 7, 2019
There you have it hopefuly Roarke has inspired you to take a chance and mod something you love as well. You can find out more info on his site at www.roarkesretrocorner.com. While your there make sure to take a look at his videos as well. Also please give a follow on twitter @Roarke84694999
I want to thank Roarke for taking time out to chat with us and thank you all for reading.
And remember keep doing it for the love of the game.