So recently I made a great find, an original GameBoy DMG from 1989 on a local flea market for 2 bucks only. Solely the screen cover and batteries were missing but aside from that it still looked great! And since all I wanted were some internal parts for another project, I couldn’t resist.
Back at home, I was already about to tore everything apart when I thought I’d better test it myself. And well, obviously the seller wasn’t aware that said GameBoy wasn’t broken at all.. (okay there were some of the screen stripes missing but that’s a common problem and fairly easy to fix)

Since I’m highly against touching a working system and especially destroying retro hardware, I wanted to do something else with it.. and ordered some parts. So if you want to revive your own GameBoy as well or planning to get one for the nostalgic feelings, this write-up is for you! 🙂
Cleaning & fixing
So the first thing, of course, is cleaning everything. What you especially should pay attention to are the following things:
The Battery Compartment – Obviously the previous owner made one of the most common mistakes.. leaving the batteries in the compartment and putting the GameBoy away. Sooner or later the batteries die and its acid will be all over the shell and attack the metal battery contacts too.
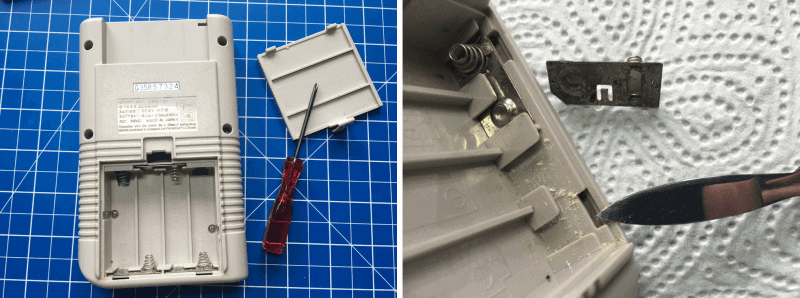
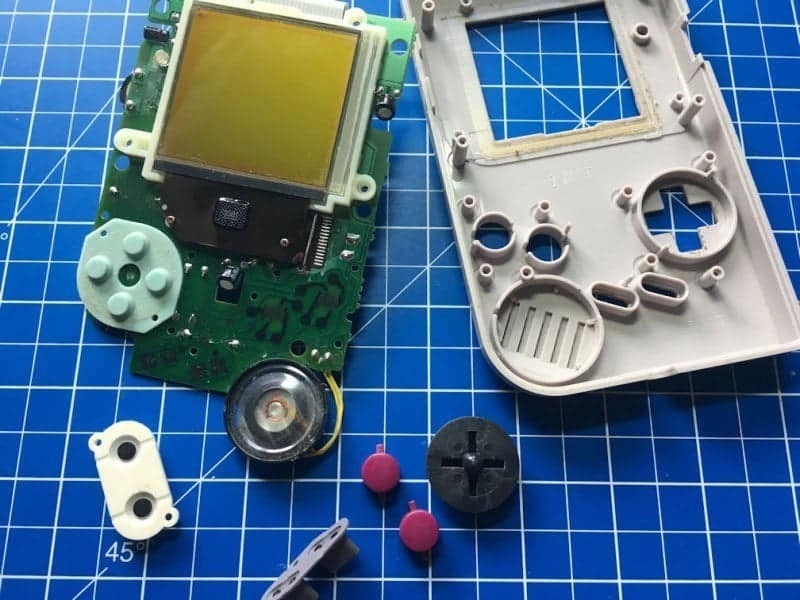
The Buttons – More specifically what’s underneath of the buttons. :/ Depending on how much dirt accumulated there over the years, the buttons might not be working properly. Just wash it away.
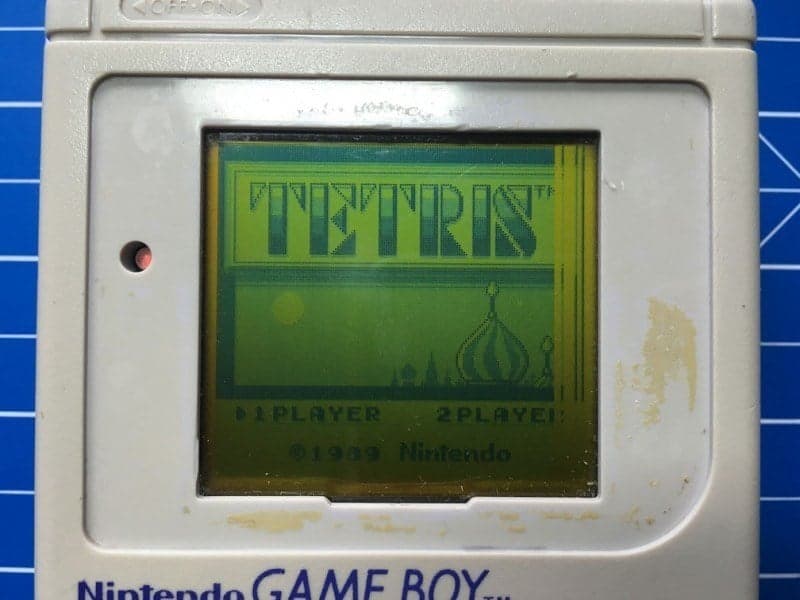
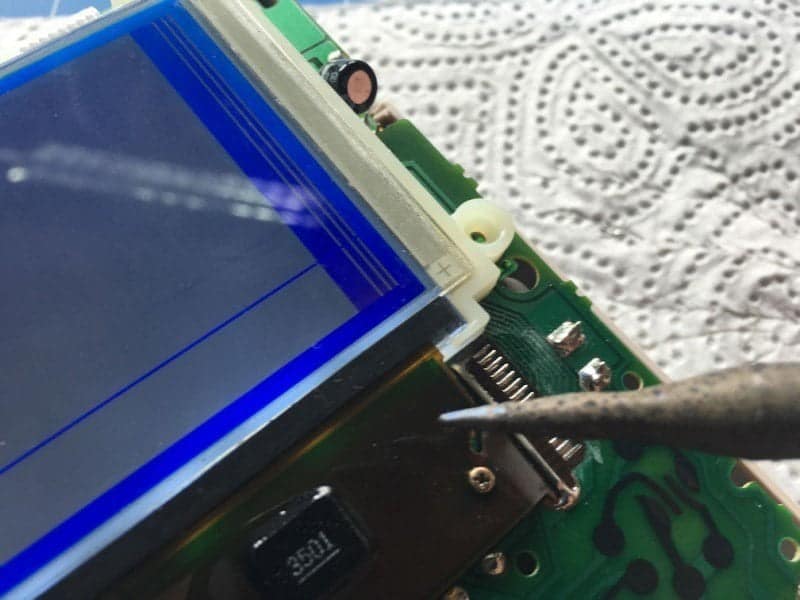
Dead stripes? – You can easily fix that by heating the ribbon cable with your soldering iron until the broken conducting paths melted back together. (more about that later)
What about yellow plastic? Another common problem of GameBoys is the yellowing process when left in the sun for example. And yes there are ways to get a yellowing Gameboy back to shine in its bright grey but that’s not easy to do and quite dangerous. However check out Retr0bright to find out more.
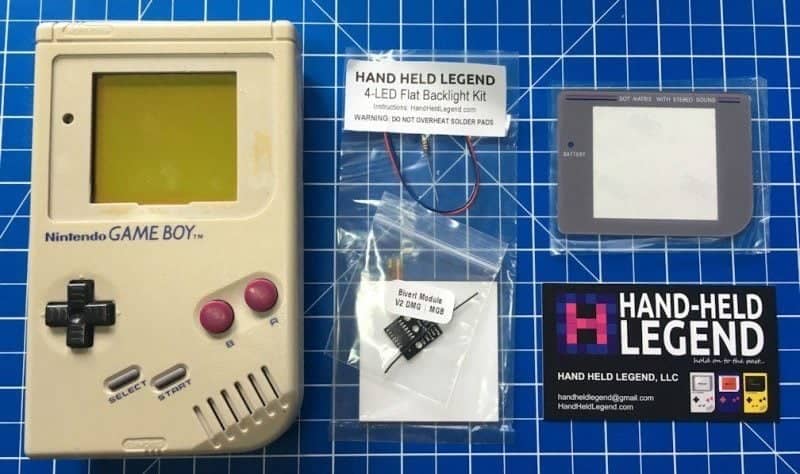
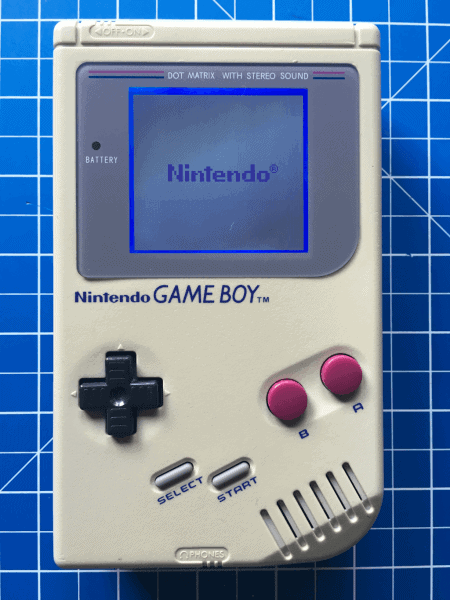
Installing a backlight
You probably heard about that already – The dream of every 90s kid – No need for a light source to see something. This is a very popular mod and there are various kits with all different colors and everything you can imagine. I went with a normal white one, though. However, this one got 4 small LEDs lighting the whole screen perfectly.
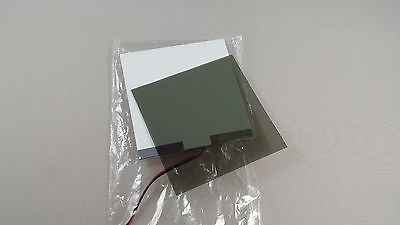
To install a backlight you need to ‘simply’ remove the original polarizer film from the back of the screen. However, it CAN be quite hard to do. I for my part had the luck and all the adhesive decided to stick to the glass instead of the foil so it was a pain to get rid of it completely!
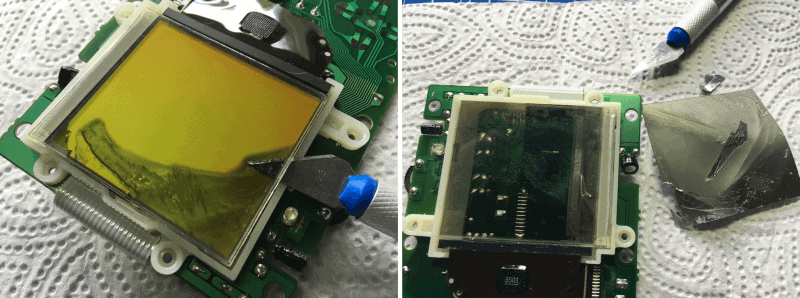
Well so much for the hard part. All that’s left to do after that is some simple soldering and applying the parts to the screen. And I can say.. its worth the struggle 😉
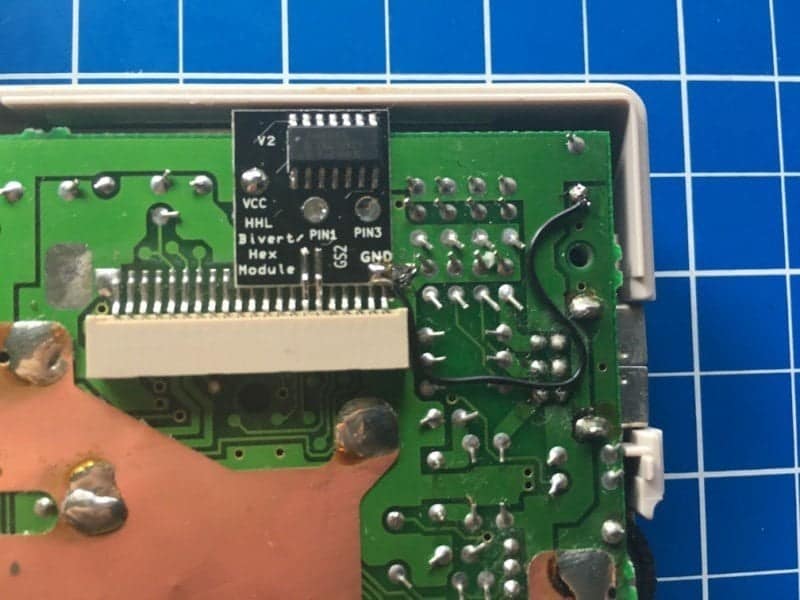
Installing a bivert chip

Basically, what this does is inverting the colors giving you a better contrast in the end. There are quite a lot of kits and different chips around but this one by Hand-Held Legend is pretty nifty. It perfectly fits and all you need to do is lift two pins and some simple soldering!
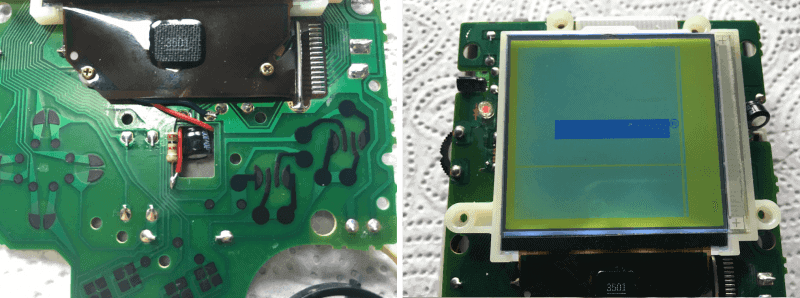
All that’s left to do is turning the polarizing film by 90 degrees, though. This will re-invert again and there we go! Obviously, now you know why this needs a backlight mod to work first and the blue effect is a nice additional improvement too.
Here I’m fixing the dead stripes by heating them so they melt back together.
A new Window
And last but not least I also ordered a real glass replacement window, since the original one fell off probably years ago already. (Another common problem of GameBoys btw 😉 )
Since it is real glass and not a simple plastic window like the stock one, it might be a little heavier but not only feels more valuable, it furthermore doesn’t get scratches that easily.
Done! And who of you would’ve thought the GameBoy can have ‘graphics’ that good by itself? Hope you liked my little write-up. Until next time 🙂
Thanks to Hand-Held Legend.com for these awesome parts of course! Check out their online store!!


Awesome job, you are getting better and better at retro repair/modding.
Thanks 🙂